Author: arino

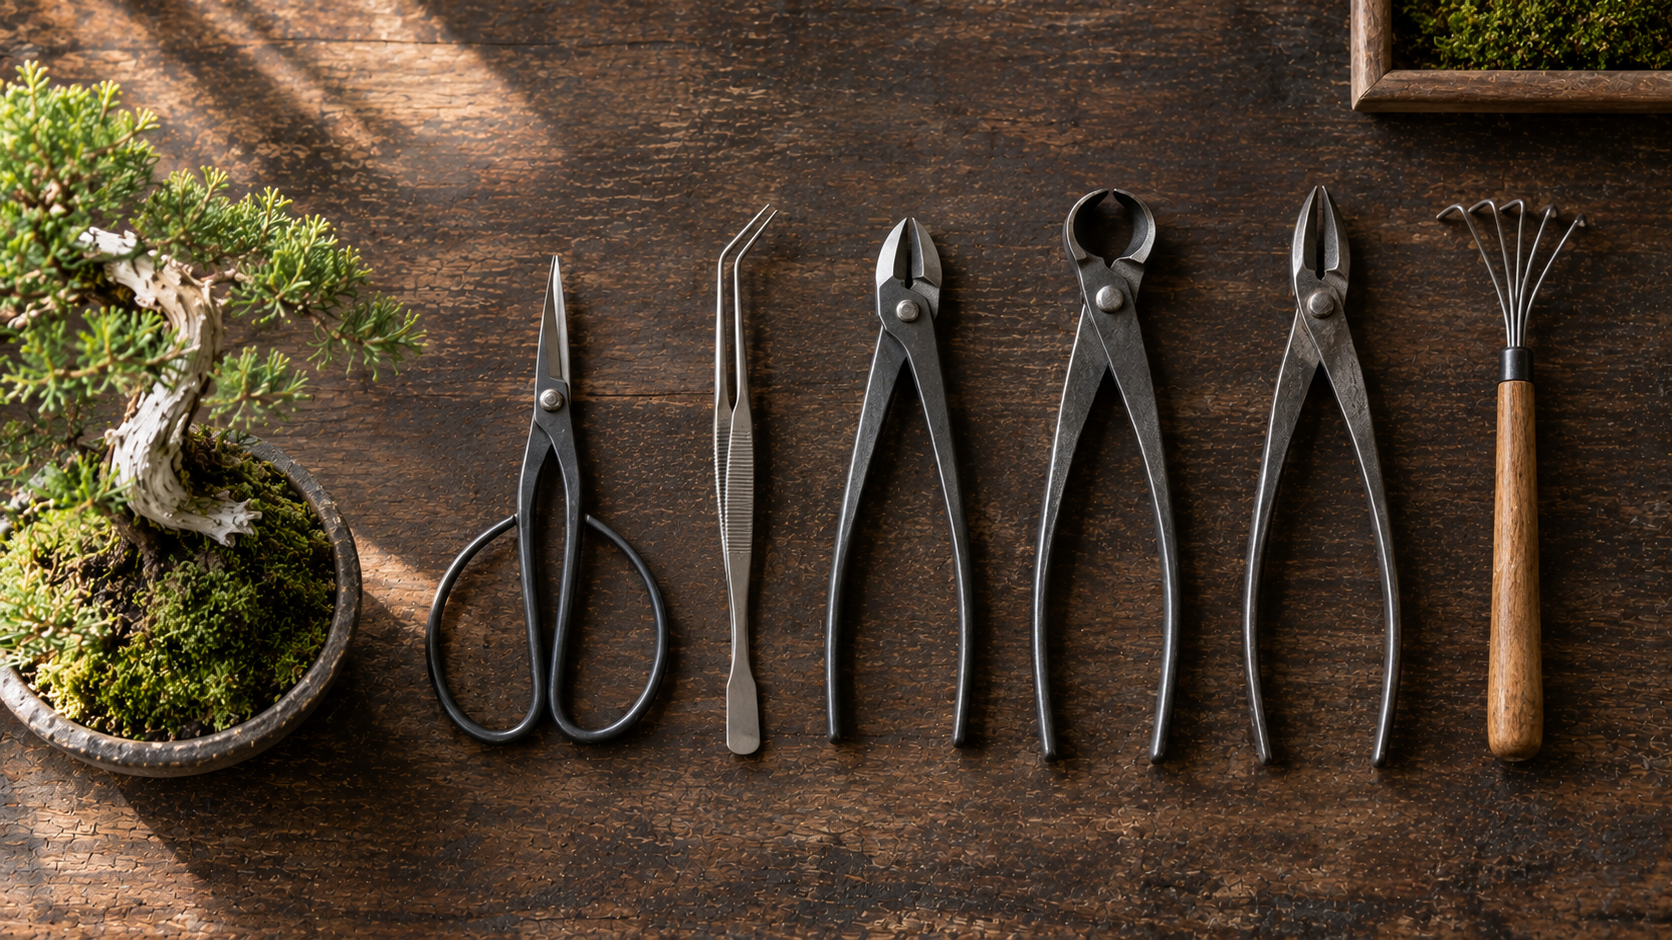
  • Stainless vs Carbon Steel Bonsai Tools: Which Is Worth It, Tool by Tool

    Stainless vs Carbon Steel Bonsai Tools: Which Is Worth It, Tool by Tool

    Affiliate disclosure: Some links on this page are affiliate links. If you buy through them, Aribonsai may earn a small commission at no extra cost to you. It doesn’t change what we recommend or how we rank anything.


    The question behind almost every tool purchase

    Shop for a Japanese bonsai tool and you’ll hit the same choice again and again. The concave cutter comes in carbon steel or stainless. So does the wire cutter, the knob cutter, the root cutter, the shears. And the stainless version usually costs a lot more, sometimes nearly double.

    So is stainless steel worth it? Or is carbon steel, the traditional choice, still the better tool?

    The debate over stainless vs carbon steel bonsai tools gets heated online. Some growers say carbon is sharper and stainless is for people who don’t look after their tools. Others say stainless is simply more practical, especially in humid climates or for anyone who works with wet soil and sap every weekend.

    The honest answer is that both are good. Neither choice is a mistake. But the right one depends on the tool, your climate, your budget and, most of all, your habits.

    In my experience, the people who regret their choice usually bought carbon steel and then never dried it, or bought stainless for a tool they rarely use and paid twice as much for nothing. This guide explains the real differences, then goes tool by tool so you can decide where stainless is worth paying for and where carbon makes more sense.


    Who this stainless vs carbon steel guide is NOT for

    It’s not a metallurgy lesson. We’ll keep the steel science simple and practical.

    It’s not about cheap no-name tools. Some cheap “stainless” tools are soft and dull quickly. This guide compares quality Japanese tools, mainly from Kaneshin, which sells many of the same tools in both carbon and stainless.

    It’s not about white steel and blue steel. Those are specialty carbon steels used in some premium shears. They’re mentioned in our bonsai shears guide.

    Still with us? Let’s go.


    How we compared them (3 things that actually matter)

    1. Rust and maintenance

    This is the biggest practical difference.

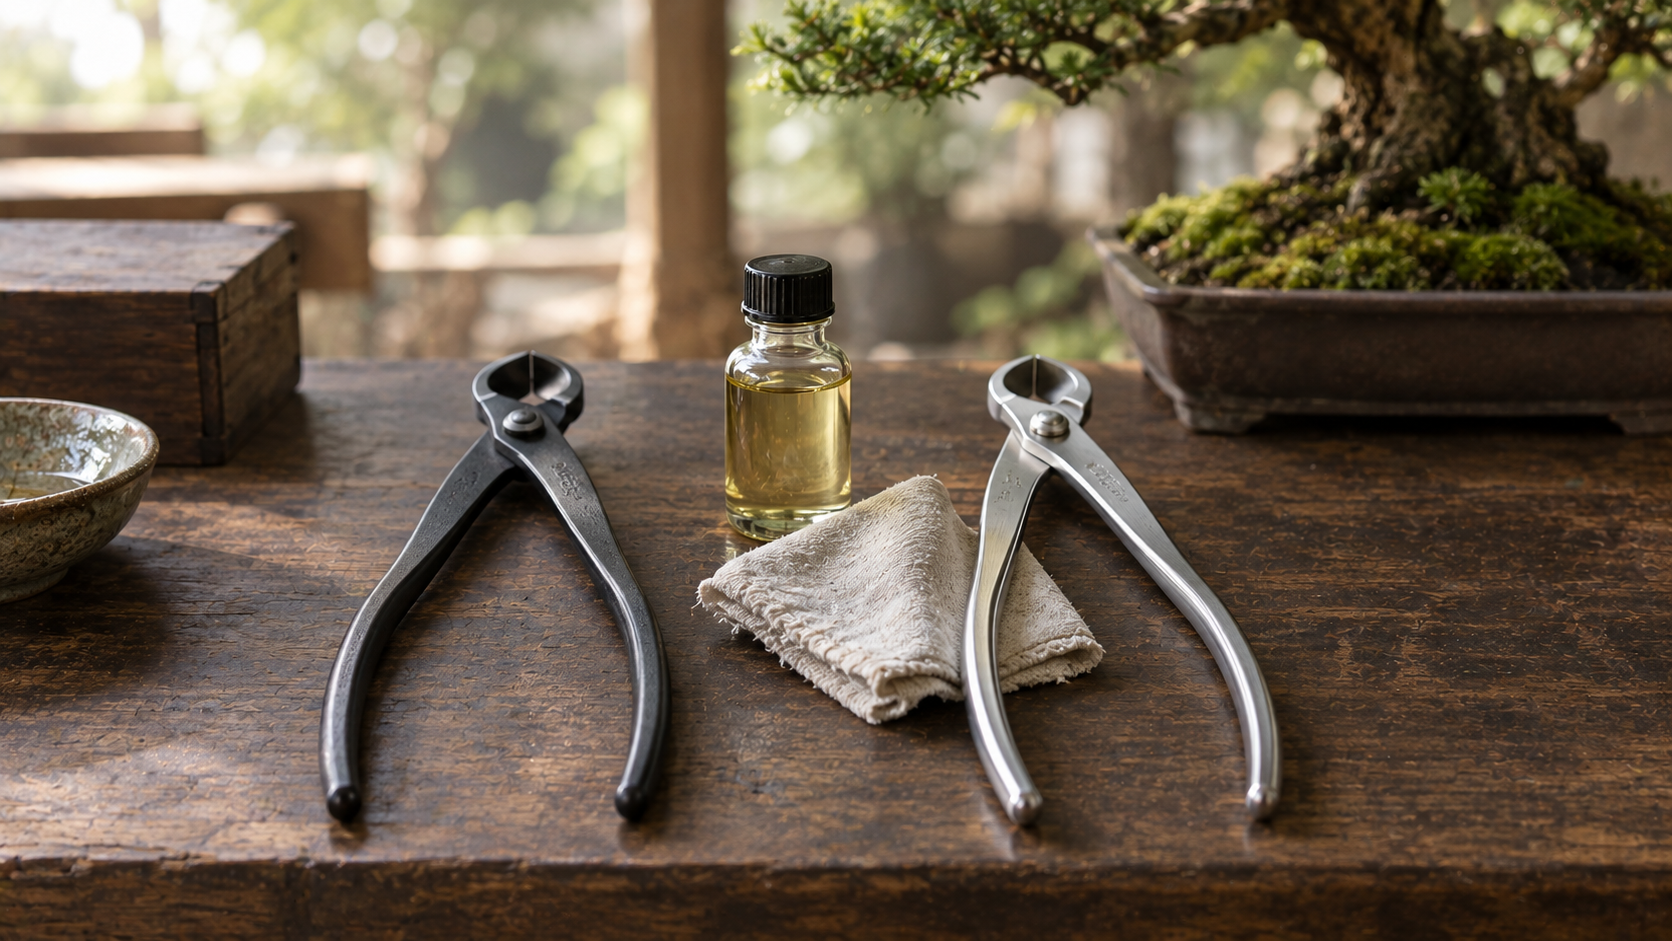
    Carbon steel rusts if it’s left wet, dirty or covered in sap. It needs wiping, drying and an occasional coat of oil. Many carbon bonsai tools have a black finish, which helps a little, but the cutting edges are still bare steel.

    Stainless steel resists rust much better. It still benefits from cleaning, and it isn’t completely rustproof, but it forgives the occasional forgotten tool left on the bench overnight.

    There’s also a middle option. Masakuni’s 8000 series, for example, is described by a retailer as high-carbon steel with a stainless coating that makes it easier to clean and more rust resistant.

    2. Sharpness and sharpening

    Carbon steel is the traditional choice for Japanese blades because it takes a very keen edge and is generally easier to sharpen at home. Many growers feel carbon tools have a slightly crisper, more precise cut.

    Stainless tools from good Japanese makers are also sharp, and for most hobbyists the difference in everyday cutting is small. But many growers find stainless a little harder to resharpen themselves. If you plan to sharpen your own tools, carbon is usually the easier steel to work with.

    3. Price

    Stainless almost always costs more. Here are Kaneshin prices from Japanese stores, collected while writing our individual tool guides:

    • Concave cutter: about ¥9,600–10,400 in carbon vs about ¥19,200 for the stainless No.802
    • Wire cutter: about ¥10,600 in carbon vs about ¥21,200 for the stainless No.815
    • Shears: about ¥9,600–10,200 in carbon vs about ¥12,900 for the stainless No.827B

    So for some tools, stainless roughly doubles the price. For others, like shears, the gap is much smaller.

    A few steel-neutral habits that matter more than the material

    None of these cost anything, and they make either steel last for decades.

    • Wipe tools after every session. Sap and soil damage edges and cause rust.
    • Dry them completely. Especially after repotting or watering.
    • Oil the edges and joints occasionally. Camellia oil is the traditional choice. Our bonsai tool maintenance guide covers oils, rust erasers and stones.
    • Remove light rust early. A rust eraser takes it off before it pits the steel.
    • Use each tool only for its job. Damage from misuse matters more than steel type.
    • Store tools dry. A damp shed undoes everything else.

    Stainless vs carbon steel bonsai tools: comparison table

    Carbon steelStainless steel
    Rust resistanceLow, needs drying and oilingHigh, more forgiving
    SharpnessVery keen edgeSharp, many feel slightly less crisp
    Home sharpeningGenerally easierMany growers find it harder
    Price (Kaneshin)LowerOften 30–100% more
    LookOften black finishSilver, polished
    Best forCareful owners, budgets, home sharpenersHumid climates, wet work, busy growers

    Tool by tool: where stainless is worth it

    1. Root cutters – stainless is most worth it here

    If there’s one tool where stainless really makes sense, it’s the root cutter. Root cutters spend their life in wet, gritty soil, often for hours during a repotting session. Carbon steel root cutters are perfectly usable, but they’re the tool most likely to rust if you’re not careful.

    In our bonsai root cutter guide, Kaneshin’s carbon No.13 / No.13A cost about ¥12,000 each, while the stainless No.812 / No.813 cost about ¥22,100 each.

    Carbon pros: much cheaper, easy to sharpen. Stainless pros: handles wet soil and long repotting sessions without rust.

    Verdict: Stainless, if you repot often. Carbon is fine for a few trees a year.


    2. Concave cutters – carbon for most, stainless for humid climates

    The concave cutter is the tool where cut quality matters most, and where many growers like the crisp edge of carbon steel.

    In our bonsai concave cutter guide, Kaneshin’s carbon concave cutter is our pick for most people, at about $65–90. The stainless Master Grade No.802 costs about $120–137, and Yagimitsu’s stainless cutter is about $139–149.

    Carbon pros: great value, keen edge, easy to sharpen. Stainless pros: low maintenance, good in humid climates.

    Verdict: Carbon for most growers. Stainless if you live somewhere humid or know you won’t oil your tools.


    3. Wire cutters – usually carbon

    Wire cutters don’t touch sap and soil as much as other tools. They mostly cut aluminum and copper wire, which wears the edge in its own way, and many growers sharpen or replace wire cutters less often than cutting tools.

    In our bonsai wire cutter guide, Kaneshin’s carbon No.22A costs about ¥10,600, while the stainless No.815 costs about ¥21,200, roughly double.

    Carbon pros: half the price, plenty durable. Stainless pros: low maintenance if your hands are often wet.

    Verdict: Carbon for most growers. Stainless only if rust has been a real problem for you.


    4. Knob cutters – carbon for most people

    Knob cutters are used less often than shears or concave cutters, usually for cleaning up stubs and old wounds.

    Kaneshin’s carbon knob cutters (No.9, No.10, No.11) cost about ¥10,600 each, while the stainless No.810 is about ¥21,200. Yagimitsu’s stainless knob cutter is around £125 at a UK retailer.

    Carbon pros: much cheaper, sharp. Stainless pros: less maintenance.

    Verdict: Carbon for most people, since it’s used occasionally. Stainless if you prefer a fully stainless kit.


    5. Shears – a close call

    Shears are used constantly, often on wet foliage and sappy shoots. They’re also the tool where the price gap is smallest.

    Kaneshin’s carbon satsuki shears cost about ¥9,600–10,200, and the stainless No.827B costs about ¥12,900. For a relatively small difference, you get a pair that shrugs off sap and moisture.

    Carbon pros: keen edge, easy to sharpen, lots of steel options, including blue steel. Stainless pros: low maintenance for your most-used tool, small price premium.

    Verdict: A genuine toss-up. Stainless is great value here if you dislike maintenance. Carbon if you enjoy sharpening or want specialty steel.


    6. Jin pliers – usually carbon

    Jin pliers mostly handle wire and deadwood, not living tissue, so an ultra-keen edge matters less.

    Kaneshin’s carbon No.49 costs about ¥9,300, while the stainless No.818 is about ¥19,200 and the No.819 around £120 in the UK.

    Carbon pros: less than half the price, strong and durable. Stainless pros: low maintenance.

    Verdict: Carbon for nearly everyone.


    Which should you choose? (By situation)

    You’re a beginner on a budget: carbon steel for everything. Learn good cleaning habits from day one.

    You live somewhere humid or rainy: stainless for shears, concave cutter and root cutter; carbon for the rest.

    You repot a lot of trees: stainless root cutter at minimum.

    You know you won’t oil your tools: stainless for the tools you use most.

    You like sharpening your own tools: carbon throughout.

    You want one “buy once” upgrade: a stainless root cutter or stainless shears.

    You want the premium look and feel: Masakuni’s coated carbon 8000 series is a middle ground.

    A sensible mixed kit

    Many experienced growers end up with a mix: carbon concave cutter, wire cutter, knob cutter and jin pliers, plus stainless shears and a stainless root cutter. That puts the extra money where moisture and sap are worst.


    How to tell carbon from stainless when shopping

    It isn’t always obvious from a photo, so here are a few quick checks.

    Look at the finish. Many Japanese carbon steel bonsai tools have a black finish. Stainless tools are usually silver and polished. But this isn’t a perfect rule: some carbon tools are polished, and some coated tools, like Masakuni’s 8000 series, look silver while being carbon steel underneath.

    Read the listing carefully. Good retailers state the steel clearly. If a listing only says “steel” or “high-quality steel,” assume it’s carbon unless stated otherwise.

    Check the model number. In Kaneshin’s range, many stainless models carry numbers in the 800s, such as the No.802 concave cutter, No.810 knob cutter, No.812 and No.813 root cutters, No.815 wire cutter, No.818 and No.819 pliers, and No.827B shears. Carbon models typically have lower numbers. It’s a useful shortcut, but always confirm with the retailer.

    Watch out for “black-coated” tools. Wazakura’s hand-forged tools, for example, are carbon steel (S55C or S58C) with a black coating. The coating helps with rust resistance, but the cutting edge is still carbon steel and needs the same care.


    A two-minute care routine for carbon steel bonsai tools

    If you choose carbon steel, this simple routine is all it takes to keep it rust-free.

    1. Wipe off sap and soil with a damp cloth straight after use.
    2. Dry the tool completely, including the joint and the inside of the jaws.
    3. Remove any spots of rust with a rust eraser before they spread.
    4. Apply a drop of camellia oil to the blades and joint, then wipe off the excess.
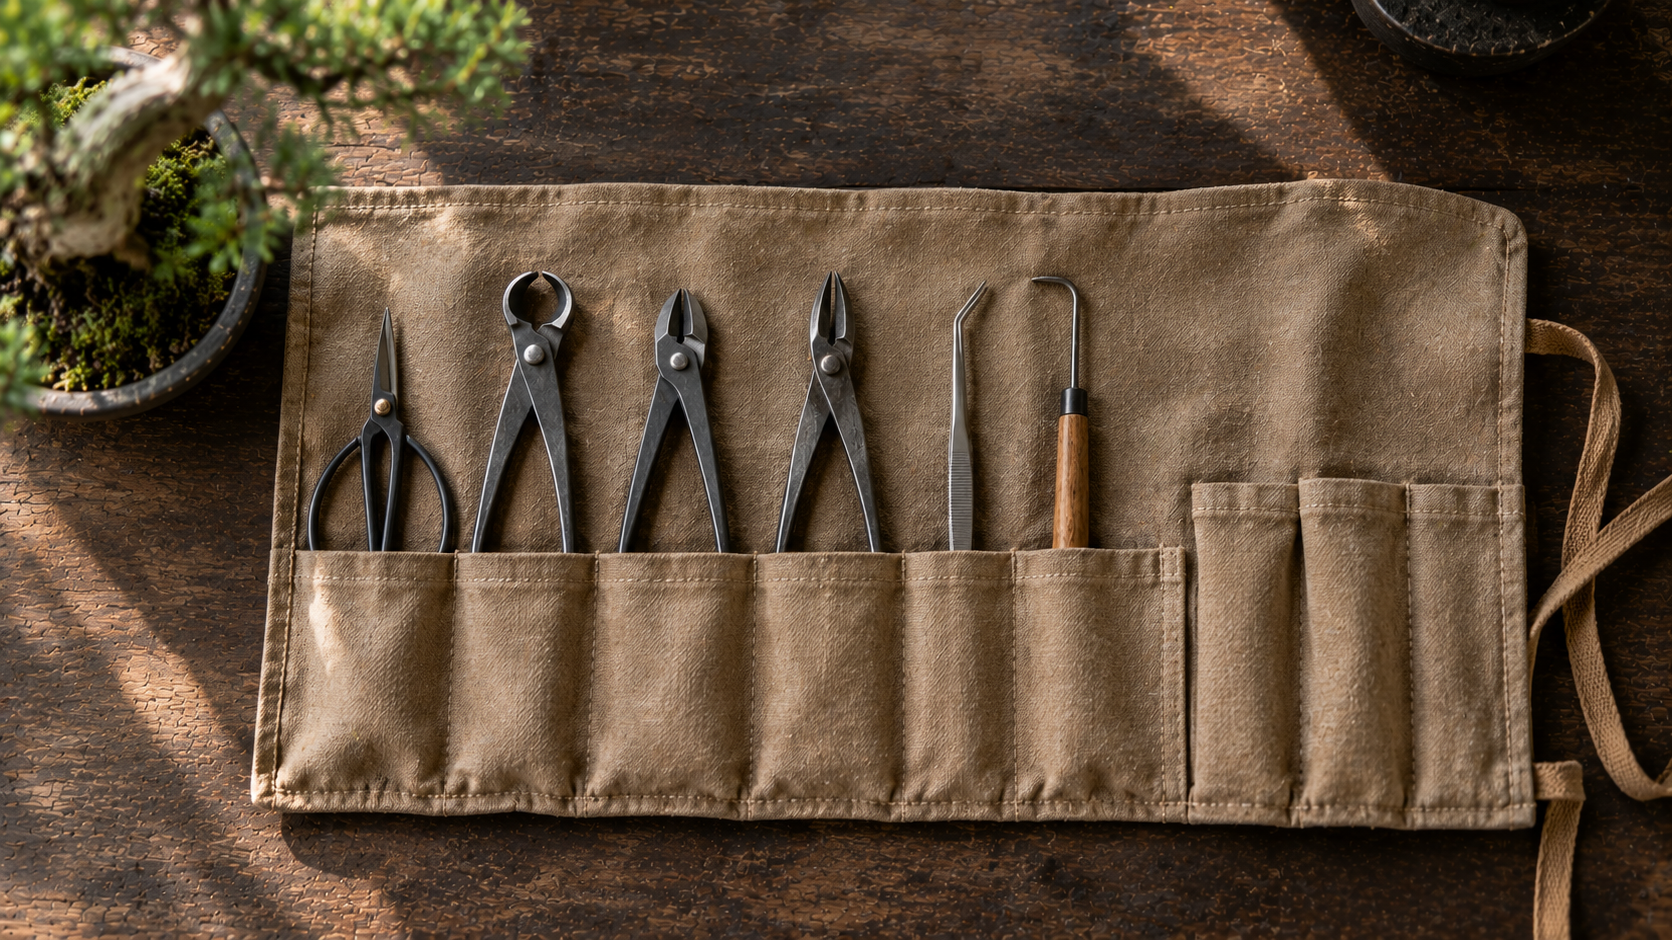
    5. Store it in a dry place, ideally in a tool roll so edges don’t knock together.

    Do that after each session and carbon steel will last for decades. Skip it regularly and even the best carbon tool will start to pit.

    Stainless needs a lighter version of the same routine: wipe, dry, and oil the joint occasionally. It’s less fussy, not maintenance-free.


    Does climate really make a difference?

    Yes, and it’s one of the most practical ways to decide.

    Humid and rainy climates are hardest on carbon steel. If your tools sit in a garden shed or garage where the air is often damp, rust can appear even on clean tools. Stainless makes much more sense here, at least for the tools you use most.

    Dry climates are much kinder to carbon steel. With basic cleaning, carbon tools can stay rust-free for years with very little effort.

    Coastal areas add salt to the air, which speeds up rust. Stainless is worth considering here, and storing tools indoors helps either way.

    If you’re not sure, look at your other garden tools. If your pruners and garden shears rust easily, your carbon bonsai tools will too.


    Quick answers to common questions

    Is stainless worth it for beginners? Usually not for every tool. Beginners are often on a budget, and carbon steel teaches good care habits early. If you want one stainless tool, make it the root cutter or the shears.

    Is carbon steel really sharper? Many growers feel carbon steel gives a slightly crisper cut and holds a very keen edge. For most hobbyists, though, a quality Japanese stainless tool is more than sharp enough, and the difference in everyday use is small.

    Can I sharpen stainless tools myself? Yes, but many growers find it takes more effort than carbon. If you plan to sharpen often, carbon is easier. If you rarely sharpen, it matters less.

    Will carbon steel tools rust immediately? No. Quality Japanese carbon tools only rust if they’re left wet, dirty or stored in damp conditions. Wiping and drying after use prevents most problems.

    What about premium brands like Masakuni? Masakuni’s standard tools are carbon steel, and its 8000 series uses a stainless coating over high-carbon steel. It sits between plain carbon and full stainless in maintenance. Our Kaneshin vs Masakuni comparison covers both brands tool by tool.

    Should my whole kit be the same steel? No. Mixing steels is common and sensible. Put your money into stainless where moisture is worst, and save on the rest.


    Common stainless vs carbon steel mistakes

    Buying carbon and never drying it. Rust is the number one reason good carbon tools wear out early.

    Paying for stainless on tools you rarely use. A knob cutter used a few times a year doesn’t need it.

    Assuming stainless never rusts. It resists rust, but it still needs cleaning.

    Buying cheap “stainless” tools. Soft steel dulls quickly, whatever it’s called.

    Over-sharpening. Light, regular honing is better than aggressive sharpening for either steel.


    Conclusion: buy carbon where you can, stainless where it counts

    When it comes to stainless vs carbon steel bonsai tools, there’s no wrong answer. Carbon steel is sharp, traditional, easier to sharpen and much cheaper. Stainless is more forgiving and makes sense where moisture and sap are constant.

    For most growers, the smart approach is a mixed kit: carbon for most tools, stainless for the root cutter and possibly the shears. And whatever you choose, the habit of wiping, drying and oiling after each session matters far more than the steel. A well-kept carbon tool will outlast a neglected stainless one, and both will serve you for many years if you treat them well.

    Ready to choose? Compare Japanese concave cutters in both steels, or search Kaneshin stainless bonsai tools on Amazon.
  • Best Bonsai Automatic Watering System in 2026: 6 Timers, Drip Kits and Misters for When You’re Away

    Best Bonsai Automatic Watering System in 2026: 6 Timers, Drip Kits and Misters for When You’re Away

    Affiliate disclosure: Some links on this page are affiliate links. If you buy through them, Aribonsai may earn a small commission at no extra cost to you. It doesn’t change what we recommend or how we rank anything.


    The weekend away that worries every bonsai grower

    Bonsai growers have a running joke: you don’t own your trees, they own you.

    In summer, a small pot of fast-draining soil can dry out in a single hot afternoon. Miss one day of watering and a tree you’ve worked on for years can be badly damaged. So the moment you plan a weekend away, a work trip or a summer holiday, the same question comes up: who’s going to water the trees?

    A bonsai automatic watering system is the usual answer. A timer on the tap, some tubing, and either drippers or fine spray heads can keep a bench watered while you’re gone, or simply take the pressure off on busy days.

    But bonsai aren’t easy to automate. Pots are shallow, soil is loose and drains fast, and trees on the same bench can have very different needs. Experienced growers warn that standard drippers can send water straight down through bonsai soil, leaving parts of the root ball dry. And any system can fail at the worst possible moment.

    In my experience, the people who are happiest with automatic watering treat it as a backup, not a replacement for checking their trees. This guide explains what matters, then compares six options, from a simple hose timer to drip kits, misting heads and a no-electricity watering system.


    Who this bonsai automatic watering system guide is NOT for

    It’s not for indoor tropical bonsai on a windowsill. Most of these systems are designed for outdoor taps and benches.

    It’s not for people who never check their trees. Automation helps, but every experienced grower we read stresses daily checks in hot weather.

    It’s not a replacement for a good watering can. You’ll still hand-water newly repotted trees, freshly collected material and anything that needs extra care. Our bonsai watering can guide covers those.

    Still with us? Let’s go.


    How we picked these (3 things that actually matter)

    1. Drip or mist

    These are the two main approaches, and bonsai growers disagree about which is better.

    • Drip systems run a small tube to each pot, ending in an adjustable dripper. They’re water-efficient and easy to set up for a few pots. The concern with bonsai is that loose, fast-draining soil lets water run straight down, so a single dripper may only wet part of the root ball.
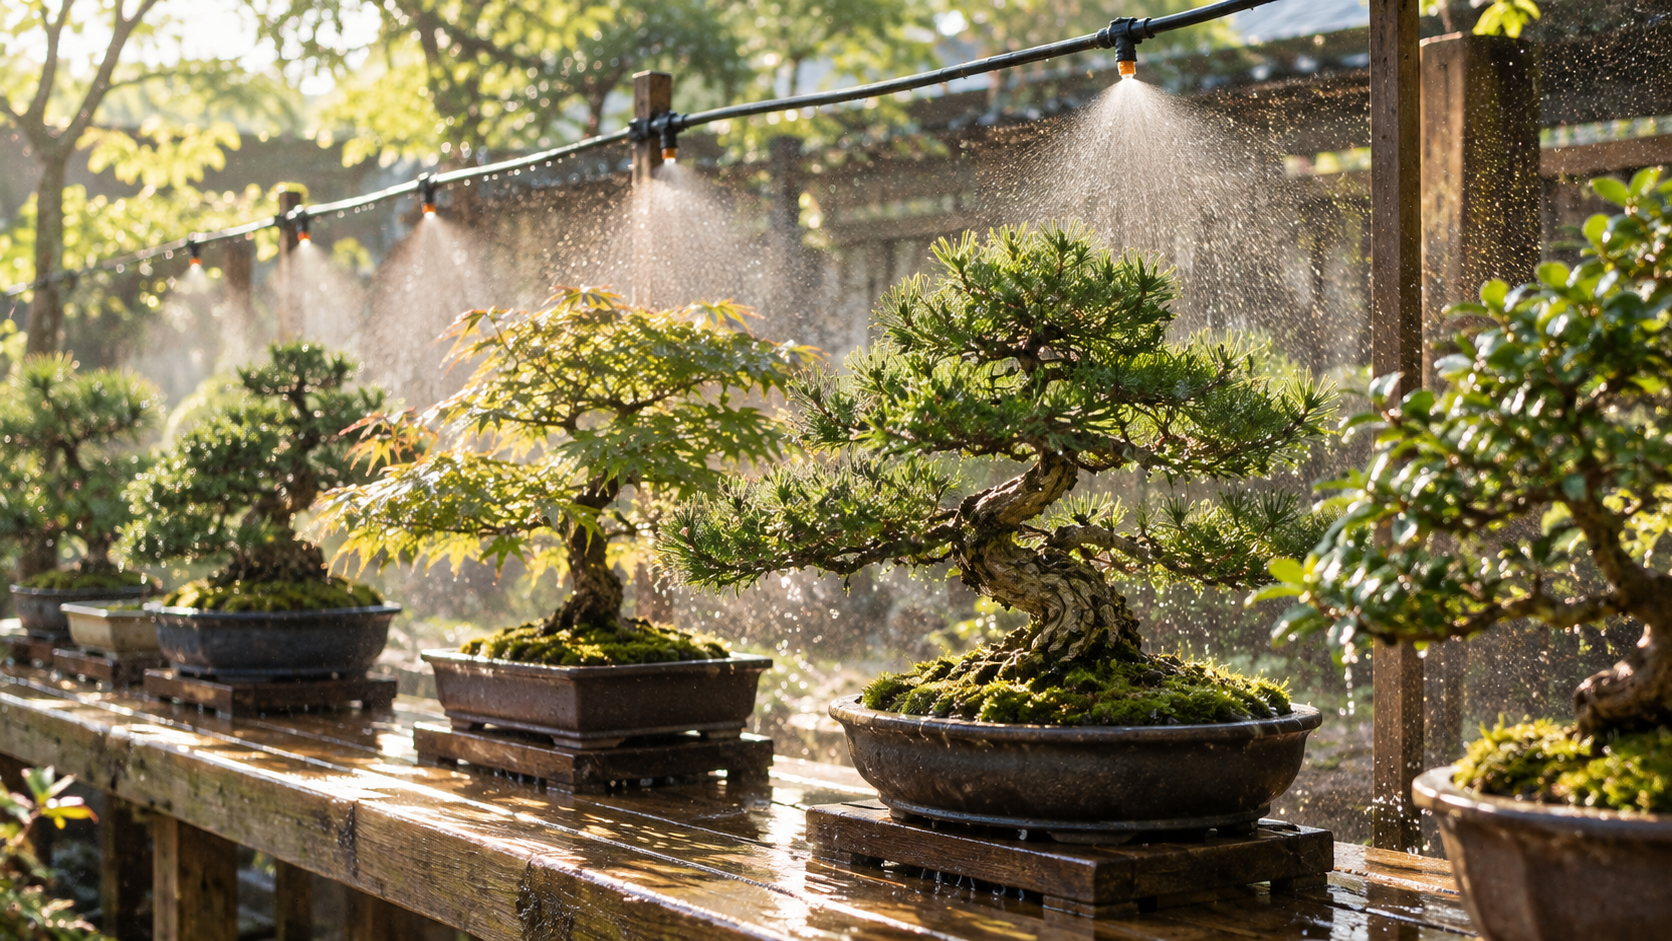
    • Mist or fine-spray systems use small spray heads on risers above or around the bench. They cover many trees at once without a tube to every pot. One long-time grower describes standard drippers and spray stakes as doing a poor job with bonsai, and recommends fine-spray heads spaced along the bench instead.

    On bonsai forums, many hobbyists use misting for whole benches, especially when traveling, and drip for larger pots or landscape plants.

    2. Timer reliability

    The timer is the heart of any system. Battery hose timers are cheap and easy, but they can fail if the battery runs low. One experienced grower recommends a hardwired irrigation timer with a solenoid valve for serious collections, and forum members suggest using two timers on one outlet for redundancy.

    For a few trees and a short trip, a good battery timer is usually fine. For a large collection or long absences, reliability is worth paying for.

    3. Your soil, wind and trees

    Fast-draining bonsai soils, like akadama and pumice mixes, need longer or more frequent watering than garden soil. Our akadama guide explains how these soils behave.

    Wind matters too. Mist blows away easily on exposed benches. And trees with very different needs, like a thirsty maple and a drought-tolerant juniper, may need separate zones or careful placement.

    A few automatic watering habits that matter more than the system

    None of these cost anything.

    • Test it before you leave. Run the system for a week while you’re home and check every pot.
    • Check that water reaches the whole root ball. Lift a pot or check the soil after a cycle.
    • Group trees by water needs. Thirsty trees together, drought-tolerant trees together.
    • Add a filter. Small drippers and mist heads clog easily. A fine filter helps.
    • Hand-water new and weak trees. Recently repotted or collected trees need closer attention.
    • Ask someone to look in. Even with automation, a neighbor checking once or twice is cheap insurance.
    • Use moss or a surface layer. It helps the soil surface stay moist between cycles. Our bonsai moss guide covers the options.

    Bonsai automatic watering system comparison table

    ProductTypeBest forCoverageApprox. price
    Orbit 62061N Hose TimerSingle-zone hose timerThe base of any systemWhatever it’s connected to~$35
    Rain Bird Patio Drip Kit (RPATIOKIT)Drip kitA few pots on a patioUp to 10 planters~$30
    Gardena Micro-Drip Starter SetDrip kitUK and EU growers5 pots, expandable to 15~£24 (UK)
    Fine-spray / mist headsOverhead sprayWhole benchesMany treesVaries
    Blumat drip systemNo-electricity dripLarger pots without powerVariesVaries
    Hardwired timer + solenoid valvePro setupLarge collectionsWhole gardenHigher

    Prices are approximate and vary by retailer and region. Always check the current price before buying.


    The 6 best bonsai automatic watering options, reviewed

    1. Orbit 62061N Hose Faucet Timer – the simplest place to start

    Every automatic watering setup needs a timer, and a single-zone hose timer is the easiest way to get one.

    The Orbit 62061N is an electronic single-zone timer that screws onto an outdoor tap. You then connect a hose, drip kit or misting line to it. US hardware retailers list it at around $35.

    On its own, it doesn’t water anything. But combined with a drip kit or spray heads, it turns a manual setup into an automatic one. Use fresh batteries before any trip, and test it at home first.

    Pros

    • Affordable and widely available in the US
    • Works with drip kits, misters and hoses
    • Easy to install on an outdoor tap

    Cons

    • Battery-powered, so check batteries regularly
    • Single zone only
    • Not a complete system on its own

    Best for: anyone setting up their first automatic watering system.

    Search Orbit hose faucet timers on Amazon


    2. Rain Bird Patio Drip Kit (RPATIOKIT) – best drip kit for a few pots

    If you have a handful of bonsai on a patio or balcony, a small drip kit is the easiest way to water each pot.

    Rain Bird’s 10-Planter Patio Drip Irrigation Watering Kit is designed to water up to 10 planters and is listed at around $30. Kits like this run tubing from a tap to each pot, ending in a dripper you place on the soil.

    For bonsai, place the dripper away from the trunk, and consider using two drippers on larger pots so water spreads more evenly through the loose soil. Pair it with a hose timer to automate it.

    Pros

    • Affordable
    • Waters each pot individually
    • Water-efficient

    Cons

    • Drippers may only wet part of a bonsai root ball
    • Tubing to every pot looks cluttered
    • Needs a separate timer

    Best for: small collections on patios and balconies.

    Search Rain Bird patio drip kit on Amazon


    3. Gardena Micro-Drip Starter Set – best drip kit for UK and EU growers

    Gardena is a German brand, and its Micro-Drip system is widely available in Europe. The terrace and balcony starter set waters five pots and can be expanded to 15.

    It includes a master unit, 10 m of supply pipe, five adjustable drip heads (each rated 0–10 liters per hour), T-pieces, pipe pegs and an end cap. It was listed at around £24, although one UK retailer had delisted it when we checked. Gardena also sells separate water computers that connect to the system for scheduled watering.

    Adjustable drippers are useful for bonsai, because you can give thirsty trees more water and drought-tolerant trees less.

    Pros

    • Adjustable flow on each dripper
    • Expandable from 5 to 15 pots
    • Compatible with Gardena timers
    • Widely available in Europe

    Cons

    • Same drip limitations in loose bonsai soil
    • Timer sold separately
    • Stock varies by retailer

    Best for: European growers with a small to medium collection.

    Search Gardena Micro-Drip starter set on Amazon


    4. Fine-spray and mist heads – best for whole benches

    Many experienced growers prefer overhead fine spray to drip for bonsai benches.

    One long-time grower describes using standard drip tubing with fine-spray heads on short risers spaced about every three feet, running for an hour or more around midday in hot weather, with water pressure around 30 psi or higher to avoid dry spots. On forums, others mention products like Antelco’s fine mist sprayers angled downward to resist wind, and spray heads designed to cover pots evenly.

    The advantages are clear: no tube to every pot, and every tree on the bench gets water. The downsides are more water use, wind drift, and wet foliage, which some growers worry can encourage fungal problems.

    Pros

    • Covers many trees at once
    • No tubing to each pot
    • Popular among experienced hobbyists

    Cons

    • Uses more water
    • Wind can blow mist away
    • Needs good pressure and filtration

    Best for: growers with a full bench of trees.

    Search fine mist sprayer heads for drip irrigation on Amazon


    5. Blumat drip system – best option without electricity or timers

    Blumat is an Austrian watering system that works differently from everything else here. Instead of a timer, each pot gets a ceramic sensor cone pushed into the soil. As the soil dries, the cone lets water flow from a supply line or reservoir; when the soil is moist, it slows or stops.

    That makes it attractive for places without power or a programmable tap, and for trees with different water needs, since each cone responds to its own pot.

    The catch for bonsai is pot depth. Many bonsai pots are very shallow, so the cone may not fit well, and loose bonsai soil behaves differently from potting compost. It’s best suited to deeper pots, pre-bonsai in training containers, or larger trees. Test it carefully before relying on it.

    Pros

    • No electricity or timer needed
    • Each pot responds to its own moisture level
    • Good for trees with different needs

    Cons

    • Cones may not suit shallow bonsai pots
    • Needs careful setup and testing
    • Less common in bonsai use

    Best for: pre-bonsai, deeper pots and setups without power.

    Search Blumat drip system on Amazon


    6. Hardwired timer with solenoid valve – the serious collector’s setup

    For large collections, many experienced growers move beyond battery hose timers.

    One long-time grower recommends a hardwired irrigation timer with a 24V solenoid valve, plus a fine-mesh filter (around 60 mesh), because battery timers can be unreliable. Forum members running bigger collections describe multi-zone timers, two solenoid valves for redundancy, and even flow sensors that alert them if water flow falls outside a set range.

    It’s more work and money to set up, and often worth asking an irrigation installer for help. But if you have dozens of trees and travel in summer, reliability matters more than anything else.

    Pros

    • Most reliable option
    • Multiple zones for different trees
    • Can add alerts and redundancy

    Cons

    • Higher cost
    • More complex to install
    • Overkill for a few trees

    Best for: large collections and growers who travel often.

    Search irrigation controllers on Amazon


    Which bonsai automatic watering system should you buy? (By situation)

    You have a few trees and go away for weekends: a hose timer plus a small drip kit.

    You’re in the UK or Europe: a Gardena Micro-Drip set with a Gardena timer.

    You have a full bench of trees: fine-spray or mist heads on a timer.

    You have no outdoor power or programmable tap: a Blumat system for deeper pots.

    You have a large collection and travel often: a hardwired timer, solenoid valves and a filter, ideally with redundancy.

    You only need help on hot days: a simple timer and a mist line to supplement hand watering.

    A good beginner setup

    For most hobbyists, the simplest reliable setup is a hose timer, a small drip kit with two drippers on larger pots, and a filter. Test it for a week before any trip.


    How to set up automatic watering for bonsai

    1. Group your trees. Put trees with similar water needs together.
    2. Install the timer on your outdoor tap.
    3. Add a filter to protect drippers or mist heads.
    4. Run the tubing along the bench.
    5. Position drippers or spray heads so water reaches the whole soil surface.
    6. Set the schedule. Start with your normal hand-watering frequency.
    7. Test for several days. Check pots after each cycle and adjust.
    8. Check again before you leave. Fresh batteries, clean filters, no leaks.

    Fertilizing with an automatic watering system

    Some systems allow fertilizer injection. But with overhead mist or spray, much of the fertilizer ends up off the pots. One experienced grower prefers to feed by hand rather than through the system. Many bonsai growers also use slow-release organic fertilizers on the soil surface, which keep working regardless of how you water. Our bonsai fertilizer guide covers those.


    Common bonsai automatic watering mistakes

    Trusting the system completely. Systems fail. Ask someone to check in if you’re away.

    Not testing before a trip. Always run it for several days while you’re home.

    One dripper on a big pot. Water may only reach part of the root ball.

    Ignoring wind. Mist can blow away on exposed benches.

    Forgetting the filter. Clogged drippers are a common cause of dry pots.

    Old batteries. Replace them before every trip.


    Conclusion: automate, but keep checking

    A bonsai automatic watering system can take a lot of stress out of summer, especially if you travel or work long hours. But it works best as a backup, not a replacement for your own eyes.

    For a few trees, a simple hose timer and a small drip kit is enough. For a full bench, fine-spray heads on a timer are popular with experienced growers. And for large collections, a hardwired timer with solenoid valves and a filter is the reliable choice.

    Test any system before you depend on it, group trees by their needs, and if you’re away for long, ask someone to look in.

    Ready to automate? Search Orbit hose timers on Amazon, or compare small drip kits for your bench.

  • Best Bonsai Raffia in 2026: 6 Wraps for Bending Branches Without Breaking Them

    Best Bonsai Raffia in 2026: 6 Wraps for Bending Branches Without Breaking Them

    Affiliate disclosure: Some links on this page are affiliate links. If you buy through them, Aribonsai may earn a small commission at no extra cost to you. It doesn’t change what we recommend or how we rank anything.


    The quiet layer behind every dramatic bend

    Watch a professional bonsai artist make a big bend on an old juniper and you’ll notice something before the wire even goes on. They wrap the branch, round and round, in pale strips of what looks like dried grass.

    That’s bonsai raffia. It’s one of the cheapest supplies in bonsai, and one of the most important for heavy work.

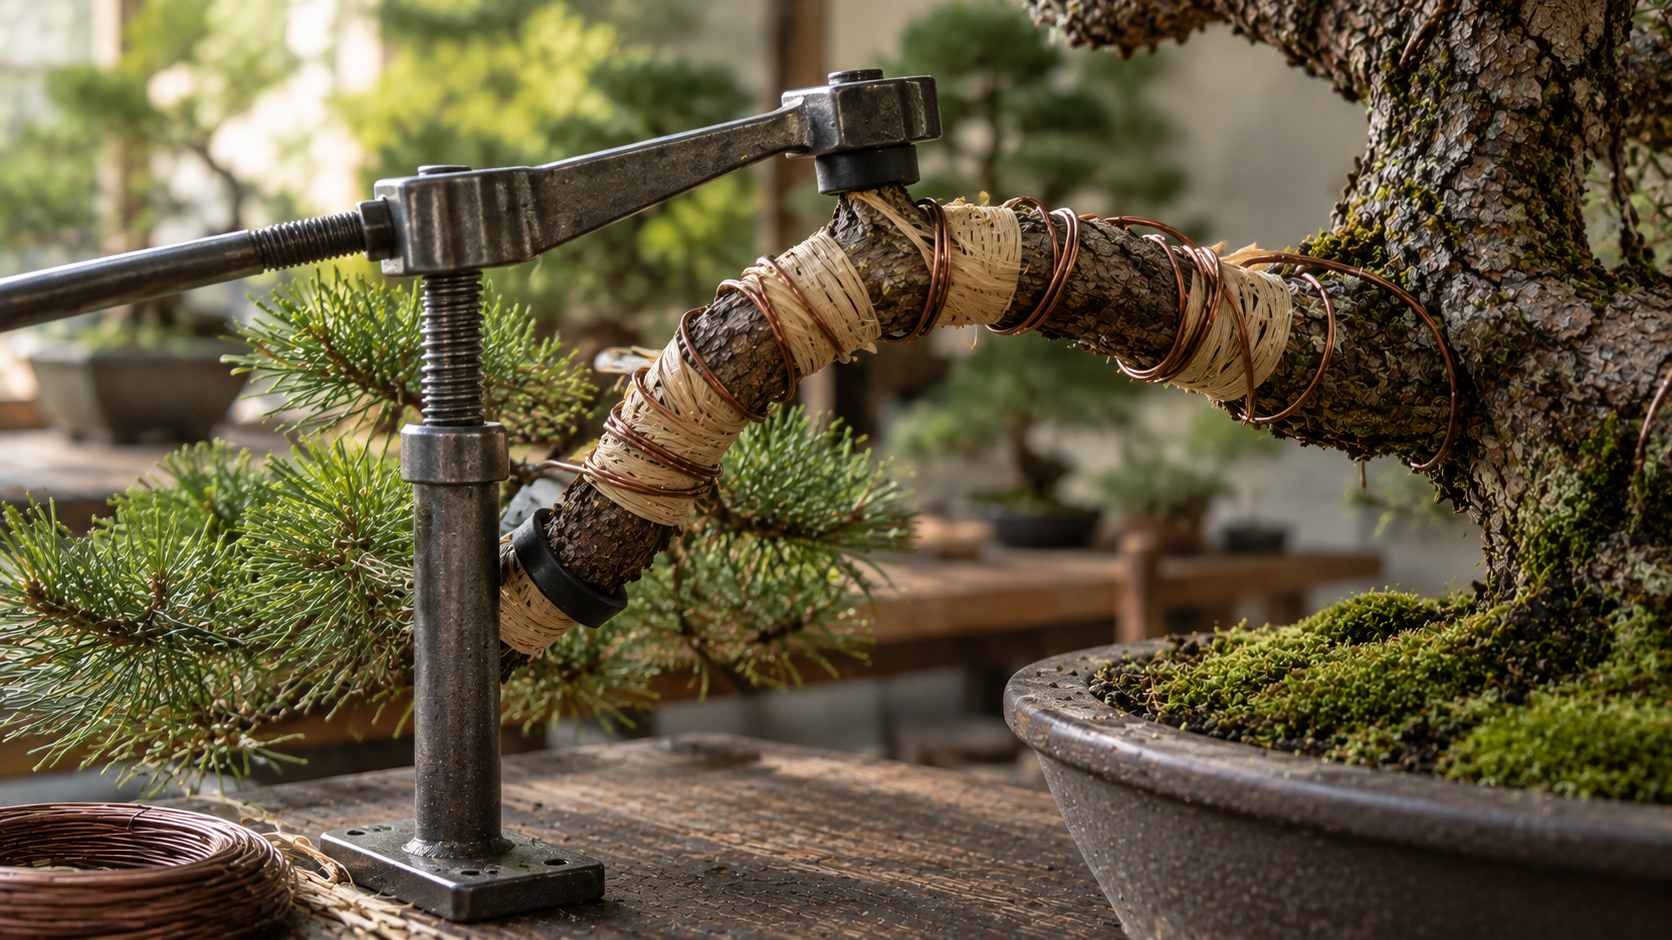
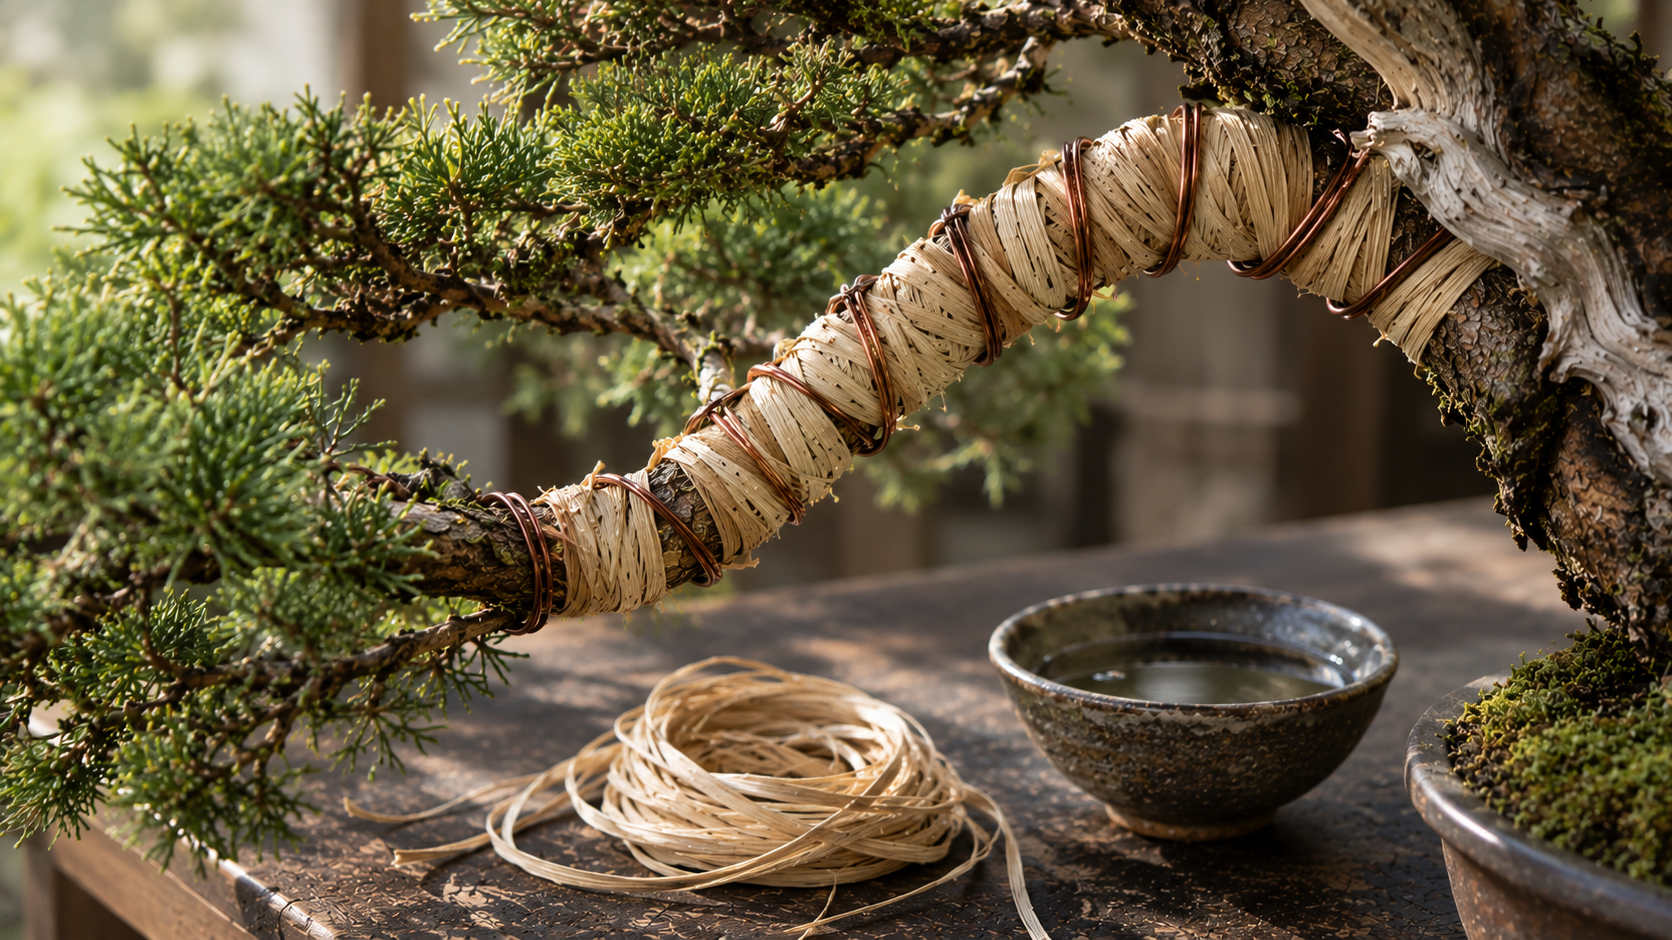
    Raffia does two jobs. It compresses the branch, holding the outer wood and bark together so they’re less likely to split when you bend. And it protects the bark from the wire, clamps and guy wires that go on top. When a big bend goes wrong, it’s often because the branch wasn’t supported well enough before the force was applied.

    The confusing part is that “raffia” covers a lot of products. There’s bonsai-specific raffia, garden raffia, craft-store raffia, and a whole range of alternatives people swear by: electrical tape, vet wrap, nylon cord. Some work well. Some leave sticky residue on your bark for a year.

    In my experience, most beginners skip raffia entirely, then wonder why a branch cracked during a bend that looked easy. This guide explains what matters, then compares six bonsai raffia options and alternatives, from premium bonsai raffia to the wraps experienced growers use on top of it.


    Who this bonsai raffia guide is NOT for

    It’s not for light wiring. Thin branches that bend easily with wire alone don’t usually need raffia.

    It’s not a wiring guide. Wire choice and gauges have their own article: our bonsai wire guide covers aluminum and copper.

    It’s not about decorative raffia. Gift-wrapping and craft raffia in bright colors is a different use, although natural craft raffia can work for bonsai, as we’ll see.

    Still with us? Let’s go.


    How we picked these (3 things that actually matter)

    1. Strand length and width

    This matters more than people expect.

    Longer, wider strands cover more of the branch in one pass and need fewer joins. On a thick trunk, short strands mean constant splicing, which is slow and creates weak points. Bonsai forum members note that craft-store raffia often has shorter strands than bonsai-specific raffia, which means more knots and more joining.

    2. Natural fiber that breathes

    Natural raffia is made from palm leaf fiber. Once soaked, it’s flexible enough to wrap tightly around a branch. As it dries, it tightens and grips.

    Bonsai Mirai makes an important point about why natural raffia is preferred: unlike electrical tape or horse wrap, it lets oxygen move through so the tree’s vascular system keeps working. Raffia also breaks down over time rather than strangling the branch.

    3. Grip and how easy it is to remove

    Wet raffia that dries on the branch grips tightly. That’s what you want for support. But it also makes it harder to remove later. Some growers wrap electrical tape over raffia to keep it moist and hold everything together, while others leave it exposed.

    You’ll eventually remove raffia once the bend has set, so think about that when you wrap.

    A few raffia habits that matter more than the product

    None of these cost anything.

    • Soak it first. Retailers and experienced growers recommend soaking raffia in water before use, from around 20 minutes to a couple of hours, so it’s flexible and won’t snap when pulled tight.
    • Wrap tightly, with overlap. Each turn should overlap the last, covering the whole area you’ll bend.
    • Use several layers for big bends. Thick branches often get two or more layers.
    • Wrap before you wire. Raffia goes on first, then wire, clamps or guy wires on top.
    • Keep it away from new buds. Leave growth points uncovered where you can.
    • Bend in the right season. Many growers avoid heavy bending in summer and prefer late winter or early spring.
    • Remove it once the bend holds. Leaving it on forever can hide problems in the bark.

    Bonsai raffia comparison table

    ProductTypeBest forSizeSellerApprox. price
    Bonsai Mirai RaffiaPremium bonsai raffiaBig bends, professional workNot statedBonsai MiraiCheck price
    Herons Natural Raffia (Cream)Natural raffiaUK growersNot statedHerons~£5 (UK)
    Bonsai Plaza Natural RaffiaNatural raffiaEU growers50 gBonsai Plaza~€4.30 (EU)
    Natural craft raffiaNatural raffiaBudget, light workVariesCraft stores, AmazonLow
    Electrical tapeOuter wrapHolding raffia moist and in placeRollsHardware storesLow
    Vet wrapSelf-adhesive wrapExperiments onlyRollsFarm storesLow

    Prices are approximate and vary by seller. Always check the current price before buying.


    The 6 best bonsai raffia options, reviewed

    1. Bonsai Mirai Raffia – the premium choice for big bends

    Bonsai Mirai, the well-known Oregon bonsai studio, sells its own raffia. It describes it as the widest, longest and most consistent raffia available, and says it constantly searches for and tests the highest-quality raffia for its trees.

    Mirai calls raffia essential for major design work on many bonsai species, because it provides compression and protection while still letting oxygen move through to the tree’s vascular system.

    The listing doesn’t give a size or price, so check the shop directly. But if you’re working on a large juniper or pine and making serious bends, long, wide, consistent strands save a lot of time and splicing.

    Pros

    • Long, wide, consistent strands
    • Chosen by a professional bonsai studio
    • Fewer joins on thick branches

    Cons

    • Price and size not listed on the page
    • More expensive than craft raffia

    Best for: serious growers doing heavy bends on large trees.

    Check Raffia at Bonsai Mirai


    2. Herons Natural Raffia (Cream) – the simple UK option

    Herons Bonsai sells natural raffia in cream for around £5. It’s described as a protective wrap: wrapping raffia around a branch before you put wire on can help protect the branch.

    The listing is short, without weight or origin details, but at this price it’s an easy add-on to any order. Herons also includes 50 g of raffia in its large branch bending kit, alongside a bender, clamp, trunk splitter and heavy wire.

    Pros

    • Inexpensive
    • Sold by an established UK bonsai nursery
    • Easy to add to a tool or soil order

    Cons

    • Weight and origin not stated
    • Mainly available in the UK

    Best for: UK growers who need raffia for occasional bends.

    Check Natural Raffia at Herons


    3. Bonsai Plaza Natural Raffia – the best-documented budget pick

    Bonsai Plaza’s natural raffia comes in 50 g bundles for around €4.30, and its listing has clearer instructions than most.

    It recommends soaking the raffia in water for a couple of hours so it can be pulled tight without breaking, then wrapping it firmly around the branch or trunk in overlapping turns before bending. It also says raffia should go on before wire, clamps or guy wires, especially for heavier bending, brittle material, or older, thicker branches.

    The product is unbranded, and origin isn’t stated. But for European growers, it’s an inexpensive and well-explained option.

    Pros

    • Clear usage instructions
    • Inexpensive 50 g bundles
    • Good for EU buyers

    Cons

    • Unbranded, origin not stated
    • Strand length not listed

    Best for: European growers who want an affordable, reliable bundle.

    Check Natural Raffia at Bonsai Plaza


    4. Natural craft raffia – the budget workaround

    You don’t always need bonsai-branded raffia. On bonsai forums, growers say craft-store raffia and bonsai-specific raffia are largely interchangeable, and some use both.

    The main difference is strand length. Craft raffia tends to have shorter strands, so you’ll make more joins on a thick branch. Make sure you buy natural raffia, not synthetic or colored decorative ribbon. US bonsai retailers also sell raffia at modest prices, so compare before buying lots of small craft bundles, which can add up.

    Pros

    • Cheap and easy to find
    • Works well for small and medium branches
    • Good for practice

    Cons

    • Shorter strands mean more joins
    • Quality varies a lot
    • Avoid synthetic or dyed versions

    Best for: beginners, practice bends, and small to medium branches.

    Search natural raffia on Amazon


    5. Electrical tape – the outer layer that holds it all together

    Electrical tape isn’t a replacement for raffia, but many experienced growers use it alongside it.

    On bonsai forums, a common method is to wrap the branch in raffia, then cover the raffia with electrical tape. The tape holds everything in place and helps keep the raffia moist. Some growers add aluminum or copper wire under the tape for extra support. One suggestion is to leave small gaps in the tape so you can rewet the raffia underneath.

    The downside is that a taped branch looks black and untidy for a while, and tape doesn’t breathe the way raffia does, which is exactly why Mirai recommends raffia as the layer against the bark.

    Pros

    • Holds raffia tightly in place
    • Helps keep raffia moist
    • Cheap and widely available

    Cons

    • Doesn’t breathe, so not ideal directly on bark
    • Looks messy during training
    • Needs careful removal

    Best for: experienced growers making very heavy bends who want an extra outer layer.

    Search vinyl electrical tape on Amazon


    6. Vet wrap – the alternative most growers regret

    Vet wrap is the stretchy, self-sticking bandage used on horses and pets. Some well-known bonsai artists have used it, and it’s sometimes described as breathable, so it’s worth discussing.

    On bonsai forums, though, opinions are mostly negative. Growers report that it gets sticky, leaves residue on the bark, gums up rough bark, and degrades in sun. One grower who used it on pines and junipers said the leftover bits disappeared within a year, but several others said they wouldn’t use it again.

    We’ve included it because people often ask. For most growers, natural raffia is the better choice.

    Pros

    • Easy and fast to apply
    • Stretchy, so it compresses well

    Cons

    • Can leave sticky residue
    • Degrades in sunlight
    • Many growers report bad experiences

    Best for: experimenters only. Most growers should use raffia.

    Search vet wrap on Amazon


    Which bonsai raffia should you buy? (By situation)

    You’re making big bends on large conifers: Bonsai Mirai Raffia.

    You’re in the UK: Herons Natural Raffia.

    You’re in Europe: Bonsai Plaza Natural Raffia.

    You’re practicing or bending smaller branches: natural craft raffia.

    You want extra hold on a very heavy bend: raffia underneath, electrical tape on top.

    You’re tempted by vet wrap: try raffia first.

    A typical heavy-bend wrap

    For a thick conifer branch, many growers use this order: soaked raffia wrapped tightly in several layers, then heavy wire over the raffia, sometimes electrical tape over everything, and finally guy wires or a jack to make the bend. Good bonsai jin pliers help tighten wire neatly over the raffia.


    How to wrap a branch with bonsai raffia

    The basic technique is simple, but a little care makes a big difference.

    1. Soak the raffia. Put a bundle in a bucket of water before you start. Wet strands are softer and can be pulled tight without snapping.
    2. Prepare a few strands at a time. Take two or three strands together for thicker branches. This gives a wider, stronger band.
    3. Anchor the start. Begin a little below the area you’ll bend. Lay the end of the raffia along the branch and wrap over it to lock it in place.
    4. Wrap tightly with overlap. Pull firmly as you wrap, overlapping each turn by about half its width. Gaps leave weak spots.
    5. Join new strands neatly. When a strand runs out, lay the new one over the old end and keep wrapping over both. No knots needed.
    6. Cover past the bend. Finish a little beyond the area that will bend, then tuck the end under the last turn.
    7. Add more layers if needed. On heavy bends, many growers wrap a second layer in the opposite direction.
    8. Wire over the raffia. Apply wire while the raffia is still damp, then bend slowly.

    The first time takes a while. After a few branches, it becomes quick and natural.


    Other uses for raffia in bonsai

    Raffia isn’t only for bending. Bonsai growers also use it to:

    • Tie a weak tree upright in its pot when it has few roots.
    • Anchor a tree temporarily during repotting. Our bonsai repotting supplies guide covers tie-down methods.
    • Hold soil in place in group plantings and landscape displays.
    • Protect bark under guy wires where they touch the trunk.

    One article from Bonsai Clubs International notes that raffia breaks down over time without harming the tree, unlike stretchy rubber tape, which can strangle roots.


    How to remove bonsai raffia

    Raffia should come off once the bend has set, which can take a growing season or longer on heavy bends.

    1. Check the bend. Make sure it holds before removing support.
    2. Remove outer layers first. Tape and wire come off before the raffia.
    3. Cut, don’t unwind forcefully. Dried raffia grips tightly. Cutting it carefully with scissors is often easier than pulling.
    4. Check the bark. Look for cracks or wounds. Seal any open wounds; our bonsai cut paste guide compares sealants.
    5. Rewire if needed. If the branch starts to spring back, rewire lightly.

    Common bonsai raffia mistakes

    Using dry raffia. It snaps and doesn’t grip properly.

    Wrapping too loosely. Loose raffia gives no compression.

    Using synthetic ribbon. Plastic raffia doesn’t breathe or break down.

    Leaving it on too long. Check regularly, and remove it when the bend has set.

    Skipping it on brittle wood. Old, thick or brittle branches need support most.


    Conclusion: wrap first, bend second

    Bonsai raffia isn’t glamorous, but it’s one of the main reasons professionals can make dramatic bends without snapping branches. It compresses the wood, protects the bark, and still lets the branch breathe.

    For heavy work on large conifers, a premium raffia like Bonsai Mirai’s is worth it. For most hobbyists, an inexpensive natural raffia from a bonsai shop works well. And if you need extra hold, electrical tape over the raffia is a proven combination.

    Soak it, wrap it tightly with overlap, bend slowly, and remove it once the branch holds its new shape.

    Ready for your next bend? Check Raffia at Bonsai Mirai, or check Natural Raffia at Bonsai Plaza.

  • Best Bonsai Tool Roll in 2026: 6 Rolls, Pouches and Cases to Protect Your Japanese Tools

    Best Bonsai Tool Roll in 2026: 6 Rolls, Pouches and Cases to Protect Your Japanese Tools

    Affiliate disclosure: Some links on this page are affiliate links. If you buy through them, Aribonsai may earn a small commission at no extra cost to you. It doesn’t change what we recommend or how we rank anything.


    Good tools deserve better than a drawer

    A bonsai tool roll isn’t the first thing anyone buys. But it’s often the thing people wish they’d bought sooner.

    You spend real money on a Japanese concave cutter. Then it goes into a drawer with the scissors, the wire cutter and a tangle of aluminum wire. The blades knock together. A cutting edge gets a tiny nick. The tweezers bend at the tip. And when you head to a club meeting or workshop, everything goes loose into a bag.

    A tool roll, pouch or case fixes all of that. Each tool sits in its own pocket, edges don’t touch, and you can see at a glance what you’ve got and what’s missing. It also makes packing for a workshop a 30-second job.

    The choice is wider than you might expect: canvas rolls, synthetic leather rolls, real leather folios, and Japanese-made pouches from tool brands like Kaneshin. Prices run from about $20 to well over $100.

    In my experience, the most common mistake is buying a roll that’s too small, or one with pockets that don’t fit Japanese tools well. This guide explains what matters, then compares six bonsai tool rolls and cases, from simple canvas rolls to Japanese-made pouches.


    Who this bonsai tool roll guide is NOT for

    It’s not about tool maintenance. Storage protects tools, but it doesn’t replace cleaning and oiling. Our bonsai tool maintenance guide covers oils, rust erasers and sharpening stones.

    It’s not about workbenches or turntables. Those are about working on a tree. This guide is about storing and carrying tools.

    It’s not for large power tools. Saws and power carving tools usually need their own boxes.

    Still with us? Let’s go.


    How we picked these (3 things that actually matter)

    1. Number and size of pockets

    This is the most important practical point.

    • Small pouches and folios hold around three to five tools. They’re great for a core kit you carry to workshops.
    • Medium rolls with around five to nine pockets suit most hobbyists.
    • Large rolls with ten or more pockets hold a full collection, including several sizes of cutters and scissors.

    Check pocket length too. Many Japanese bonsai tools are around 180–210 mm long, and some are longer. A roll designed for small garden tools may leave handles sticking out.

    2. Material

    Each material has trade-offs.

    • Canvas is tough, light and usually affordable. Heavier canvas lasts longer and gives better protection. Waxed canvas also resists water and stains.
    • Synthetic leather is easy to wipe clean and often water resistant.
    • Real leather looks and feels beautiful and ages well, but costs more and needs a little care.

    A soft lining, such as felt, is a nice bonus. It helps protect polished or black-finished tools from scratches.

    3. Roll, pouch or case

    • Rolls lay flat when open so you can see every tool. They’re great on a workbench.
    • Pouches and folios are compact and protective, ideal for carrying a few favorite tools.
    • Cases that come with tool sets are convenient if you’re buying a set anyway.

    A few tool storage habits that matter more than the roll

    None of these cost anything.

    • Clean and dry tools before storing them. A roll can trap moisture against wet tools.
    • Oil carbon steel before long storage. Especially over winter.
    • Store the roll somewhere dry. Not in a damp shed or a car trunk.
    • Give each tool its own pocket. Two tools in one pocket defeats the purpose.
    • Keep blades closed. Close cutters and scissors before putting them away.
    • Air out the roll occasionally. Let it dry fully if it gets damp.

    Bonsai tool roll comparison table

    Roll / caseTypePockets / capacityMaterialOriginApprox. price
    Kaneshin Bonsai Tool Pouch (Small)PouchCompact, a few toolsSynthetic leather, felt liningJapan~$64
    Yoshiaki Bonsai Tool RollRoll12 pocketsFabric with leather trimJapan~$38
    Niwaki Tool RollRoll5 pouches16 oz canvasNot stated~£18 (UK)
    Herons Bonsai Tool RollRoll9 pockets, tools up to 210 mmSynthetic leather lookNot stated~£15 (UK)
    Niwaki Bonsai Tool FolioFolioUp to 5 toolsLeather, felt liningChina~$110
    Tool set with included caseSet + caseVariesVariesVariesSet price

    Prices are approximate and vary by country and seller. Always check the current price before buying.


    The 6 best bonsai tool rolls and cases, reviewed

    1. Kaneshin Bonsai Tool Pouch – best Japanese-made pouch

    If your tools are Kaneshin, a Kaneshin pouch is a natural match. And it’s one of the few tool cases here that’s clearly made in Japan.

    The small pouch measures about 10.1 × 5.4 × 1.8 inches and weighs 7.4 oz. It’s made from tough synthetic leather with a soft synthetic felt lining, and Niwaki describes it as water resistant. It’s sized for a compact set of tools rather than a whole collection. Niwaki sells it for around $64; a larger size has been discontinued.

    It’s ideal for carrying your core tools to a workshop or club meeting, or for keeping your best cutters protected at home.

    Pros

    • Made in Japan
    • Soft felt lining protects tool finishes
    • Water-resistant synthetic leather
    • Compact and easy to carry

    Cons

    • Small capacity
    • Larger size discontinued

    Best for: Kaneshin owners and anyone who wants a Japanese-made case for a few key tools.

    Check the Kaneshin Bonsai Tool Pouch at Niwaki


    2. Yoshiaki Bonsai Tool Roll – best Japanese roll for a full collection

    If you’ve already built up a collection of tools, a 12-pocket roll gives you room for all of them.

    Bonsai Learning Center sells this Japanese-made tool roll by Yoshiaki for around $38. It has 12 pockets, each about 2¼ inches wide, and measures 28 inches long and 11¾ inches high with the flap down. Product images show white fabric with tan leather trim and a leather strap.

    That’s a lot of capacity for the price. It was listed as out of stock when we checked, so check back or ask the retailer.

    Pros

    • Made in Japan
    • 12 pockets for a full collection
    • Good value
    • Flap protects tool tips

    Cons

    • Stock can be limited
    • Material not fully described

    Best for: growers with a growing collection who want one roll for everything.

    Check the Yoshiaki Bonsai Tool Roll at Bonsai Learning Center


    3. Niwaki Tool Roll – best tough canvas roll

    Niwaki is a UK-based company known for Japanese garden tools, and its canvas tool roll is a popular, practical choice.

    It’s made from heavy-duty, weatherproof 16 oz canvas and measures 43 × 59 cm. There are five pouches, and the top edge can be rolled over for compact tools or left open for longer ones. At around £18 at UK retailers, it’s very reasonably priced.

    Five pockets is enough for a core bonsai kit, and the heavy canvas will take years of use. The listing doesn’t say where it’s made.

    Pros

    • Heavy-duty 16 oz canvas
    • Adjustable top edge for tools of different lengths
    • Affordable
    • Weatherproof

    Cons

    • Only five pockets
    • Origin not stated
    • Spot clean only

    Best for: growers who want a tough, simple roll for a core kit.

    Check the Niwaki Tool Roll at Burford


    4. Herons Bonsai Tool Roll – best budget roll for UK growers

    Herons Bonsai sells a practical tool roll with nine individual pockets for around £15.

    It’s made from a synthetic material with a leather-look finish, measures 59.5 × 25 cm when open, and holds tools up to 210 mm long, which covers most standard bonsai tools. A strap keeps the roll closed.

    Nine pockets is a good middle ground: enough for scissors, a couple of cutters, pliers, tweezers and a root hook, with space to grow. The listing doesn’t state where it’s made.

    Pros

    • Nine pockets
    • Fits tools up to 210 mm
    • Easy-clean synthetic material
    • Very affordable

    Cons

    • Origin not stated
    • Longer tools may not fit
    • Mainly available in the UK

    Best for: UK growers who want a budget roll with plenty of pockets.

    Check the Bonsai Tool Roll at Herons


    5. Niwaki Bonsai Tool Folio – best premium leather option

    If you want something that feels as special as your tools, this leather folio is the premium choice.

    It’s made from tan leather with an embossed Niwaki logo and a soft felt lining, and fits up to five bonsai tools. It weighs about 12.9 oz. Niwaki sells it for around $110, and lists it as made in China.

    It’s not cheap, and it doesn’t hold a full collection. But for a small set of high-end tools, perhaps Masakuni or Kaneshin stainless, it offers good protection and a handsome look that will age well. If you’re deciding between those brands, our Kaneshin vs Masakuni comparison may help.

    Pros

    • Real leather that ages well
    • Soft felt lining
    • Attractive gift option

    Cons

    • Expensive
    • Holds only five tools
    • Made in China, not Japan

    Best for: owners of premium tools and anyone looking for a gift.

    Check the Niwaki Bonsai Tool Folio


    6. A tool set with an included case – best if you’re buying tools anyway

    If you haven’t bought your main tools yet, it can make sense to get a set that already includes a case or roll.

    Several Japanese sets come this way. Kaneshin’s 8-piece set with case, for example, includes two pairs of shears, pliers, a concave cutter, a wire cutter, tweezers and a knob cutter. Wazakura also sells 5-piece Japanese tool kits with a roll bag. Our bonsai starter tool set guide compares Japanese sets in more detail.

    The trade-off is flexibility. An included case is sized for the set, so it may not have space for tools you add later.

    Pros

    • Tools and case in one purchase
    • Case fits the set exactly
    • Often better value than buying separately

    Cons

    • Little room for extra tools
    • Only makes sense if you need the tools

    Best for: beginners buying their first set of Japanese tools.

    Shop Wazakura bonsai tool kits with roll bag*Tip: Use code **ARIBONSAI** at checkout for 10% off at Wazakura.*


    Which bonsai tool roll should you buy? (By situation)

    You own Kaneshin tools and want a Japanese case: Kaneshin Bonsai Tool Pouch.

    You have a big collection: Yoshiaki 12-pocket roll.

    You want a tough, simple roll: Niwaki canvas Tool Roll.

    You’re in the UK and on a budget: Herons Bonsai Tool Roll.

    You own premium tools or want a gift: Niwaki Bonsai Tool Folio.

    You haven’t bought your tools yet: a Japanese tool set that includes a case.

    You go to workshops regularly: a compact pouch for your core tools, plus a larger roll at home.

    Two-roll setup for serious hobbyists

    Many growers end up with two: a large roll that stays on the workbench and holds everything, and a small pouch with their core tools for workshops and club meetings. It saves packing and unpacking every time.


    Tool roll, hard case or toolbox?

    It’s worth asking whether a bonsai tool roll is the right kind of storage for you at all, because there are other options.

    A tool roll is the classic bonsai choice. It lies flat on the bench, every tool is visible, and it packs down small. The downside is that it offers less protection from heavy knocks, and tools can slide out if you pick it up carelessly.

    A hard case, like the cases some tool sets come with, gives the best protection in transport. Each tool sits in a fitted slot. But fitted cases rarely have room for new tools, and they take up more space.

    A toolbox or drawer is fine at home, as long as tools don’t touch each other. Many growers line a shallow drawer with felt or foam and cut slots for each tool. It works well, but it doesn’t travel.

    For most hobbyists, a roll is the best balance. It protects edges from each other, it’s easy to carry, and it grows with your collection. If you often travel to workshops by car or plane, a compact pouch for your best tools adds an extra layer of protection.

    One more practical tip: lay out all your tools before buying, and count them, plus two or three spare pockets. That number tells you which size of roll you actually need.


    What to put in your first bonsai tool roll

    If you’re filling a roll for the first time, these are the tools most growers use most:

    • Bonsai shears
    • Tweezers
    • Wire cutter
    • Concave cutter
    • Jin pliers
    • Root hook

    Leave a couple of empty pockets. You’ll fill them sooner than you think.


    How to care for a bonsai tool roll

    • Brush off soil and debris after use.
    • Spot clean canvas with a damp cloth.
    • Wipe synthetic leather with a damp cloth.
    • Condition real leather occasionally with a suitable leather care product.
    • Let it dry fully if it gets wet, before putting tools back in.
    • Store it flat or loosely rolled, somewhere dry.

    Common bonsai tool roll mistakes

    Putting wet tools in the roll. It traps moisture and causes rust.

    Choosing pockets that are too short. Check your longest tool.

    Overfilling pockets. Two tools in one pocket rub against each other.

    Storing the roll in a damp place. The roll protects tools from knocks, not from humidity.

    Buying too few pockets. Collections grow. Leave room.


    Conclusion: protect the tools you paid for

    A bonsai tool roll is a small investment that protects much bigger ones. It keeps edges from knocking together, makes it easy to see what you have, and turns packing for a workshop into a quick job.

    For a Japanese-made option, the Kaneshin pouch and the Yoshiaki 12-pocket roll are both excellent. For a tough, affordable roll, the Niwaki canvas roll and the Herons roll are hard to beat. And if you want something truly special for premium tools, the Niwaki leather folio is a lovely choice.

    Clean and dry your tools first, give each one its own pocket, and keep the roll somewhere dry.

    Ready to organize your tools? Check the Kaneshin Bonsai Tool Pouch at Niwaki, or check the Niwaki canvas Tool Roll.

  • Bonsai Tools for Beginners in 2026: The 6 Japanese Tools to Buy First, and in What Order

    Bonsai Tools for Beginners in 2026: The 6 Japanese Tools to Buy First, and in What Order

    Affiliate disclosure: Some links on this page are affiliate links. If you buy through them, Aribonsai may earn a small commission at no extra cost to you. It doesn’t change what we recommend or how we rank anything.


    Do you really need all those tools?

    Search for bonsai tools for beginners and you’ll quickly feel overwhelmed. There are concave cutters, knob cutters, root cutters, wire cutters, jin pliers, three kinds of scissors, tweezers, root rakes, brooms, saws, carving knives and more. A full Japanese tool roll can easily run to several hundred dollars.

    Then there’s the question of brands. Kaneshin, Masakuni, Wazakura, Yagimitsu. Carbon steel or stainless. Black finish or polished.

    It’s no surprise many beginners either buy a cheap 12-piece kit that falls apart, or freeze and buy nothing at all, trimming their first tree with kitchen scissors.

    Here’s the good news: you don’t need everything at once. Most bonsai work in the first year or two needs only a handful of tools. The rest can wait until your trees, and your skills, actually call for them.

    In my experience, the best way to build a tool kit isn’t to buy a big set on day one. It’s to buy the right tool when you first need it, and buy one good one instead of three cheap ones. This guide explains which six Japanese tools beginners need, in what order, and roughly what each should cost.


    Who this bonsai tools for beginners guide is NOT for

    It’s not for experienced growers. If you already own several Japanese tools, our individual buying guides will be more useful.

    It’s not a starter set comparison. If you’d rather buy several tools in one box, our bonsai starter tool set guide compares Japanese kits.

    It’s not about advanced work. Carving, heavy bending and collected trees need specialist tools. We’ll mention them at the end, but this guide focuses on the basics.

    Still with us? Let’s go.


    How we picked these (3 things that actually matter)

    1. How often you’ll use it

    The first tools you buy should be the ones you’ll pick up every week. For most beginners, that’s scissors for trimming and something to handle wire. Tools for repotting come next, since you’ll usually repot once every year or few. Specialist tools come last.

    2. What a cheap version costs you

    Some tools are fine to buy cheaply. Others aren’t.

    A budget pair of tweezers is fine. A budget concave cutter that crushes branches instead of cutting them can leave wounds that take years to heal. A cheap wire cutter with misaligned jaws can damage bark. So it makes sense to spend more on cutting tools and less on simple ones.

    3. Japanese quality at a beginner price

    You don’t need Masakuni on day one. Japanese brands like Wazakura offer hand-forged tools at prices close to cheap imported kits, and Kaneshin’s carbon steel range is the long-time standard for serious hobbyists. Both are good places to start. If you’re curious about the premium end, our Kaneshin vs Masakuni comparison explains the difference.

    A few beginner habits that matter more than any tool

    None of these cost anything.

    • Use each tool only for its job. Cutting wire with scissors, or roots with a concave cutter, damages edges quickly.
    • Clean tools after every session. Sap and soil cause rust and dull edges.
    • Oil carbon steel occasionally. A light coat prevents rust.
    • Store tools dry. A tool roll or drawer is fine. A damp shed is not.
    • Don’t force a cut. If a tool struggles, the branch is too thick for it.
    • Learn on one tree before buying more tools. Your needs will become clear quickly.

    Bonsai tools for beginners: comparison table

    Prices below come from our individual buying guides, checked in September and October 2026. They’re approximate and vary by seller and exchange rate.

    OrderToolWhat it doesWhen you need itBeginner price range
    1Bonsai shearsTrimming shoots, leaves and fine branchesFrom day one~$40–85
    2TweezersWeeding, removing dead leaves, moss workFrom day one~$10–30
    3Wire cutterCutting and removing wire safelyWhen you start wiring~$56–97
    4Concave cutterRemoving branches with clean, healing cutsFirst structural pruning~$60–140
    5Jin pliersBending, tightening and removing wireWhen you wire regularly~$46–97
    6Root rakeLoosening soil and roots when repottingFirst repot~$15–40

    The 6 bonsai tools beginners need, reviewed in order

    1. Bonsai shears – the first tool everyone needs

    If you buy only one Japanese bonsai tool, make it a pair of shears. You’ll use them for trimming new shoots, cutting off leaves and thin twigs, and generally keeping the tree in shape. Most beginners use them almost every time they touch a tree.

    The classic beginner style is the satsuki-style scissor: long, narrow blades with comfortable round handles. It reaches into the tree easily and handles most light pruning.

    In our bonsai shears guide, the Wazakura Satsuki Bonsai Scissors (around $40) are our first-pair pick, while Kaneshin’s carbon satsuki scissors (around $60–65) are a reliable everyday step up.

    Pros

    • Used constantly, so excellent value
    • Affordable Japanese options
    • Handles most everyday pruning

    Cons

    • Not for thick branches, wire or roots
    • Carbon steel needs drying and oiling

    Best first pick: Wazakura Satsuki Bonsai Scissors. Step up: Kaneshin carbon satsuki scissors.

    Search Japanese satsuki bonsai scissors on Amazon


    2. Tweezers – the cheapest tool you’ll use every week

    Tweezers are easy to overlook, but they’re one of the most-used tools in any kit. You’ll use them to pull weeds, remove dead leaves and old needles, pick off pests, and place or tidy moss. Many have a small spatula on the other end for pressing down soil after repotting.

    The good news is that quality Japanese tweezers are very affordable. Kaneshin’s No.61A bent-nose tweezers with a spatula, made in Japan from stainless steel, cost about $10 at a US retailer. That’s our top beginner pick.

    Pros

    • Very cheap for a Japanese tool
    • Used on every tree, every week
    • Spatula end helps with repotting and moss

    Cons

    • Easy to damage the tips by prying with them

    Best first pick: Kaneshin No.61A Bent Nose Tweezers.

    Search Kaneshin bonsai tweezers on Amazon


    3. Wire cutter – the tool that protects your bark

    Most beginners start wiring branches within the first year. And the first time you remove wire, you’ll see why a proper wire cutter matters.

    Bonsai wire cutters have short, rounded jaws that cut wire right against the branch without digging into the bark. Ordinary hardware-store wire cutters have pointed jaws and often leave marks. Unwinding wire by hand can also tear bark, especially once the branch has thickened.

    In our bonsai wire cutter guide, the Wazakura Hand Forged Wire Cutter (around $56) is our first dedicated cutter pick, and Kaneshin’s No.22A (around $67) is a dependable general-purpose choice.

    Pros

    • Removes wire without damaging bark
    • Works with aluminum and copper wire
    • Affordable Japanese options

    Cons

    • Not for cutting branches
    • One more tool to buy if you’re not wiring yet

    Best first pick: Wazakura Hand Forged Wire Cutter. Step up: Kaneshin No.22A.

    Search Japanese bonsai wire cutters on Amazon


    4. Concave cutter – the most important “real” bonsai tool

    If bonsai has a signature tool, it’s the concave cutter. It removes a branch so the cut is slightly hollow, rather than flat. That shallow hollow lets the wound heal over more smoothly, leaving a much less visible scar.

    You won’t need one on day one. But once you start removing branches to shape a tree, it becomes essential. This is also the tool where quality matters most, because a poor cutter crushes wood instead of cutting it.

    In our bonsai concave cutter guide, the Wazakura Hand Forged Concave Cutter (around $60) is the first serious cutter pick, and Kaneshin’s carbon concave cutter (around $65–90) is the best long-term value.

    Pros

    • Leaves cuts that heal smoothly
    • Essential for structural pruning
    • Good Japanese options under $100

    Cons

    • Not for wire, roots or very thick branches
    • Worth spending a little more on

    Best first pick: Wazakura Hand Forged Concave Cutter. Step up: Kaneshin carbon concave cutter.

    Search Japanese concave cutters on Amazon


    5. Jin pliers – the wiring helper

    Despite the name, jin pliers aren’t just for deadwood. For most beginners, they’re a wiring tool: tightening wire ends, bending wire into place, pulling wire off, and tightening tie-down wire when repotting.

    They’re not the first tool you need. But once you start wiring regularly, they make the job much easier on your fingers and give you more control.

    In our bonsai jin pliers guide, the Wazakura Hand Forged Wire & Jin Pliers (around $46) are our first-pair pick, and Kaneshin’s No.49 (around $60) is a strong choice for more leverage and heavier wire.

    Pros

    • Makes wiring easier and neater
    • Useful for repotting too
    • Later useful for deadwood work

    Cons

    • Not essential on day one
    • Carbon steel needs basic care

    Best first pick: Wazakura Hand Forged Wire & Jin Pliers. Step up: Kaneshin No.49.

    Search Japanese bonsai jin pliers on Amazon


    6. Root rake – the repotting tool you’ll be glad you bought

    Repotting is one of the most stressful moments for a beginner, and a root rake makes it much gentler. Its curved prongs comb old soil away from the roots and untangle circling roots, without tearing the fine roots you want to keep.

    You only need one when you first repot, which is often in your first or second spring. Japanese root hooks start at around $15 at US retailers, and Kaneshin’s handmade 2-prong root hook costs around $40.

    Pros

    • Gentle on fine roots
    • Affordable
    • Lasts for years

    Cons

    • Only used at repotting time

    Best first pick: a simple Japanese root hook from a bonsai retailer. Step up: Kaneshin 2 Prong Root Hook.

    Search Japanese bonsai root rakes on Amazon


    Which bonsai tools should beginners buy? (By stage)

    You’ve just bought your first tree: shears and tweezers. That’s it for now.

    You’re starting to wire: add a wire cutter, plus some aluminum wire.

    You’re starting to shape the tree: add a concave cutter.

    You’re wiring regularly: add jin pliers.

    You’re about to repot: add a root rake, pot mesh and a couple of bamboo chopsticks.

    You’d rather buy everything at once: a starter set can save money, as long as it contains the tools you’ll actually use.

    A realistic first-year budget

    Buying one good Japanese tool at a time, a beginner can build the six-tool kit above for roughly $230–490, depending on whether you choose budget Japanese tools or step-up Kaneshin models. Spread over a year or two, that’s very manageable, and every tool will last for many years with basic care.


    Carbon steel or stainless: which is better for beginners?

    This question comes up with almost every Japanese tool, so it’s worth answering once.

    Carbon steel is the traditional choice. It’s what most Japanese bonsai tools are made from, it takes a sharp edge, and it’s usually cheaper. The downside is rust. If you leave a carbon tool wet or covered in sap, it can rust within days.

    Stainless steel resists rust much better, which makes it attractive for beginners, for humid climates, and for anyone who knows they won’t always clean their tools straight away. It usually costs noticeably more for the same tool.

    For most beginners, carbon steel is perfectly fine as long as you build one small habit: wipe the tool dry after use and oil it now and then. If you already know that won’t happen, or you live somewhere very humid, stainless is worth the extra money for the tools you use most, like shears and a concave cutter.

    Where to buy Japanese bonsai tools for beginners

    You don’t need to import tools from Japan yourself. Many specialist bonsai retailers in the US, UK and Europe stock Kaneshin and other Japanese brands, and some Japanese brands like Wazakura ship internationally. Amazon also carries many Japanese bonsai tools, but check the brand and seller carefully, because similar-looking tools from other makers are common. When in doubt, buy from a bonsai specialist.


    Tools beginners can wait for

    These are excellent tools, but most beginners don’t need them yet.

    • Knob cutter: for removing stubs and very flush cuts. Useful once you’re doing more structural work.
    • Root cutter: for thick roots on bigger trees.
    • Bonsai saw: for branches too thick for a concave cutter.
    • Carving tools: for creating jin and shari.
    • Branch bender or jack: for heavy bends on mature conifers.
    • Turntable: makes working on a tree easier, but it’s a comfort, not a necessity.

    How to care for your first bonsai tools

    • Wipe them after every use. Sap and soil cause rust.
    • Dry them completely. Especially carbon steel.
    • Oil them lightly from time to time. A drop of tool oil on blades and joints.
    • Use a rust eraser for light rust. Remove it early, before it pits the steel.
    • Store them in a roll or drawer. Protect edges from knocking against each other.

    Common beginner tool mistakes

    Buying a big cheap kit. Many pieces go unused, and the important ones may be poor quality.

    Cutting wire with scissors. It ruins the edge quickly.

    Using a concave cutter on thick wood. If it doesn’t cut easily, use a saw.

    Skipping a proper wire cutter. Ordinary cutters and unwinding by hand can damage bark.

    Never cleaning tools. Rust is the most common reason good tools wear out early.


    Conclusion: buy the right tool when you need it

    The best bonsai tools for beginners aren’t the most expensive ones, and you don’t need a huge kit to start. Begin with shears and tweezers. Add a wire cutter when you start wiring, a concave cutter when you start shaping, jin pliers when wiring becomes regular, and a root rake for your first repot.

    Choose affordable Japanese tools like Wazakura to start, or Kaneshin if you’d like to buy once and keep them for decades. Clean them, keep them dry, and use each one only for its job.

    Do that, and your first six tools will serve you for years, long after your first tree has become a real bonsai.

    Ready to start? Compare Japanese bonsai shears for your very first tool, or search Japanese bonsai tools on Amazon.

  • Best Kanuma Bonsai Soil in 2026: Kanuma, Kiryu, Hyuga Pumice and 6 Japanese Soils Beyond Akadama

    Best Kanuma Bonsai Soil in 2026: Kanuma, Kiryu, Hyuga Pumice and 6 Japanese Soils Beyond Akadama

    Affiliate disclosure: Some links on this page are affiliate links. If you buy through them, Aribonsai may earn a small commission at no extra cost to you. It doesn’t change what we recommend or how we rank anything.


    Akadama isn’t the whole story

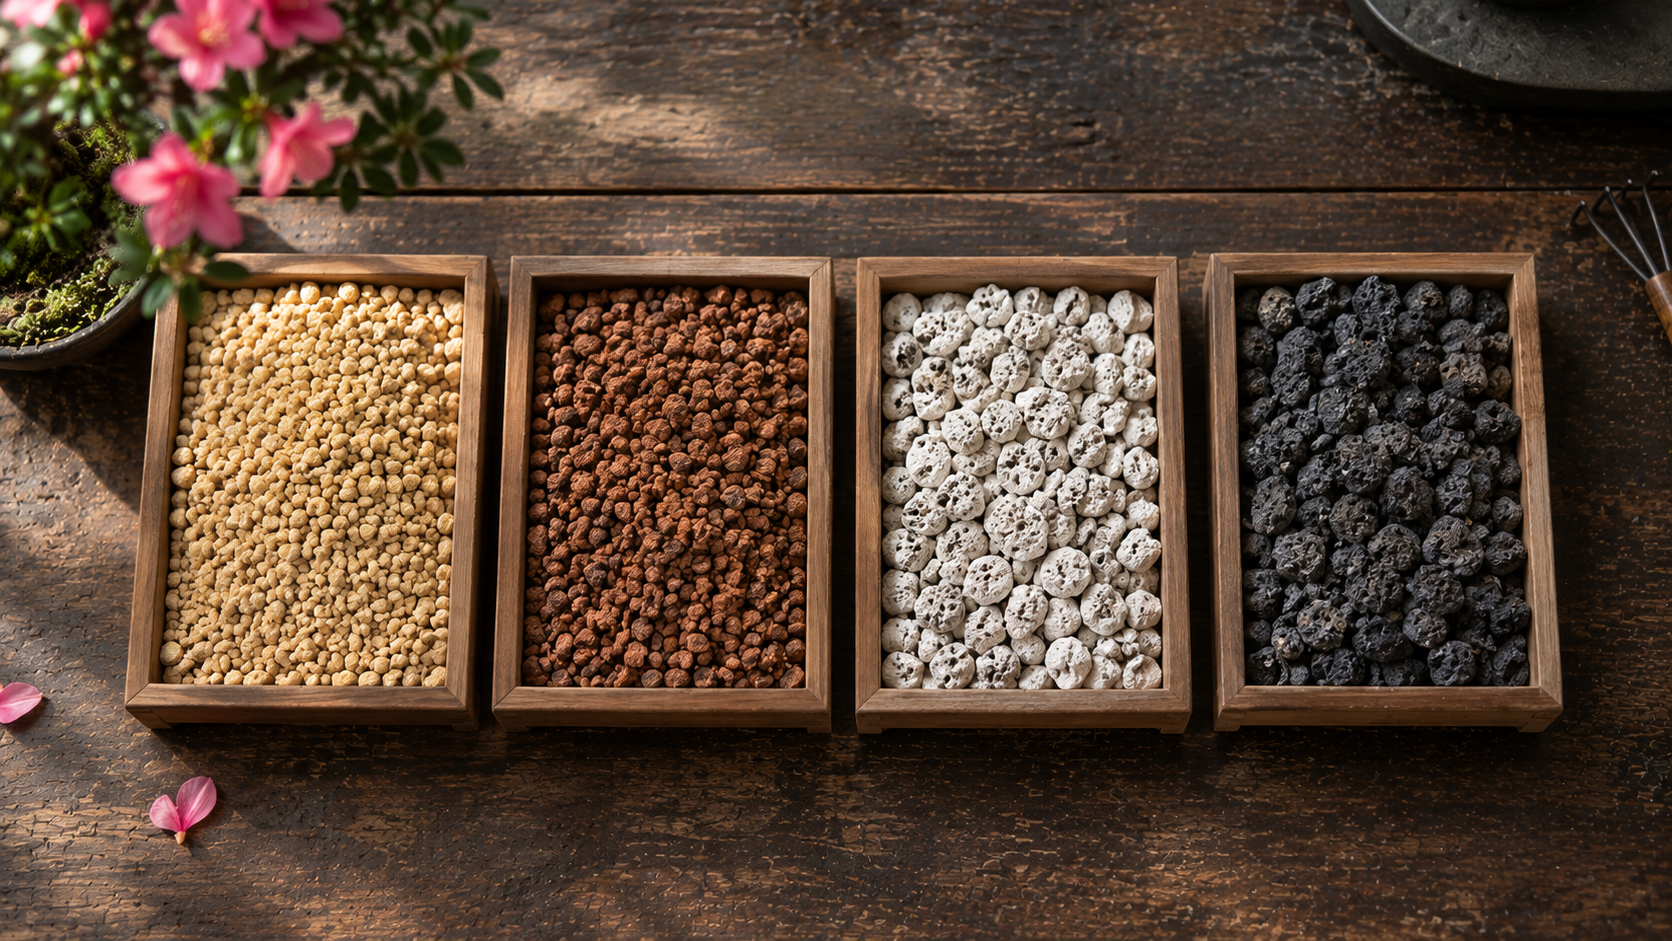
    Most bonsai growers learn about akadama first. It’s the famous Japanese clay that appears in almost every soil mix you read about. But walk into a serious bonsai nursery in Japan and you’ll see bags of other soils stacked right next to it: pale yellow kanuma, rusty brown kiryu, white hyuga pumice, black volcanic rock.

    Each one exists for a reason. Kanuma bonsai soil is the classic choice for satsuki azaleas. Kiryu drains fast and suits pines and junipers. Hyuga pumice adds air and lightness. Black lava rock gives structure that lasts for years.

    The confusing part is knowing which one you actually need, and in what proportion. A mix that’s perfect for an azalea can be wrong for a pine. A soil that works in Japan’s humid summers may stay too wet in a cold, rainy climate.

    In my experience, most people only need one or two of these beyond akadama, and the right choice depends almost entirely on the species they grow. This guide explains what each soil does, then compares six Japanese soils and mixes you can buy outside Japan, starting with kanuma.


    Who this kanuma bonsai soil guide is NOT for

    It’s not an akadama guide. Akadama has its own article: our akadama and Japanese bonsai soil guide compares the main brands.

    It’s not for indoor tropical trees in potting compost. If your tree lives in a garden-center potting mix and you’re happy with it, this guide may be more than you need.

    It’s not a fertilizer guide. These soils are mostly inorganic. Feeding is a separate topic.

    Still with us? Let’s go.


    How we picked these (3 things that actually matter)

    1. What each soil does

    Japanese bonsai soils aren’t interchangeable. Here’s the quick version.

    • Kanuma is a soft, pale yellow, acidic volcanic soil. It holds water and air well and is the traditional soil for satsuki azaleas and other acid-loving plants. It’s usually described as darkening when wet, which helps you see when it needs watering.
    • Kiryu is a harder, iron-rich granular soil. It drains freely and keeps its structure longer than akadama, which makes it popular for pines, junipers and other conifers.
    • Hyuga pumice is a light Japanese pumice. It adds aeration and drainage while holding some water.
    • Fuji rock (black lava) is a durable volcanic rock. It adds structure, drainage and aeration, and doesn’t break down.

    2. Your species

    This decides almost everything.

    • Satsuki and other azaleas: kanuma, often on its own or as most of the mix.
    • Pines and junipers: kiryu, pumice and lava, usually mixed with akadama.
    • Deciduous trees: akadama-based mixes, sometimes with pumice and lava.
    • Many other species: the common “equal thirds” mix of akadama, pumice and lava.

    3. Grain size, dust and durability

    Grain size should match the pot. Smaller particles (around 2–4 mm) suit shohin and small pots. Medium grains (about 3–6 mm) suit most bonsai. Larger grains suit big trees and the bottom drainage layer.

    Dust matters too. Fine particles clog the gaps between grains and slow drainage. Sifting before use makes a real difference. Our bonsai soil sieve guide covers the tools.

    And durability varies. Kanuma and akadama are softer and break down over time. Kiryu, pumice and lava last much longer.

    A few soil habits that matter more than the brand

    None of these cost anything.

    • Sift everything. Remove dust before you repot.
    • Match soil to species. Don’t put a pine in pure kanuma, or an azalea in pure lava.
    • Use a coarser bottom layer. Many growers put larger particles at the bottom of the pot for drainage.
    • Watch how fast the pot dries. Adjust the mix if it stays wet too long or dries out too quickly.
    • Think about your climate. In wet, cold areas, a mix with more pumice and lava drains better. In hot, dry areas, more akadama or kanuma holds water longer.
    • Store soil dry. Wet, frozen soil can break down in the bag.

    Kanuma bonsai soil and other Japanese soils: comparison table

    SoilTypeBest forBag sizeSellerApprox. price
    Japanese KanumaAcidic volcanic soilSatsuki, azaleas16 LBonsai Learning Center (US)~$45–69
    Kanuma (UK / Canada)Acidic volcanic soilSatsuki, azaleas~14–17 LHerons, Canada Bonsai~£25 / CAD $42
    KiryuIron-rich volcanic gritPines, junipers2 LBonsai Direct (UK)~£12
    Hyuga PumiceJapanese pumiceAeration in any mix18 LBonsai Learning Center (US)~$45–69
    Fuji Rock (Black Lava)Volcanic rockStructure, drainage18 LBonsai Learning Center (US)~$45–69
    Premium Japanese MixAkadama + Fuji rock + HyugaReady-to-use mix~24–25 lbBonsai Learning Center (US)~$70–94

    Prices are approximate, often include shipping in a price range, and vary by country and seller. Always check the current price before buying.


    The 6 best Japanese bonsai soils beyond akadama, reviewed

    1. Japanese Kanuma (Bonsai Learning Center) – the classic azalea soil in the US

    If you grow satsuki azaleas in the US, this is the soil you’re looking for. Bonsai Learning Center sells Japanese kanuma in 16-liter bags, with shipped and local pickup options, priced at about $45–69 depending on the option.

    The seller describes it as an excellent drainage component for bonsai soil, recommended for azaleas and other acid-loving plants. Kanuma’s natural acidity and its soft, water-holding structure are exactly why satsuki growers in Japan have used it for generations.

    It was listed as out of stock when we checked, which is common for imported soils. Check back, or look at other US bonsai nurseries.

    Pros

    • Traditional Japanese soil for azaleas
    • Acidic, which suits acid-loving plants
    • Holds water and air well
    • Shipping option available

    Cons

    • Stock is inconsistent
    • Grain size not listed
    • Softer than other soils, so breaks down over time

    Best for: US satsuki and azalea growers.

    Check Japanese Kanuma at Bonsai Learning Center


    2. Kanuma from Herons and Canada Bonsai – best options outside the US

    If you’re in the UK or Canada, kanuma is easier to find than you might think.

    Herons Bonsai in the UK sells kanuma for around £25, in two grades: standard (3–6 mm) and large (6–11 mm). The listing describes the bag as approximately 14 liters, though the title says 17 liters, so confirm the size if it matters. Herons describes kanuma as great for acid-loving plants like azaleas and camellias, and useful as an additive in other mixes.

    In Canada, Canada Bonsai sells 17-liter bags of 3–5 mm kanuma, describing it as the substrate to use for satsuki azaleas and for producing satsuki cuttings. It was listed at around CAD $42.

    Neither listing states the country of origin, though kanuma is traditionally a Japanese soil.

    Pros

    • Easy to buy in the UK and Canada
    • Two grain sizes at Herons
    • Good for cuttings and azaleas

    Cons

    • Origin not stated
    • Bag size wording inconsistent at Herons

    Best for: UK and Canadian growers of azaleas and camellias.

    Check Kanuma at Herons · Check Kanuma at Canada Bonsai


    3. Kiryu (Bonsai Direct) – best for pines and junipers

    Kiryu is the soil many conifer growers reach for. Bonsai Direct describes it as a natural granular material mined in Japan, formed from weathered volcanic deposits and rich in iron minerals.

    It’s harder than akadama and keeps its structure longer. That’s why it’s popular for pines, junipers and other conifers that dislike soggy roots, and for older trees that are repotted less often. Bonsai Direct notes that it’s often mixed roughly 50/50 with akadama.

    The 2-liter bag (around £12) is small, which makes it a good way to try kiryu before buying larger quantities.

    Pros

    • Mined in Japan
    • Free-draining and long-lasting
    • Ideal for conifers
    • Small bag for trying it out

    Cons

    • 2-liter bag doesn’t go far
    • Mainly available in the UK and Europe

    Best for: pine and juniper growers.

    Check Kiryu at Bonsai Direct


    4. Hyuga Pumice (Bonsai Learning Center) – best for lighter, airier mixes

    Pumice is one of the most useful bonsai soil components, and Japanese hyuga pumice is a premium version. Bonsai Learning Center sells it in 18-liter bags for about $45–69.

    The seller describes it as a drainage component that also retains water and provides good aeration. It’s usually mixed with akadama and lava to make a complete bonsai soil. Because it doesn’t break down like akadama or kanuma, it helps a mix keep its structure between repottings.

    Pros

    • Japanese pumice
    • Adds aeration and drainage while holding some water
    • Long-lasting
    • Works with almost any species

    Cons

    • Not a complete soil on its own
    • Grain size not listed

    Best for: anyone building their own mix.

    Check Hyuga Pumice at Bonsai Learning Center


    5. Fuji Rock Black Lava (Bonsai Learning Center) – best for structure

    Black lava rock gives a soil mix its backbone. Bonsai Learning Center sells Japanese Fuji Rock in 18-liter bags for about $45–69.

    It’s described as a durable volcanic rock that adds aeration and drainage while holding some moisture, and that releases trace minerals and supports microbial life. Like pumice, it doesn’t break down, so it helps keep the mix open as akadama gradually softens. The seller says it’s typically mixed with akadama and pumice in equal thirds.

    Pros

    • Japanese volcanic rock
    • Very durable
    • Adds drainage and aeration
    • Supports a long-lasting mix

    Cons

    • Heavier than pumice
    • Grain size not listed

    Best for: conifers and any mix that needs to stay open for years.

    Check Fuji Rock at Bonsai Learning Center


    6. Premium Japanese Mix (Bonsai Learning Center) – best ready-to-use option

    Don’t want to buy three bags and mix them yourself? This is the shortcut.

    Bonsai Learning Center’s Premium Japanese Mix is made from equal thirds of Double Line akadama, black Fuji rock and hyuga pumice. It’s hand-sifted through window screen to remove most of the dust, and the seller says it’s the same mix it uses on its own trees. A bag of around 24–25 pounds costs about $70–94.

    The equal-thirds mix is a widely used all-purpose bonsai soil. It drains well, holds water and nutrients, and keeps its structure for a good while. It isn’t ideal for satsuki azaleas, which prefer kanuma, but it suits a wide range of other species.

    Pros

    • Ready to use, no mixing
    • All Japanese components
    • Pre-sifted
    • Suits many species

    Cons

    • More expensive than mixing your own
    • Not ideal for azaleas

    Best for: growers who want a high-quality Japanese mix without the work.

    Check the Premium Japanese Mix at Bonsai Learning Center


    Which kanuma bonsai soil or mix should you buy? (By species)

    Satsuki and other azaleas: kanuma. Many growers use it alone or as most of the mix. Many satsuki growers also top it with Japanese mountain moss to hold moisture at the surface.

    Pines and junipers: kiryu mixed with akadama, or an akadama, pumice and lava mix.

    Deciduous trees: an akadama-based mix, with some pumice and lava.

    Most other species: the Premium Japanese Mix, or your own equal thirds of akadama, pumice and lava.

    Cuttings of azaleas: small-grain kanuma.

    Cold, wet climates: more pumice and lava, less akadama or kanuma.

    Hot, dry climates: a little more akadama or kanuma to hold water.

    Simple starting mixes

    These are starting points, not rules. Adjust them to your trees and climate.

    • Azalea mix: mostly kanuma, with a little pumice if you want faster drainage.
    • Conifer mix: akadama and kiryu, roughly half and half.
    • All-purpose mix: equal thirds akadama, pumice and lava.

    Kanuma vs akadama: what’s the difference?

    This is one of the most common questions, because the two look a little alike in the bag. Both are soft Japanese volcanic soils that hold water and air, and both gradually break down over time.

    The main differences are color, acidity and use. Kanuma bonsai soil is pale yellow and noticeably acidic, which is why it’s the go-to soil for satsuki azaleas and other acid-loving plants. Akadama is reddish-brown, closer to neutral, and used across a much wider range of species.

    In practice, that means kanuma is usually a specialist soil and akadama is a general one. If you grow mostly pines, maples and junipers, you may never need kanuma at all. If you grow satsuki, it’s likely to become the main soil on your bench.

    A useful side benefit, often mentioned by azalea growers, is that kanuma visibly darkens when wet and lightens as it dries. That makes it easy to see at a glance which pots need water, which is helpful for azaleas that dislike drying out.


    How to use kanuma and other Japanese soils when repotting

    1. Sift each soil. Remove dust and separate grain sizes.
    2. Mix in a tray. Combine components evenly before you start.
    3. Prepare the pot. Mesh over drainage holes and tie-down wire in place. Our bonsai repotting supplies guide lists everything.
    4. Add a coarse base layer.
    5. Position and tie in the tree.
    6. Fill and work in the soil with a chopstick.
    7. Water until it runs clear.

    Common Japanese bonsai soil mistakes

    Using kanuma for everything. It’s excellent for azaleas, but its acidity and softness don’t suit every tree.

    Skipping sifting. Dust clogs the pot and slows drainage.

    Ignoring climate. A mix that works in Japan may stay too wet in a cooler, rainier place.

    Mixing grain sizes randomly. Similar-sized particles drain more evenly.

    Leaving soil bags out in the rain and frost. Soft soils like kanuma and akadama can break down in the bag.


    Conclusion: choose soil by species, then by climate

    Akadama gets most of the attention, but Japanese bonsai soil is a whole family. Kanuma bonsai soil is the classic choice for satsuki azaleas. Kiryu suits pines and junipers. Hyuga pumice and Fuji lava rock keep any mix airy and durable.

    For most growers, the simplest approach is this: kanuma for azaleas, kiryu or an akadama-pumice-lava mix for conifers, and the equal-thirds mix for almost everything else. If you’d rather not mix at all, a ready-made Japanese mix saves time.

    Sift your soil, match it to your trees, and adjust for your climate.

    Ready to repot? Check Japanese Kanuma at Bonsai Learning Center, or try the Premium Japanese Mix for an all-purpose option.

  • Best Bonsai Branch Bender in 2026: 6 Japanese Jacks, Splitters and Kits for Heavy Bends

    Best Bonsai Branch Bender in 2026: 6 Japanese Jacks, Splitters and Kits for Heavy Bends

    Affiliate disclosure: Some links on this page are affiliate links. If you buy through them, Aribonsai may earn a small commission at no extra cost to you. It doesn’t change what we recommend or how we rank anything.


    When wire just isn’t strong enough

    Every bonsai grower eventually meets a branch that wire can’t move.

    It might be a thick pine branch that needs to come down 30 degrees. A collected juniper trunk that’s ramrod straight. A first branch that’s been growing upward for ten years. You wrap it with the thickest wire you own, pull, and nothing happens, except maybe a worrying creak.

    That’s the job of a bonsai branch bender. Jacks, benders and splitters let you apply slow, controlled force to wood that’s far too thick for wire alone. Used carefully, they can make the kind of dramatic movement that turns raw material into a real bonsai.

    They’re also some of the riskiest tools in bonsai. Too much force, too fast, and branches crack or snap. Hooks can dig into bark and leave scars that take years to heal. And some species simply don’t tolerate heavy bending.

    In my experience, the people who succeed with heavy bends aren’t the ones with the strongest tools. They’re the ones who prepare the branch well, bend slowly, and stop when the wood tells them to. This guide explains what matters, then compares six options, from Japanese Kikuwa jacks and a Kaneshin trunk splitter to a full bending kit and a low-cost DIY approach.


    Who this bonsai branch bender guide is NOT for

    It’s not for beginners on their first tree. Heavy bending is an advanced technique. If you’re still learning wiring, start with our bonsai wire guide.

    It’s not for most deciduous trees. On bonsai forums, experienced growers point out that dramatic bending is mainly done on conifers, whose wood is more pliable. Older deciduous wood tends to be brittle, and big changes are often made by cutting back and growing new branches instead.

    It’s not for small branches. If wire can move it, use wire. Benders are for when it can’t.

    Still with us? Let’s go.


    How we picked these (3 things that actually matter)

    1. Type of tool

    There are three main kinds of heavy-bending tools.

    • Jacks use a threaded rod to push or pull gradually. They’re the most controllable option and are used on thick trunks and branches. They’re also the most expensive.
    • Branch benders and clamps usually have hooks at each end and a screw in the middle that presses the branch down. They’re simpler, but the hooks can damage bark if not padded.
    • Trunk splitters don’t bend anything themselves. They make controlled splits in thick wood so it becomes flexible enough to bend with wire or a jack.

    2. Capacity and size

    A tool that’s too small won’t move the branch. One that’s too big is clumsy on a smaller tree and harder to position without hitting other branches.

    Jacks are sold in sizes, usually described by their length range and how far they extend. Match the tool to the thickness and length of the branch, and think about where you can anchor it.

    3. Protection and control

    The best bonsai branch bender is useless if it scars the tree. Look at how the tool contacts the bark, and plan to pad every contact point.

    Bonsai Tonight’s jack tutorial, for example, covers sharp contact edges with rubber hose secured by small copper wires, and protects guy wires with tubing so they don’t cut into the trunk. Many growers also wrap the branch in raffia and wire before bending, to support it and reduce the risk of cracking.

    A few heavy-bending habits that matter more than the tool

    None of these cost anything.

    • Bend slowly. Turn the jack a little, then pause. Fast bends crack wood.
    • Listen. Small cracking sounds mean stop, check, and maybe come back another day.
    • Pad every contact point. Rubber hose, raffia or several layers of tape.
    • Support the branch first. Wrapping with raffia and wiring the branch helps hold it together under stress.
    • Bend at the right time. Many growers prefer late winter to early spring for heavy bends, when the tree is about to grow and heal. Check the right timing for your species.
    • Take up slack as you go. Tightening guy wires during the bend helps the branch hold its new position.
    • Be patient. A heavy bend can take a growing season or more to set.

    Bonsai branch bender comparison table

    ToolTypeBest forOriginApprox. price
    Kikuwa Bonsai Jack, Small (2472)Threaded jackMost heavy bendsJapan~$125
    Kikuwa Bonsai Jack, Medium (2476)Threaded jackLarger trunks and branchesJapan~$145
    Kaneshin Trunk Branch SplitterSplitterMaking thick wood bendableJapan~$140
    Herons Large Branch Bending KitKit (bender, clamp, splitter, raffia, wire)Getting everything at once (UK)Not stated~£95 (UK)
    XL Branch Bender (Love My Bonsai)Screw benderBudget heavy bendingNot stated~$90
    Guy wires, rebar and clampsDIYLow cost, flexible setupsVariesLow

    Prices are approximate and vary by country and seller. Always check the current price before buying.


    The 6 best bonsai branch benders, reviewed

    1. Kikuwa Bonsai Jack, Small (2472) – the best all-round jack

    If you’re going to buy one serious bending tool, this is it. Bonsai Tonight, which sells it in the US, calls it “the original bonsai jack for heavy bending.”

    It’s made in Japan by Kikuwa. The small jack runs from 14.75 inches to 21.5 inches, extending by 7 inches. You bend by turning a threaded rod, which moves the arms gradually and gives you fine control. The tip rotates 360 degrees, so you can set anchor points in many different positions, and an Allen wrench is included.

    At around $125, it’s a real investment. But a jack gives you something no other tool does: the ability to bend a little today, stop, and continue next week, all with precise, gradual pressure.

    Pros

    • Made in Japan by Kikuwa
    • Very controllable threaded action
    • 360-degree rotating tip for flexible anchoring
    • Suits most heavy bends on bonsai

    Cons

    • Expensive
    • Takes practice to rig safely

    Best for: serious growers working on conifers and thick branches.

    Check the Kikuwa Small Jack at Bonsai Tonight


    2. Kikuwa Bonsai Jack, Medium (2476) – for bigger trunks

    The medium version of the same tool is for larger material. It runs from 15 inches to 23.5 inches, extending by 8.25 inches. Like the small jack, it’s made in Japan and bends by turning a threaded rod.

    The extra reach and extension help on larger collected trees and thick trunks, where you need more distance between anchor points or more travel to make the bend. At around $145, it’s slightly more expensive than the small jack.

    Bonsai Tonight’s tutorial on using a jack is well worth reading before your first bend. It covers anchoring to a root with wire, padding the jack’s contact points with rubber hose, protecting guy wires with tubing, and taking up slack as you go. In its example, the bend took about one to two hours, with frequent pauses to inspect.

    Pros

    • More reach and extension for big material
    • Same Japanese build quality
    • Precise, gradual control

    Cons

    • Overkill for medium-sized trees
    • Highest price among the jacks

    Best for: advanced growers working with large collected trees and thick trunks.

    Check the Kikuwa Medium Jack at Bonsai Tonight · Read Bonsai Tonight’s jack tutorial


    3. Kaneshin Trunk Branch Splitter – best for making thick wood bendable

    Sometimes a branch is simply too stiff to bend, even with a jack. A trunk splitter solves that.

    Kaneshin’s splitter makes controlled splits in the branches and trunks of small to medium trees. The splits soften the wood so it can be bent into shape, usually with heavy wire or a jack. Niwaki describes it as 8.3 inches long, carbon steel, handmade in Japan, and weighing 5.2 oz.

    It’s important to understand what it isn’t. Niwaki is clear that it’s not a cutting tool and should never be used to sever a branch or trunk. It’s a precision tool for a specific job.

    Splitting is an advanced technique. After splitting, growers typically wrap the area with raffia and wire to hold it together while it bends and heals. Any exposed wounds benefit from sealing; our bonsai cut paste guide covers the options.

    Pros

    • Handmade in Japan by Kaneshin
    • Makes very stiff wood bendable
    • Precise, controlled splits

    Cons

    • Advanced technique with real risk
    • Expensive for a specialized tool
    • Carbon steel needs care to avoid rust

    Best for: experienced growers making dramatic trunk and branch changes.

    Check the Kaneshin Trunk Branch Splitter at Niwaki


    4. Herons Large Branch Bending Kit – best all-in-one kit for UK growers

    If you’re in the UK and want everything for heavy bending in one box, Herons Bonsai sells a large branch bending kit for around £95.

    It includes a 430 mm heavy-duty branch bender, a 195 mm branch and trunk bending clamp, a 270 mm trunk splitter, 50 g of raffia and 500 g of 5 mm wire. That covers the main pieces of a heavy-bending setup: tools to apply force, a splitter for stiff wood, and raffia and wire to protect and support the branch.

    The listing doesn’t state where the tools are made, and it was marked as limited stock when we checked.

    Pros

    • Everything you need in one kit
    • Includes raffia and heavy wire
    • Good value compared with buying separately

    Cons

    • Origin not stated
    • Mainly available in the UK
    • Limited stock

    Best for: UK growers getting into heavy bending for the first time.

    Check the Large Branch Bending Kit at Herons


    5. XL Branch Bender – the budget screw-type option

    If a Japanese jack is out of budget, a simpler screw-type branch bender is the next step down.

    Monster Gardens sells an XL branch bender from Love My Bonsai, sized at 7 by 7 inches, for about $90. Tools like this typically have hooks at each end and a central screw that presses the branch into a curve.

    The listing doesn’t state the material or country of origin, and it was backordered when we checked. Be aware of how these tools work, too. On bonsai forums, experienced growers note that the outer hooks can damage bark as the middle is cranked down, and one reported serious scarring on a maple. Pad the hooks heavily, and use them mainly on conifers.

    Pros

    • Cheaper than a Japanese jack
    • Simple to use
    • Large size for thick branches

    Cons

    • Hooks can scar bark without heavy padding
    • Origin and material not stated
    • Less precise than a threaded jack

    Best for: budget-conscious growers bending conifer branches, with good padding.

    Check the XL Branch Bender at Monster Gardens


    6. Guy wires, rebar and clamps – the low-cost DIY approach

    You don’t always need a dedicated tool. Many experienced growers make heavy bends with simple materials.

    On bonsai forums, a common recommendation is a rebar lever: a piece of steel rod tied along the branch and extending past it, then pulled down by a well-placed guy wire. One experienced grower describes this as far more effective and far less intrusive than a branch bender for moving large branches. Others use ordinary trigger clamps from a hardware store as a cheap alternative to a bonsai bender.

    Guy wires on their own also work well for lowering branches gradually. Anchor them to the pot or a root, protect the bark where the wire touches, and tighten them a little at a time. A good pair of bonsai jin pliers makes tightening much easier.

    Pros

    • Very low cost
    • Flexible, adaptable setups
    • Often gentler on bark than hooked benders

    Cons

    • Takes more planning and practice
    • Less precise than a jack
    • Rigging can look messy during training

    Best for: growers on a budget, and anyone who wants a gentler approach.

    Search trigger clamps on Amazon · Search bonsai raffia on Amazon


    Which bonsai branch bender should you buy? (By situation)

    You want one serious bending tool: Kikuwa Bonsai Jack, Small.

    You work with large collected trees: Kikuwa Bonsai Jack, Medium.

    Your branch or trunk is too stiff to bend at all: Kaneshin Trunk Branch Splitter, followed by raffia, wire and a jack.

    You’re in the UK and want everything at once: Herons Large Branch Bending Kit.

    You’re on a budget: XL Branch Bender with heavy padding, or the DIY guy wire and rebar approach.

    You want the gentlest method: guy wires and a rebar lever, tightened gradually over time.

    You grow deciduous trees: consider cutting back and growing new branches instead of heavy bending.

    A typical heavy-bending setup

    For a big conifer bend, many growers use a combination: raffia wrapped around the branch, heavy wire over the raffia, a jack or bender to apply force slowly, and guy wires to hold the new position once the bend is made.


    How to prepare a branch for a heavy bend

    1. Choose the right time. Many growers bend heavily in late winter or early spring. Check what suits your species.
    2. Make sure the tree is healthy. Only bend vigorous trees. A weak tree may not recover from heavy work.
    3. Wrap with raffia. Soak the raffia, then wrap it tightly around the branch. It supports the outer layers of wood and bark.
    4. Wire over the raffia. Heavy wire adds support and helps hold the bend.
    5. Pad contact points. Rubber hose or extra raffia wherever a tool or guy wire touches.
    6. Bend slowly. Small turns, frequent pauses, listen for cracks.
    7. Secure the position. Use guy wires to hold the bend, then remove the jack or bender.
    8. Protect and wait. Keep the tree out of strong wind and harsh sun while it recovers.

    Common bonsai branch bender mistakes

    Bending too fast. The single biggest cause of snapped branches.

    Skipping padding. Bare hooks and wires can scar bark badly.

    Bending brittle wood. Old deciduous wood and dead branches often snap.

    Removing support too early. A heavy bend can take a growing season or more to set.

    Forgetting about the pot. Heavy bends put force on the root ball and pot. Anchor carefully and protect the pot rim.


    Conclusion: slow force, good preparation

    A bonsai branch bender lets you make movements that wire alone can’t. But it’s not about strength. It’s about control, preparation and patience.

    For most serious growers, the Kikuwa Small Jack is the best single tool: Japanese-made, precise and versatile. If wood is too stiff, Kaneshin’s Trunk Branch Splitter makes it workable. And if you’re on a budget, guy wires and a rebar lever can achieve surprisingly big changes with very little money.

    Whichever you choose, wrap the branch, pad every contact point, bend a little at a time, and stop when the wood tells you to.

    Ready to move that branch? Check the Kikuwa Bonsai Jack at Bonsai Tonight, or check the Kaneshin Trunk Branch Splitter at Niwaki.

  • Best Bonsai Moss in 2026: 6 Picks, From Japanese Mountain Moss to Sun-Tolerant Live Moss

    Best Bonsai Moss in 2026: 6 Picks, From Japanese Mountain Moss to Sun-Tolerant Live Moss

    Affiliate disclosure: Some links on this page are affiliate links. If you buy through them, Aribonsai may earn a small commission at no extra cost to you. It doesn’t change what we recommend or how we rank anything.


    Why does every show tree have that green carpet?

    Look at photos from any major bonsai exhibition and you’ll notice the same thing. The soil is almost never visible. Instead, there’s a low, even carpet of moss that makes the tree look like it’s growing on an old hillside rather than in a pot.

    Bonsai moss isn’t just decoration, though. A good moss layer helps keep the soil surface from drying out too fast, stops heavy watering from washing soil away, and keeps birds from digging through the pot. And on a newly repotted tree, it can help hold the surface together while the roots settle.

    The trouble is that moss is surprisingly hard to get right. You lay down a nice sheet, and two weeks later it’s brown. Or it grows so well that it creeps up the trunk and holds water against the bark. Or it simply looks wrong, like a piece of carpet dropped on top of the soil.

    In my experience, most moss problems come down to choosing the wrong type for the conditions. Shade moss in full sun burns. Thick sheet moss on a fast-draining pot dries out. This guide explains what matters, then compares six bonsai moss options, from Japanese mountain moss to live moss you can grow in sun.


    Who this bonsai moss guide is NOT for

    It’s not about air layering. Long-fibered sphagnum is also used to wrap air layers. That’s a different job. Here, we’re talking about moss for the soil surface.

    It’s not about terrariums. Indoor terrarium moss lives in high humidity. Most bonsai live outdoors, in wind and sun, which is a very different environment.

    It’s not for people who want zero maintenance. Moss needs moisture and the right light. If your trees are in a hot, dry spot and you can’t water often, a bare soil surface or a thin sphagnum layer may suit you better.

    Still with us? Let’s go.


    How we picked these (3 things that actually matter)

    1. Sun or shade

    This is the most important question.

    Many mosses naturally grow in shade, on forest floors or the north side of rocks. Put them on a bonsai bench in full sun and they quickly dry out and brown. Others, often collected from sidewalks, rooftops and rock surfaces, handle sun and drying much better.

    Bonsai growers have long noticed this. Many recommend collecting moss from sunny, hard surfaces like concrete, brick or stone, because those conditions are closer to a bonsai pot than a shady forest floor.

    2. Sheets, fragments or a top dressing

    Moss comes in different forms, and each suits a different use.

    • Live sheets or squares give instant coverage. They’re great before a show. But laying large plates of moss on the surface often looks unnatural, and some growers find that placed moss doesn’t last as well as moss grown in place.
    • Fragments, crumbled or sieved moss are sprinkled on the soil and grow into a carpet over a few weeks. It’s slower, but the result often looks and lasts better.
    • Top dressings like Japanese mountain moss or sieved sphagnum aren’t always about a green carpet. They mainly hold moisture at the surface.

    3. Your species and your soil

    Moss affects the root zone. A thick, wet moss layer keeps the surface damp for longer, which some trees love and others don’t. Bonsai Tonight notes, for example, that Japanese mountain moss may acidify the root environment slightly more than white sphagnum, which suits acid-loving satsuki azaleas.

    Think about your soil too. If you use fast-draining akadama mixes, a thin moss or sphagnum layer helps the surface stay moist between waterings. Our akadama and Japanese bonsai soil guide explains how these soils behave.

    A few moss habits that matter more than the product

    None of these cost anything.

    • Keep moss off the trunk base. Moss growing up the trunk keeps bark wet. Leave a small gap around the base.
    • Use tweezers to place it. Pressing small pieces of moss into the soil surface with bonsai tweezers gives a much more natural result than laying big sheets.
    • Water it in. After applying moss, water gently so it settles, then water the tree as usual.
    • Mist new moss daily. Fresh moss needs moisture to establish.
    • Thin it if it gets too thick. A dense moss mat can block water from reaching the roots.
    • Remove it when repotting. Old moss can be reused, or crumbled and grown again.
    • Watch out for weeds. Collected moss can carry weed seeds. Pull them early.

    Bonsai moss comparison table

    MossTypeLightBest forOriginApprox. price
    Mountain Moss (Yamagoke)Top dressingVariesSatsuki azaleas, moistureImported from Japan~$8 (2 L)
    Besgrow NZ SphagnumSieved sphagnumAnyMoisture layer, moss baseNew ZealandVaries
    Sun Tolerant Moss ClumpsLive mossSunOutdoor bonsai in sunUS sellerFrom ~$35
    Racomitrium Sun MossLive mossSunJapanese-style carpetUS sellerCheck price
    Sheet Moss (Hypnum)Live sheetsShadeQuick display coverageUS sellerFrom ~$14
    Kyoto Moss SporesSporesPartial shadeExperimentingNot statedVaries

    Prices are approximate and vary by seller and season. Always check the current price before you buy.


    The 6 best bonsai moss options, reviewed

    1. Mountain Moss (Yamagoke) – the classic Japanese top dressing

    If you grow satsuki azaleas, this is the one you’ll hear about most. Bonsai Tonight calls Japanese mountain moss, or yamagoke, the go-to top dressing for satsuki bonsai.

    It’s imported from Japan and sold in 2-liter and 8-liter bags, from about $8. You spread it over the soil surface, where it helps keep moisture near the top so trees don’t dry out. Azalea growers like that it knits together into a protective layer on the surface.

    Bonsai Tonight also notes that mountain moss may acidify the root environment slightly more than white sphagnum. That’s a good thing for satsuki and other acid-loving plants. For other species, many growers prefer sphagnum.

    Bonsai Tonight only ships within the US, so growers elsewhere will need to look for Japanese mountain moss from a local bonsai shop.

    Pros

    • Imported from Japan
    • Traditional choice for satsuki azaleas
    • Knits into a protective surface layer
    • Inexpensive

    Cons

    • Slightly acidifying, which won’t suit every species
    • US shipping only from this seller

    Best for: satsuki and azalea growers, and anyone who wants a traditional Japanese top dressing.

    Check Mountain Moss at Bonsai Tonight


    2. Besgrow New Zealand Sphagnum – the best base for any moss layer

    Sphagnum isn’t the green carpet you see at shows, but it’s the quiet workhorse underneath many of them.

    New Zealand sphagnum, often sold under the Besgrow Spagmoss name, is harvested from New Zealand’s West Coast and sold dry in compressed blocks. Bonsai growers use it in a few ways. Sieved finely, it makes a thin layer that holds moisture at the surface. Long-fibered sphagnum can hold soil in place on uneven surfaces. And many growers mix shredded sphagnum with crumbled live moss and sprinkle it on, so the moss has something moist to grow into.

    On bonsai forums, some growers describe sphagnum as the most important part of the mix for function, with live moss added for looks.

    Availability varies. One US retailer we checked had paused dry-goods shipments to the US, so check a few sellers.

    Pros

    • Holds moisture at the soil surface
    • Helps live moss establish
    • Works on almost any species
    • Sold dry, so it stores well

    Cons

    • Not a green carpet on its own
    • Availability varies by country and seller
    • Needs sieving or shredding for top dressing

    Best for: every grower, as a moisture layer or a base for growing moss.

    Search Besgrow sphagnum moss on Amazon


    3. Sun Tolerant Moss Clumps – best live moss for sunny benches

    Most bonsai live in sun for much of the day, which is exactly where many mosses fail. Moss Acres, a US live moss grower, sells a moss specifically for those conditions: Sun Tolerant Moss Clumps (Bryum caespiticium), from around $35.

    Bryum is the kind of moss you often see growing in sidewalk cracks and on sunny walls, which is why it suits a bonsai pot. Clumps can be broken into small pieces and pressed into the soil surface, where they spread into a low, natural-looking cover.

    Moss Acres also lists a “Moss for Bonsai” bundle and other sun-tolerant options, so it’s worth browsing its bonsai section.

    Pros

    • Chosen for sun tolerance
    • Low, fine texture suits bonsai
    • Clumps break up easily for natural placement
    • From a specialist moss grower

    Cons

    • More expensive than collecting your own
    • Still needs regular moisture to establish

    Best for: outdoor bonsai in sunny spots.

    Check moss for bonsai at Moss Acres


    4. Racomitrium Sun Moss – the Japanese-style carpet

    Racomitrium is the moss genus behind many of the soft, gray-green carpets associated with Japanese moss gardens, where it’s often called sunagoke. It’s popular in Japan because it handles sun and drying better than many mosses, then greens up quickly when it gets wet.

    Moss Acres sells a Racomitrium Sun Moss square, about 13 by 13 inches, alongside its other live mosses. A square gives you enough to break into pieces for several trees.

    Because it changes color with moisture, it can look silvery when dry and bright green after watering. Some growers love that changing look; others prefer a moss that stays green.

    Pros

    • Classic Japanese moss garden look
    • Good tolerance of sun and drying
    • Greens up quickly after watering

    Cons

    • Looks gray-green when dry
    • Price and stock vary

    Best for: growers who want a Japanese-style moss carpet on sunny trees.

    Check Racomitrium moss at Moss Acres


    5. Sheet Moss (Hypnum) – best for quick display coverage

    Sometimes you just need the soil covered by Saturday. That’s what sheet moss is for.

    Moss Acres sells live Sheet Moss (Hypnum imponens) from around $14. It comes in flat mats you can cut and lay on the soil for instant green coverage, which makes it popular for displays and tray landscapes.

    The catch is light. Sheet moss generally prefers shade and steady moisture, so on a sunny bench it may brown quickly. It also tends to look like a “plate” laid on top unless you tear it into irregular pieces and press them in. Many growers use it for shows and photos, then remove or replace it afterward.

    If you’re preparing for a show, combine it with a well-chosen bonsai display stand for a finished look.

    Pros

    • Instant coverage
    • Easy to cut and shape
    • Affordable

    Cons

    • Prefers shade
    • Can look unnatural if laid in large sheets
    • May not last long in sun

    Best for: shows, photos, and trees kept in shade.

    Check Sheet Moss at Moss Acres


    6. Kyoto Moss Spores – for patient experimenters only

    The idea is appealing: sprinkle spores, and a velvety Kyoto garden moss appears. Joshua Roth sells Kyoto Moss Spores for bonsai, saikei and tray landscapes, with each pack covering up to about 3 square feet.

    The reality is less certain. Customer feedback describes it as fairly temperamental, and at least one grower reported it didn’t grow in their climate. On the Bonsai Mirai forum, one experienced member’s advice was blunt: don’t bother with Kyoto moss, and use local species instead.

    We’ve included it because people often ask about it. It can work, but it’s slow and unpredictable compared with the other options here.

    Pros

    • Designed for bonsai and tray landscapes
    • Covers a fair area
    • Fun if you enjoy experimenting

    Cons

    • Slow and unpredictable
    • Mixed feedback from growers
    • Origin of the spores not stated

    Best for: patient growers who enjoy experimenting.

    Search Kyoto Moss Spores on Amazon


    The free option: grow your own bonsai moss

    Before you buy anything, it’s worth knowing that many experienced growers never buy moss at all.

    A common method shared on bonsai forums goes like this:

    1. Collect moss from sunny, hard surfaces. Sidewalks, brick paths, walls and rocks are good sources. Only collect where you have permission.
    2. Dry and crumble it. Let it dry, then crumble or rub it through a screen. Some growers blend it.
    3. Mix with sieved sphagnum. Many use a mix of moss and shredded sphagnum, roughly half and half or a little more moss.
    4. Sprinkle on the soil. Apply a thin, even layer.
    5. Mist regularly. With daily moisture, growers report new growth within a few weeks.

    One forum member even added a little sumi ink to the sphagnum, and reported lush growth afterward. It’s an experiment, not a proven method, but an interesting one. A soil sieve works well for preparing both the moss and the sphagnum.


    Which bonsai moss should you buy? (By situation)

    You grow satsuki azaleas: Mountain Moss (Yamagoke).

    You want a moisture layer for any tree: sieved New Zealand sphagnum.

    Your trees sit in full sun: Sun Tolerant Moss Clumps or Racomitrium.

    You want a Japanese moss garden look: Racomitrium Sun Moss.

    You need coverage fast for a show: Sheet Moss, torn into irregular pieces.

    You enjoy experiments: Kyoto Moss Spores.

    You want the most natural result for free: collect local moss and mix it with sphagnum.

    You’ve just repotted: a thin layer of sieved sphagnum helps keep the surface moist and hold fresh soil in place. Our bonsai repotting supplies guide covers the rest of what you’ll need.


    How to keep bonsai moss healthy

    • Water regularly. Moss dries out faster than the soil beneath it.
    • Match moss to light. If moss keeps browning, it’s probably getting more sun than it likes.
    • Expect summer dieback. Many growers report moss browning in hot summers, then recovering when cooler, wetter weather returns.
    • Don’t let it get too thick. Thin it out if it forms a dense mat that blocks water.
    • Keep it away from the trunk. Bark that stays wet can suffer.
    • Remove weeds early. They’re much easier to pull when small.

    Common bonsai moss mistakes

    Laying big sheets on top. It looks unnatural and often doesn’t last. Small, irregular pieces work better.

    Using shade moss in full sun. It browns quickly. Choose sun-tolerant moss for sunny benches.

    Covering the trunk base. Leave a gap so the bark can dry.

    Letting moss block watering. A thick mat can shed water. Check that water reaches the soil.

    Expecting instant results from spores or crumbled moss. Growing moss takes weeks, sometimes longer.


    Conclusion: choose moss for your conditions, not the photo

    Bonsai moss is one of the easiest ways to make a tree look finished, and it genuinely helps the soil surface stay moist. But the right moss depends on your light, your species and how much time you have.

    For satsuki growers, Japanese mountain moss is the traditional choice. For almost everyone else, a thin layer of sieved sphagnum mixed with sun-tolerant live moss gives the most natural, long-lasting result. And if you only need coverage for a show, sheet moss will do the job quickly.

    Start small, place it with tweezers, keep it moist, and let it grow into the pot rather than sitting on top.

    Ready to finish your trees? Check Mountain Moss at Bonsai Tonight, or browse live moss for bonsai at Moss Acres.

  • Best Lime Sulfur for Bonsai in 2026: 6 Options for Jin and Shari, From Jin Seal to Sumi Ink

    Best Lime Sulfur for Bonsai in 2026: 6 Options for Jin and Shari, From Jin Seal to Sumi Ink

    Affiliate disclosure: Some links on this page are affiliate links. If you buy through them, Aribonsai may earn a small commission at no extra cost to you. It doesn’t change what we recommend or how we rank anything.


    Your deadwood is carved. Now it needs to last.

    Lime sulfur for bonsai is the step that turns freshly stripped wood into deadwood that looks like it’s been weathering on a mountain for decades.

    You’ve made a jin. Maybe you’ve carved a long shari down the trunk. It looks great for a week. Then the wood starts to look dull, a bit dirty, maybe a little green where algae creeps in. On a tree that sits outside in the rain, untreated deadwood can also start to rot over time.

    That’s why most bonsai growers treat jin and shari with lime sulfur. It does two jobs at once: it helps protect the wood from rot and pests, and it bleaches it to that pale, silvery color you see on old junipers in exhibitions.

    The tricky part is buying it. Lime sulfur comes as bonsai-specific bottles, as “Jin Seal” brush-on liquids, as concentrated animal dips, and in big agricultural containers. It’s restricted for horticultural use in some places. And some growers skip it completely in favor of wood hardeners or ink-tinted finishes.

    In my experience, most people’s first lime sulfur job looks too white. It’s a common surprise, and an easy one to fix next time. This guide explains what matters, then compares six options for treating bonsai deadwood, from simple bonsai bottles to alternatives for growers who don’t want the bright white look.


    Who this lime sulfur for bonsai guide is NOT for

    It’s not a pest-control guide. Lime sulfur is also used as a dormant spray against fungus and pests on some plants. That’s a different use with different dilutions and rules. This guide covers deadwood treatment only.

    It’s not a carving guide. Lime sulfur goes on after the wood is shaped. If you’re still stripping bark, our bonsai jin pliers guide covers the tools for that stage.

    It’s not for every tree. Lime sulfur deadwood is most associated with junipers and other conifers. On some species, many growers prefer a more natural, darker finish, or no whitening at all.

    Still with us? Let’s go.


    How we picked these (3 things that actually matter)

    1. Strength and how you’ll dilute it

    Lime sulfur products vary a lot in concentration.

    • Bonsai-specific bottles are sold for deadwood and are usually ready to use or easy to dilute.
    • “Jin Seal” style liquids are brush-on deadwood treatments containing lime sulfur. They can be used undiluted or diluted with water.
    • Animal dips and agricultural lime sulfur are often stronger. Bonsai forum users point out that animal-dip products can be more concentrated than bonsai-grade products, so the strength should be checked before use.

    Full strength whitens deadwood a lot. Lower strength, built up over several coats, gives more control.

    2. The finish you want

    Fresh lime sulfur doesn’t look the way it ends up. Growers describe it going on yellow, then drying and fading over time toward a bleached, pale color.

    If you want a softer, grayer look, many growers add a colorant. India ink or Japanese sumi ink is a common choice for toning down chalky white deadwood. Others skip lime sulfur entirely and use a clear wood hardener, which preserves the wood without bleaching it.

    3. Safety, storage and where you can buy it

    Lime sulfur is a pesticide-type product with a strong sulfur smell. Treat it with respect: work outside, wear gloves and eye protection, and keep it off foliage and away from children and pets. Read the label of whatever you buy.

    Availability is the other issue. Some bonsai forum members report that lime sulfur is restricted for horticultural use in some US states, and registration rules have affected supply in the past. Rules vary by country and state, so check what’s allowed where you live.

    Storage matters too. Growers recommend buying only what you’ll use in a season, because opened lime sulfur can settle and lose quality over time.

    A few lime sulfur habits that matter more than the brand

    None of these cost anything.

    • Finish carving first. Treat the wood only once it’s shaped.
    • Clean and wet the wood. Many growers wet deadwood and let it dry slightly before applying, so the solution soaks in instead of sitting on top.
    • Protect the pot and soil. Lime sulfur can stain pots and shouldn’t soak into the soil. Cover the soil surface and the pot with plastic or paper. Our Japanese bonsai pots guide shows the kind of pot you’ll want to protect.
    • Keep it off living bark and foliage. Use a small brush and work carefully along the lifeline.
    • Go light, then add more. Thin coats give more control than one heavy coat.
    • Wait before judging. The color changes as it dries and over the following days and weeks.
    • Practice on scrap. A dead branch from the garden is a free test piece.

    Lime sulfur for bonsai comparison table

    ProductTypeBest forFinishAvailabilityApprox. price
    Wigert’s Lime Sulfur (4 oz)Bonsai lime sulfurUS growers, small jobsBleached, paleUS~$10
    Jin Seal (100 ml)Brush-on deadwood liquidEasy application, EU growersGray to whiteEU~€7.50
    Lime sulfur animal dipConcentrated liquidLarge collections, valueVery white at full strengthUS (varies)~$12
    Eutrema Lime SulphurAgricultural lime sulfurClubs, nurseries (UK)Bleached, paleUKFrom ~£69 (5 L)
    PC PetrifierWood hardenerPreserving without whiteningNatural, can be shinyUSVaries
    Japanese sumi inkColorantToning down white deadwoodGray, weatheredWidely availableLow

    Prices are approximate and vary by country and seller. Always check the current price and local rules before buying.


    The 6 best lime sulfur options for bonsai, reviewed

    1. Wigert’s Lime Sulfur (4 oz) – the easiest choice for US growers

    If you’re in the US and just want lime sulfur sold specifically for bonsai, this is the simplest option.

    Wigert’s Bonsai, a long-established Florida bonsai nursery, sells a 4 oz bottle for about $10, described simply as being for bleaching and preserving deadwood on bonsai. It’s a small size, which is actually a good thing: most hobbyists only treat a few trees a year, and lime sulfur is best used within a season.

    The listing doesn’t give a concentration, so start with a light coat and build up.

    Pros

    • Sold specifically for bonsai deadwood
    • Small, affordable bottle
    • Easy to buy in the US

    Cons

    • Concentration not stated
    • Small size won’t go far on large collections

    Best for: beginners and US hobbyists treating a few trees.

    Check Lime Sulfur at Wigert’s Bonsai


    2. Jin Seal – the classic brush-on deadwood treatment

    “Jin Seal” is a name many bonsai growers know. It’s a liquid made for preserving jin and shari, and it contains lime sulfur, which gives treated wood a gray or white look.

    Bonsai Plaza sells a 100 ml bottle for around €7.50. The product description says it helps against fungus and algae and slows rot. The suggested method is to clean the wood with water, let it dry slightly, and brush it on, either undiluted or diluted with water. It recommends allowing 24 hours to dry, using it in a well-ventilated area, and avoiding eye contact.

    Historically, Jin Seal was also associated with the Hô Yoku bonsai care line in the US and UK, so you may see it under slightly different names and sellers. The maker isn’t stated on the Bonsai Plaza listing.

    Pros

    • Made for jin and shari
    • Brush-on liquid is easy to control
    • Clear usage instructions
    • Inexpensive

    Cons

    • Maker and origin not stated
    • Mainly sold in Europe today

    Best for: European growers who want a ready-made deadwood treatment.

    Check Jin Seal at Bonsai Plaza


    3. Lime sulfur animal dip – best value for large collections

    This is the open secret of the bonsai world. Many growers buy lime sulfur sold as a pet or livestock dip, because it’s easy to find and inexpensive.

    Bonsai forum members describe it as essentially the same material used in bonsai, sold for around $12 in the US. The catch is concentration: they warn that animal dips are often stronger than bonsai-grade products, so you should check the strength and dilute it with water before using it on deadwood.

    It’s also worth being clear: this is an off-label use. The product is labeled for animals, not plants, so read the label carefully, follow its safety instructions, and check your local rules.

    Pros

    • Inexpensive and widely available
    • Plenty of product for many trees
    • Can be diluted to suit your finish

    Cons

    • Often more concentrated than bonsai products
    • Labeled for animals, not plants
    • Strong smell and needs careful handling

    Best for: experienced growers with larger collections who are comfortable diluting.

    Search lime sulfur dip on Amazon


    4. Eutrema Lime Sulphur – the UK bulk option

    If you run a club, a nursery or a large collection in the UK, buying bonsai-sized bottles adds up quickly. Eutrema sells lime sulphur (a calcium polysulphide solution) in much larger quantities.

    Its jin page describes lime sulphur, also called Jin Fluid, as giving deadwood an aged patina. The product is listed in 5-litre containers, with larger packs for commercial users, starting at around £69.

    That’s far more than most hobbyists will ever use. But for a bonsai club that runs deadwood workshops, or a professional with many trees, it can make sense. Remember that opened lime sulfur doesn’t keep forever, so only buy what you’ll realistically use.

    Pros

    • Large quantities for clubs and nurseries
    • Sold in the UK
    • Proper horticultural product

    Cons

    • Far too much for most hobbyists
    • Higher upfront cost
    • Storage and shelf life need managing

    Best for: UK clubs, nurseries and professional growers.

    Check Eutrema Lime Sulphur


    5. PC Petrifier – best if you don’t want white deadwood

    Not every tree suits bright white deadwood. Some growers want to preserve the wood but keep its natural color, especially on deciduous trees and some pines.

    That’s where wood hardeners come in. On bonsai forums, PC Petrifier is one of the most-recommended alternatives to lime sulfur. Growers describe it as safe and effective, though it can look shiny when dry, especially with heavy coats. Several report that the shine fades over days or weeks, and that one or two light coats avoid the problem.

    It isn’t lime sulfur, and it doesn’t bleach the wood. But if your goal is “keep this deadwood from rotting without turning it white,” it’s worth considering.

    Pros

    • Preserves wood without bleaching
    • Often described as safer and easier to handle than lime sulfur
    • Good for species where white deadwood looks unnatural

    Cons

    • Can look shiny if overapplied
    • Not a bonsai-specific product
    • No bleached, aged look

    Best for: growers who want natural-colored deadwood.

    Search PC Petrifier on Amazon


    6. Japanese sumi ink – the secret to natural-looking deadwood

    This isn’t a preservative. It’s the finishing trick that makes lime sulfur look less like paint and more like nature.

    Many growers mix a little India ink or Japanese sumi ink into their lime sulfur, or apply a light ink wash afterward, to tone down chalky white deadwood toward a more natural gray. Some use a light black wash on new deadwood to get a weathered look before applying a preservative.

    Sumi ink is the traditional black ink used in Japanese calligraphy, so it’s easy to find in art stores and online. You only need a few drops. Test the mix on scrap wood first, because a little goes a long way.

    Pros

    • Turns bright white deadwood into natural gray
    • Very inexpensive
    • Easy to find
    • Fits the Japanese aesthetic

    Cons

    • Not a preservative on its own
    • Easy to overdo, so test first

    Best for: anyone whose lime sulfur looks too white, and anyone preparing a tree for display.

    Search Japanese sumi ink on Amazon


    Which lime sulfur for bonsai should you buy? (By situation)

    You’re in the US and treating a few trees: Wigert’s Lime Sulfur.

    You’re in Europe: Jin Seal from Bonsai Plaza.

    You have a large collection and know how to dilute: a lime sulfur animal dip, checked for concentration.

    You run a UK club or nursery: Eutrema Lime Sulphur.

    You want to preserve deadwood without whitening it: PC Petrifier.

    Your deadwood looks too white: add Japanese sumi ink to your lime sulfur, or use a light ink wash.

    You’re preparing a tree for a show: freshen the deadwood with a light lime sulfur coat a few weeks before, tone it with ink if needed, and set the tree on a bonsai display stand that suits it.

    A simple deadwood finishing kit

    For most hobbyists, a bottle of bonsai lime sulfur, a small bottle of sumi ink, a couple of small brushes, gloves and some plastic sheeting to protect the pot and soil is everything you need.


    How to apply lime sulfur to bonsai deadwood (the basics)

    Every product has its own instructions, so always read the label. But the general process growers describe looks like this:

    1. Finish carving. Remove loose fibers and debris with a brush.
    2. Protect the tree. Cover the soil surface and pot. Keep foliage out of the way.
    3. Wet the wood. Lightly wet the deadwood and let it dry slightly so the solution soaks in.
    4. Apply a thin coat. Use a small brush, working carefully along the edge of the living bark.
    5. Let it dry. The color changes as it dries. Some products suggest allowing about 24 hours.
    6. Assess and repeat. Add another coat if needed, or tone it with ink.
    7. Refresh occasionally. Many growers reapply lightly once a year or before shows.

    Lime sulfur safety and storage

    • Work outdoors. The sulfur smell is strong and unpleasant.
    • Wear gloves and eye protection. Avoid skin and eye contact.
    • Keep it off foliage and living bark. It can damage living tissue.
    • Keep it away from metal you care about. Many growers find it stains and corrodes.
    • Store it sealed, cool and out of reach of children and pets.
    • Buy small. Opened lime sulfur can settle and degrade within a season or so.
    • Check local rules. Availability and permitted uses vary by country and state.

    Common lime sulfur mistakes

    Making deadwood too white. The most common mistake. Use lighter coats or add ink.

    Applying before carving is finished. You’ll just expose fresh wood again.

    Getting it on living bark. Work slowly near the lifeline.

    Forgetting to protect the pot. Stains on a good pot are hard to remove.

    Using concentrated products undiluted. Check strength first, especially with animal dips.


    Conclusion: preserve first, then make it look natural

    Lime sulfur for bonsai isn’t glamorous, but it’s what makes deadwood last, and what gives jin and shari that aged, weathered look.

    For most US hobbyists, Wigert’s small bottle is the easiest place to start. In Europe, Jin Seal is a simple brush-on option. If you have many trees, a diluted animal dip is the value choice, as long as you check its strength. And whichever you use, a few drops of Japanese sumi ink can turn harsh white into a natural silver-gray.

    Work outside, protect the pot, go light, and let the color settle before you judge it.

    Ready to finish your deadwood? Check Lime Sulfur at Wigert’s Bonsai, or check Jin Seal at Bonsai Plaza before your next carving session.

  • Best Bonsai Repotting Supplies in 2026: Pot Mesh, Tie-Down Wire, Chopsticks and the Small Extras

    Best Bonsai Repotting Supplies in 2026: Pot Mesh, Tie-Down Wire, Chopsticks and the Small Extras

    Affiliate disclosure: Some links on this page are affiliate links. If you buy through them, Aribonsai may earn a small commission at no extra cost to you. It doesn’t change what we recommend or how we rank anything.


    The tree is ready. The pot isn’t.

    Bonsai repotting supplies are the small things nobody gets excited about, until you’re missing one.

    You’ve got fresh soil sifted. The tree is out of its old pot, roots combed out and trimmed. Then you pick up the new pot and realize you have nothing to cover the drainage holes. No wire to tie the tree in. No chopstick to work the soil between the roots. So the tree sits there drying out while you hunt through a drawer for a piece of window screen and a bent coat hanger.

    It happens to almost everyone once.

    The good news is that none of these supplies are expensive. Pot mesh, tie-down wire and a couple of bamboo chopsticks cost very little, and having them ready makes repotting faster, calmer and kinder to the tree. The less time roots spend exposed, the better.

    In my experience, the difference between a smooth repot and a stressful one usually isn’t the soil or the pot. It’s whether the small stuff was ready before you started. This guide explains what you need, then compares six repotting essentials, from Japanese pot mesh to the tools you use to tie the tree in firmly.


    Who this bonsai repotting supplies guide is NOT for

    It’s not a soil guide. Soil choice deserves its own article. Our akadama and Japanese bonsai soil guide covers that.

    It’s not about cutting tools. Root cutters, shears and saws are covered in our tool guides. This guide is about the consumables and small extras.

    It’s not a step-by-step repotting tutorial. Timing and technique depend on your species and climate. We’ll explain where each supply fits, but not when to repot a particular tree.

    Still with us? Let’s go.


    How we picked these (3 things that actually matter)

    1. Will it keep soil in and let water out?

    That’s the whole job of pot mesh. It covers the drainage holes so soil doesn’t wash out, while letting water drain freely. It also helps keep some pests from crawling in through the bottom.

    Good bonsai mesh is stiff enough to stay flat, has openings small enough to hold fine soil particles, and is easy to cut to size.

    2. Will it hold the tree firmly?

    A newly repotted tree must not move. If it rocks in the wind or when you water, the new fine roots tear and the tree struggles to establish.

    That’s why bonsai growers tie trees into their pots with wire that runs through the drainage or tie-down holes and over the root ball. The wire needs to be strong enough to hold, but soft enough to bend and tighten easily. Pliers make tightening much easier.

    3. Will it help soil reach every gap?

    Air pockets under the root ball are a common problem. Roots that sit in empty space dry out and die back.

    A simple bamboo chopstick, worked gently into the soil, settles it around the roots without crushing them. It’s one of the cheapest and most important repotting tools there is.

    A few repotting habits that matter more than any product

    None of these cost anything.

    • Prepare everything first. Cut mesh, prepare wire and sift soil before the tree comes out of its pot.
    • Work in the shade. Exposed roots dry quickly in sun and wind.
    • Mist the roots. If a repot takes longer than expected, mist exposed roots with water.
    • Use the right wire thickness. Too thin and it won’t hold. Too thick and it’s hard to tighten neatly.
    • Don’t overtighten. Tie-down wire should hold the root ball firmly, not cut into roots or bark.
    • Water thoroughly afterward. Water until it runs clear from the drainage holes, which also washes out remaining dust.
    • Protect the tree afterward. Keep it out of strong wind and harsh sun for a while after repotting.

    Bonsai repotting supplies comparison table

    SupplyWhat it doesFormatOriginApprox. price
    Japanese Pot Mesh (Wigert’s)Covers drainage holes5 sheets, 12 × 8 inJapanese mesh~$10
    Japanese Pot Mesh (Herons)Covers drainage holes5 A4 sheetsJapanese quality~£15 (UK)
    Pre-cut Mesh Discs (Yorkshire Bonsai)Covers drainage holes, no cutting3.5 cm or 7 cm discsNot stated~£4 per 5 (UK)
    Aluminum Tie-Down WireAnchors tree and meshCoils, various gaugesVariesVaries
    Bamboo ChopsticksWorks soil around rootsHandmade or boughtVariesVery low
    Pliers for Tie-Down WireTightens and forms wireHand toolJapan (bonsai brands)Varies

    Prices are approximate and vary by country and seller. Always check the current price before buying.


    The 6 best bonsai repotting supplies, reviewed

    1. Japanese Pot Mesh from Wigert’s Bonsai – best value for US growers

    If you’re in the US, this is an easy first pick. Wigert’s Bonsai sells Japanese mesh in packs of five 12 × 8 inch sheets for around $10.

    That’s a lot of mesh for the money. One sheet covers the drainage holes of many small and medium pots. Wigert’s notes that the original Japanese packaging is sometimes out of stock, in which case it supplies the same amount of mesh cut from its own large sheets, just without the Japanese packing.

    The listing doesn’t name the material, but bonsai pot mesh is usually a stiff plastic grid that you cut to size with scissors.

    Pros

    • Japanese mesh at a low price
    • Large sheets you can cut for any pot
    • Plenty for many repots

    Cons

    • Material not stated on the listing
    • Packaging may vary

    Best for: US growers who want a stock of proper bonsai mesh.

    Check Japanese mesh at Wigert’s Bonsai


    2. Japanese Pot Mesh from Herons – best for UK growers

    Herons Bonsai, a well-known UK nursery, sells a pack of five A4-sized sheets of what it calls Japanese quality bonsai pot mesh, for around £15.

    As with most mesh, you cut it to size and place it over the drainage holes inside the pot. A4 sheets are a practical size: big enough for large pots, and easy to store flat.

    The listing doesn’t name a maker or the material, so it’s best thought of as “Japanese-style” quality mesh rather than a specific branded product.

    Pros

    • Easy to buy in the UK
    • Five large A4 sheets
    • Good for pots of any size

    Cons

    • Maker and material not stated
    • Pricier than the Wigert’s pack

    Best for: UK growers who want quality mesh from an established bonsai nursery.

    Check bonsai pot mesh at Herons


    3. Pre-cut Mesh Discs from Yorkshire Bonsai – best for convenience

    Cutting mesh squares before every repot isn’t hard, but pre-cut discs save time, especially if you repot lots of small trees.

    Yorkshire Bonsai sells mesh wire discs designed to cover drainage holes, in 3.5 cm and 7 cm sizes. A pack of five 3.5 cm discs is about £3.95. The listing doesn’t state the material or whether pins are included, so you’ll still need wire to hold them in place.

    They’re especially handy for shohin and small pots, where a neat round disc looks tidier than a roughly cut square.

    Pros

    • No cutting needed
    • Two sizes available
    • Neat fit on small pots

    Cons

    • Material not stated
    • More expensive per piece than cutting your own
    • Mainly available in the UK

    Best for: growers with many small pots who want to save time.

    Check pre-cut mesh discs at Yorkshire Bonsai


    4. Aluminum Tie-Down Wire – the essential anchor

    This is the supply most beginners forget, and the one that matters most for a healthy recovery.

    Tie-down wire holds the tree firmly in the pot. Typically, it’s threaded up through the drainage or tie-down holes, then pulled over the root ball and twisted tight. The same kind of wire is also used to make small pins that hold the mesh in place.

    Most growers use anodized aluminum wire for this, because it’s soft enough to bend and twist easily and doesn’t rust. Thicker wire holds better on larger trees. If you already have bonsai training wire, you probably have what you need. Our bonsai wire guide compares aluminum and copper and covers gauges.

    A popular trick from the bonsai blog Adamaskwhy: to hold mesh in place, cut a piece of wire about three times the hole’s diameter (the author suggests at least 2.5–3 mm thick), form two loops facing opposite directions, push it through the mesh into the hole, and bend the ends outward. The tension keeps the mesh from slipping or spinning. It’s one of those small bonsai repotting supplies tricks that saves a lot of frustration.

    Pros

    • Holds the tree still while new roots grow
    • Also makes mesh pins
    • Aluminum is easy to bend and doesn’t rust

    Cons

    • Choosing the right thickness takes a little practice
    • Overtightening can damage roots

    Best for: every repot. Don’t skip it.

    Search anodized aluminum bonsai wire on Amazon


    5. Bamboo Chopsticks – the cheapest tool that matters most

    A bamboo chopstick might be the most underrated repotting tool there is.

    Bonsai Mirai lists bamboo chopsticks among its five most important repotting tools. Worked gently into the soil, a chopstick pushes soil into gaps around the roots so there are no air pockets. It can also scrape soil away from the edge of a pot to free a tree, and act as a prop to hold the tree at the right angle while you tie it in.

    You can use ordinary chopsticks, but many serious growers make their own from bamboo. Mirai’s guide suggests making each one from a single section of bamboo, keeping the node as a handle, and shaping a sharp tip so it moves soil gently and leaves clean wounds if it touches a root. They note that a chopstick should never span more than one node, because the swelling can crush soil and break roots.

    Pros

    • Very cheap or free
    • Eliminates air pockets
    • Gentle on roots
    • Easy to make in different sizes

    Cons

    • Wears down over a repotting season
    • Homemade ones take a little time to make

    Best for: every grower, from beginner to professional.

    Search bamboo chopsticks for bonsai on Amazon · Read Bonsai Mirai’s chopstick guide


    6. Pliers for Tie-Down Wire – the tool that makes tying in easy

    Tying a tree in by hand is possible. Tying it in tightly and neatly is much easier with pliers.

    Bonsai Mirai calls anchoring the tree with tie-down wire the most important step for stability, and notes that pliers are used constantly throughout a repot: to pull wire tight, twist it, form hooks and remove old wire. Bonsai jin pliers are ideal, because they grip wire firmly and many also have a cutting edge.

    If you already own jin pliers for wiring, you’re set. If not, our bonsai jin pliers guide compares Japanese options.

    Pros

    • Makes tie-down wire tight and secure
    • Also used for wiring and deadwood work
    • Saves your fingers

    Cons

    • Good Japanese pliers are an investment
    • Easy to overtighten if you’re not careful

    Best for: anyone who repots more than one or two trees a year.

    Search Japanese bonsai jin pliers on Amazon


    Which bonsai repotting supplies should you buy? (By situation)

    You’re repotting for the first time: A pack of Japanese mesh, a coil of aluminum wire and a couple of chopsticks. That’s all you really need.

    You’re in the US: Japanese mesh from Wigert’s Bonsai.

    You’re in the UK: Mesh sheets from Herons, or pre-cut discs from Yorkshire Bonsai.

    You repot many shohin or small trees: Pre-cut mesh discs save time and look neat.

    You repot larger trees: Large mesh sheets, thicker tie-down wire and pliers.

    You want a complete repotting setup: Mesh, aluminum wire, chopsticks, jin pliers, a root rake, a root cutter and a bonsai soil sieve for clean soil.

    A simple repotting kit checklist

    Before you start, have these ready on your bench:

    • Mesh cut to size for every drainage hole
    • Wire pins to hold the mesh
    • Tie-down wire threaded through the pot
    • Sifted soil, ready to use
    • A chopstick or two
    • Pliers and wire cutters
    • A spray bottle to mist roots

    If all of that is ready before the tree comes out of the old pot, the roots spend minutes exposed instead of an hour.


    Where each supply fits in the repotting process

    1. Prepare the pot. Cut mesh, pin it over the drainage holes, and thread tie-down wire through the pot.
    2. Add a base layer of soil. Many growers use slightly larger particles at the bottom.
    3. Position the tree. Use chopsticks as props if you need to hold an angle.
    4. Tie the tree in. Pull the wire over the root ball and tighten with pliers until the tree doesn’t move.
    5. Fill with soil. Add soil and work it in with a chopstick until there are no gaps.
    6. Water thoroughly. Water until it runs clear from the bottom.

    How to store bonsai repotting supplies

    • Keep mesh flat. Rolled mesh tends to curl up in the pot.
    • Store wire dry. Aluminum doesn’t rust, but tangled coils are frustrating.
    • Keep chopsticks dry. Damp bamboo can grow mold.
    • Keep everything together. A small box with mesh, wire, chopsticks and pliers means you’re always ready.

    Common bonsai repotting supply mistakes

    Skipping tie-down wire. A tree that moves after repotting struggles to grow new roots.

    Using window screen that’s too fine. Very fine screen can clog and slow drainage.

    Not pinning the mesh. Loose mesh slides when you add soil.

    Using a thick stick to push soil. Pushing hard with a blunt stick compacts soil and crushes particles. A sharp chopstick works gently.

    Overtightening the wire. Firm is good. Cutting into roots is not.


    Conclusion: small supplies, big difference

    Bonsai repotting supplies are cheap, simple and easy to forget. But they decide whether your tree sits firmly in a well-drained pot, or wobbles in soil full of air pockets.

    For most growers, a pack of Japanese pot mesh, a coil of aluminum tie-down wire and a couple of bamboo chopsticks are the essentials. Add pliers to tie the tree in firmly, and pre-cut discs if you repot lots of small trees.

    Prepare everything before you start, work in the shade, and tie the tree in so it doesn’t move. That’s most of what makes a repot successful.

    Ready for repotting season? Check Japanese mesh at Wigert’s Bonsai, or pick up aluminum tie-down wire on Amazon before your next repot.