Author: arino

  • Best Bonsai Root Rake in 2026: 6 Japanese Root Hooks and Rakes for Easier Repotting

    Best Bonsai Root Rake in 2026: 6 Japanese Root Hooks and Rakes for Easier Repotting

    Affiliate disclosure: Some links on this page are affiliate links. If you buy through them, Aribonsai may earn a small commission at no extra cost to you. It doesn’t change what we recommend or how we rank anything.


    Repotting day, and the root ball won’t let go

    A bonsai root rake is one of those tools you don’t think you need until you’re halfway through repotting.

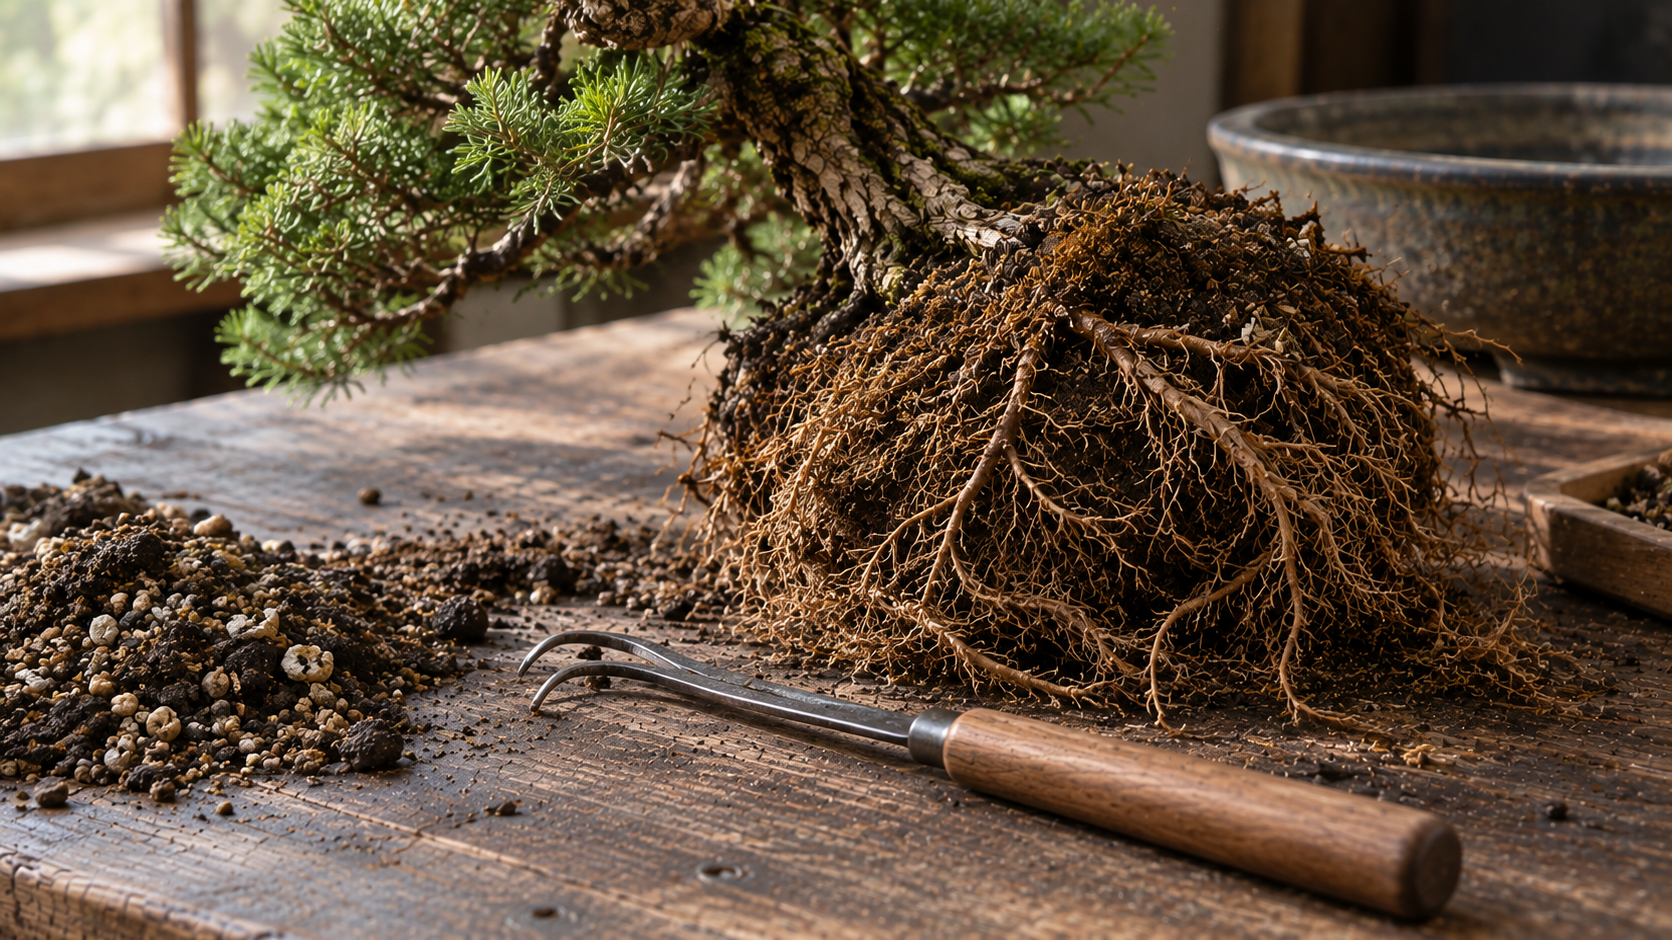
    You slide the tree out of its pot. The root ball is a solid block: old soil packed tight, roots circling the bottom, maybe a thick mat where the drainage holes used to be. You poke at it with a chopstick. Nothing much happens. You try your fingers, and tear a few fine roots you were hoping to keep.

    That’s where a root rake or root hook comes in. Its curved prongs slip into the soil, catch it, and pull it away from the roots without ripping them. It loosens circling roots so you can see what to trim, and it lets you comb the root ball out evenly before the tree goes into fresh soil.

    The confusing part is the variety. There are single-prong hooks, two- and three-prong rakes, small versions for shohin, heavy-duty ones for collected trees, and combo tools with tweezers on the other end. Prices range from a few dollars to around $40.

    In my experience, most people do fine with one good rake for years, but the right size makes a real difference. A big rake on a small tree tears roots. A tiny hook on a big root ball takes forever. This guide explains what matters, then compares six root hooks and rakes, mostly Japanese, from budget picks to tools made for compact yamadori root balls.


    Who this bonsai root rake guide is NOT for

    It’s not for cutting roots. A rake loosens and untangles. To cut thick roots, you need a bonsai root cutter.

    It’s not for garden soil cultivation. Garden hand rakes and cultivators are much bigger and rougher. This guide is about tools sized for bonsai root balls.

    It’s not a full repotting guide. We’ll cover the tool and good habits, but timing and soil mixes depend on your species and climate.

    Still with us? Let’s go.


    How we picked these (3 things that actually matter)

    1. Number of prongs

    This is the main difference between models.

    • Single-prong root hooks are precise. They work into tight spaces, around the trunk base and between thick roots. They’re slower on large areas.
    • Two-prong hooks are a middle ground: still fairly precise, but faster than a single prong.
    • Three-prong rakes cover more area and are faster on large root balls. They’re less precise near the trunk.

    Many growers own two: a single-prong hook for detail and a three-prong rake for bulk work.

    2. Size and strength

    Size should match your trees.

    • Small or shohin hooks are gentle and fit tiny root balls.
    • Standard hooks (around 16–21 cm long) suit most bonsai.
    • Heavy-duty rakes are for compact old root balls, nursery stock and yamadori (collected trees), where the soil can be almost as hard as clay.

    A rake that’s too strong and too big will tear fine roots on a small tree. One that’s too weak can bend on a packed root ball.

    3. Material and handle

    You’ll see carbon steel, cast iron and stainless steel prongs. Carbon steel and cast iron are strong but need drying after use. Stainless resists rust, which helps because root rakes spend their life in wet soil.

    Handles are either wood or all-metal. Wooden handles are comfortable and grippy. All-metal tools are easier to wash. A good tool should have a solid connection between prongs and handle, so it doesn’t twist when you pull.

    A few root rake habits that matter more than the brand

    None of these cost anything.

    • Work from the outside in. Start at the edges and bottom of the root ball, and move inward gradually.
    • Pull outward and downward. Comb in the direction the roots grow, away from the trunk.
    • Let the soil dry a little first. Very wet soil clumps and drags roots. Slightly dry soil falls away more easily. Just don’t let the fine roots dry out.
    • Use light pressure. Kaneshin’s own guidance for its root hook is to pull gently, because excessive pressure can damage roots.
    • Switch tools near the trunk. Use a single-prong hook or chopstick in tight areas.
    • Keep the roots moist. Mist the exposed roots or cover them while you work, especially on warm or windy days.
    • Clean the tool after repotting. Old soil and moisture lead to rust.

    Bonsai root rake comparison table

    ToolProngsLengthMaterialBest forOriginApprox. price
    Bonsai Tonight Root Hooks & Rakes1–3 (several models)VariesSteel / stainless optionsChoosing the right sizeJapan~$15
    Kaneshin 2 Prong Root Hook26.3 in (16 cm)Carbon steel, poplar handleAll-round repottingJapan~$40
    Three Prong Root Hook, Wood Handle38.25 in (21 cm)Cast iron, wood handleFaster work on bigger root ballsJapan~$27
    Single Prong Root Hook, Wood Handle18.25 in (21 cm)Cast iron, wood handleDetail work near the trunkJapan~$22
    Kaneshin 3-Hook Repotting Rake3210 mmNot statedCompact root balls, yamadoriJapan~€27 (EU)
    Root Rake + Tweezers Combo3 + tweezers~220 mmNot statedBudget backupChina~€7 (EU)

    Prices are approximate and vary by country and seller. Always check the current price before buying.


    The 6 best bonsai root rakes, reviewed

    1. Bonsai Tonight Root Hooks & Rakes – best range to choose from

    If you’re not sure which size or shape you need, Bonsai Tonight’s range is a good place to start. It’s made in Japan, and it includes almost every common style in one place.

    The listing includes a standard root hook, a shohin root hook, steel and heavy-duty steel versions, a heavy-duty stainless version, a wood-handled hook, a root rake and a heavy-duty root rake. Bonsai Tonight notes that the root rake is useful for working on the bottom of the root ball, and that larger hooks and rakes speed up work on larger trees.

    The starting price is around $15. The listing doesn’t give detailed specs for every model, so if you need exact lengths or prong counts, it’s worth contacting the shop.

    Pros

    • Made in Japan
    • Wide range of sizes, including shohin and heavy-duty
    • Stainless option available
    • Affordable starting price

    Cons

    • Detailed specs aren’t listed for each model
    • Price varies by model

    Best for: anyone who wants to pick a Japanese rake in exactly the right size.

    Check root hooks and rakes at Bonsai Tonight


    2. Kaneshin 2 Prong Root Hook – the best all-round bonsai root rake

    Kaneshin is one of the most trusted Japanese bonsai tool makers, and this two-prong hook is a lovely everyday tool.

    It’s 6.3 inches long and weighs 2.7 oz. The prongs are carbon steel, the handle is poplar, and a metal tang runs through the handle so it doesn’t loosen or twist. Niwaki describes it as handmade in Japan, for loosening old soil and gently separating delicate roots during repotting.

    Two prongs is a sensible middle ground. It’s faster than a single hook, but still precise enough to work close to the trunk on most trees. At around $40, it’s the priciest tool here, but you’re paying for build quality that should last for decades.

    Because the prongs are carbon steel, wipe them dry after use. Our bonsai tool maintenance guide covers simple rust prevention.

    Pros

    • Handmade in Japan by Kaneshin
    • Two prongs balance speed and precision
    • Solid tang construction that won’t twist
    • Comfortable wooden handle

    Cons

    • Carbon steel needs drying to avoid rust
    • Highest price on this list

    Best for: growers who want one high-quality root rake for most trees.

    Check the Kaneshin 2 Prong Root Hook at Niwaki


    3. Three Prong Root Hook with Wood Handle – best for bigger root balls

    This is the classic three-prong bonsai root rake, sold in the US by Bonsai Learning Center.

    It’s made in Japan, with cast iron prongs and a wooden handle that has an anti-slip grip. It’s 8.25 inches long overall, with a 3-inch hook, which gives it good reach on larger root balls. Bonsai Learning Center describes it as a tool for baring and separating roots during transplanting and repotting.

    Three prongs make quick work of the outer layers of soil. Switch to a single hook or chopstick when you get close to the trunk.

    Pros

    • Made in Japan
    • Three prongs cover more area quickly
    • Anti-slip wooden handle
    • Good reach on larger trees

    Cons

    • Less precise near the trunk
    • Cast iron should be dried after use

    Best for: medium and large trees with dense root balls.

    Check the Three Prong Root Hook at Bonsai Learning Center


    4. Single Prong Root Hook with Wood Handle – best for detail work

    The single-prong version of the tool above is the precision partner.

    It’s made in Japan, with one strong cast iron prong, a 2.25-inch hook and an 8.25-inch overall length. The wooden handle has the same anti-slip grip.

    A single prong is the tool for tight spots: under the trunk, between thick surface roots, and in small pots where a three-prong rake would tear more than it loosens. It’s also useful for teasing out circling roots one at a time so you can decide what to keep.

    Pros

    • Precise in tight spaces
    • Strong single prong
    • Made in Japan
    • Pairs well with a three-prong rake

    Cons

    • Slow on large areas
    • Cast iron needs drying after use

    Best for: shohin, small pots, and detail work near the trunk.

    Check the Single Prong Root Hook at Bonsai Learning Center


    5. Kaneshin 3-Hook Repotting Rake (210 mm) – best for yamadori and tough root balls

    This Kaneshin rake is aimed at a specific job: breaking up very compact root balls.

    It’s a 210 mm, three-hook tool that Laos Garden describes as highly robust and perfect for the most compact root balls. It’s intended mainly for pre-bonsai and yamadori, where you’re often dealing with heavy, old soil, field clay or roots packed into a nursery container.

    The listing doesn’t state the material, and it’s easier to find in Europe than in the US. But if you work with collected trees or raw nursery stock, a heavy-duty rake like this saves a lot of time and effort.

    Pros

    • Made in Japan by Kaneshin
    • Built for compact, heavy root balls
    • Ideal for yamadori and nursery stock

    Cons

    • Too strong for small, delicate trees
    • Material not stated
    • Harder to find in the US

    Best for: advanced growers working with collected trees and pre-bonsai.

    Check the Kaneshin 3-Hook Rake at Laos Garden


    6. Root Rake + Tweezers Combo – best budget backup

    This is the cheap, practical option, and we’re including it because many people want a spare tool without spending much.

    It’s a two-in-one tool about 220 mm long, with a three-prong rake on one end and fine tweezers on the other. Mistral Bonsai, which sells it in Europe, says it’s made in China. The rake combs roots and removes old soil, and the tweezers pull weeds, debris and small roots near the trunk.

    It won’t feel like a Japanese tool, and the material isn’t stated. But at under €10, it’s a reasonable spare for a club workshop, a second workstation, or a beginner who isn’t sure yet how much repotting they’ll do.

    Pros

    • Very inexpensive
    • Rake and tweezers in one tool
    • Good spare or beginner tool

    Cons

    • Made in China, not Japan
    • Material and durability not stated
    • Less comfortable for long sessions

    Best for: beginners on a tight budget, or as a spare.

    Check the combo tool at Mistral Bonsai · Search bonsai root rakes on Amazon


    Which bonsai root rake should you buy? (By use case)

    You want one tool for most repotting: Kaneshin 2 Prong Root Hook.

    You want to choose the exact size for your trees: Bonsai Tonight’s root hooks and rakes.

    You have medium to large trees with dense root balls: Three Prong Root Hook with Wood Handle.

    You grow shohin or work in small pots: Single Prong Root Hook, or the shohin hook from Bonsai Tonight.

    You work with yamadori or raw nursery stock: Kaneshin 3-Hook Repotting Rake.

    You’re on a tight budget or need a spare: the Root Rake + Tweezers Combo.

    You want a “pro” repotting setup: a three-prong rake for bulk work, a single-prong hook for detail, a root cutter for thick roots, and a soil sieve to prepare fresh soil.

    A simple two-tool setup

    Most growers are well served by two tools: a three-prong (or two-prong) rake for the outer root ball, and a single-prong hook for the area near the trunk. Add a chopstick for working fresh soil in around the roots, and you’re ready for most repotting jobs.


    Where a root rake fits in the repotting process

    It helps to see where the rake actually comes in.

    1. Remove the tree from the pot. Cut any wires holding it in, and run a knife around the edge if it’s stuck.
    2. Rake the bottom and sides. This is where the rake does most of its work. Comb out circling roots and old soil from the outside in.
    3. Work toward the trunk carefully. Switch to a single hook or chopstick near the base.
    4. Trim the roots. Once the roots are combed out, you can see which long or thick roots to cut back.
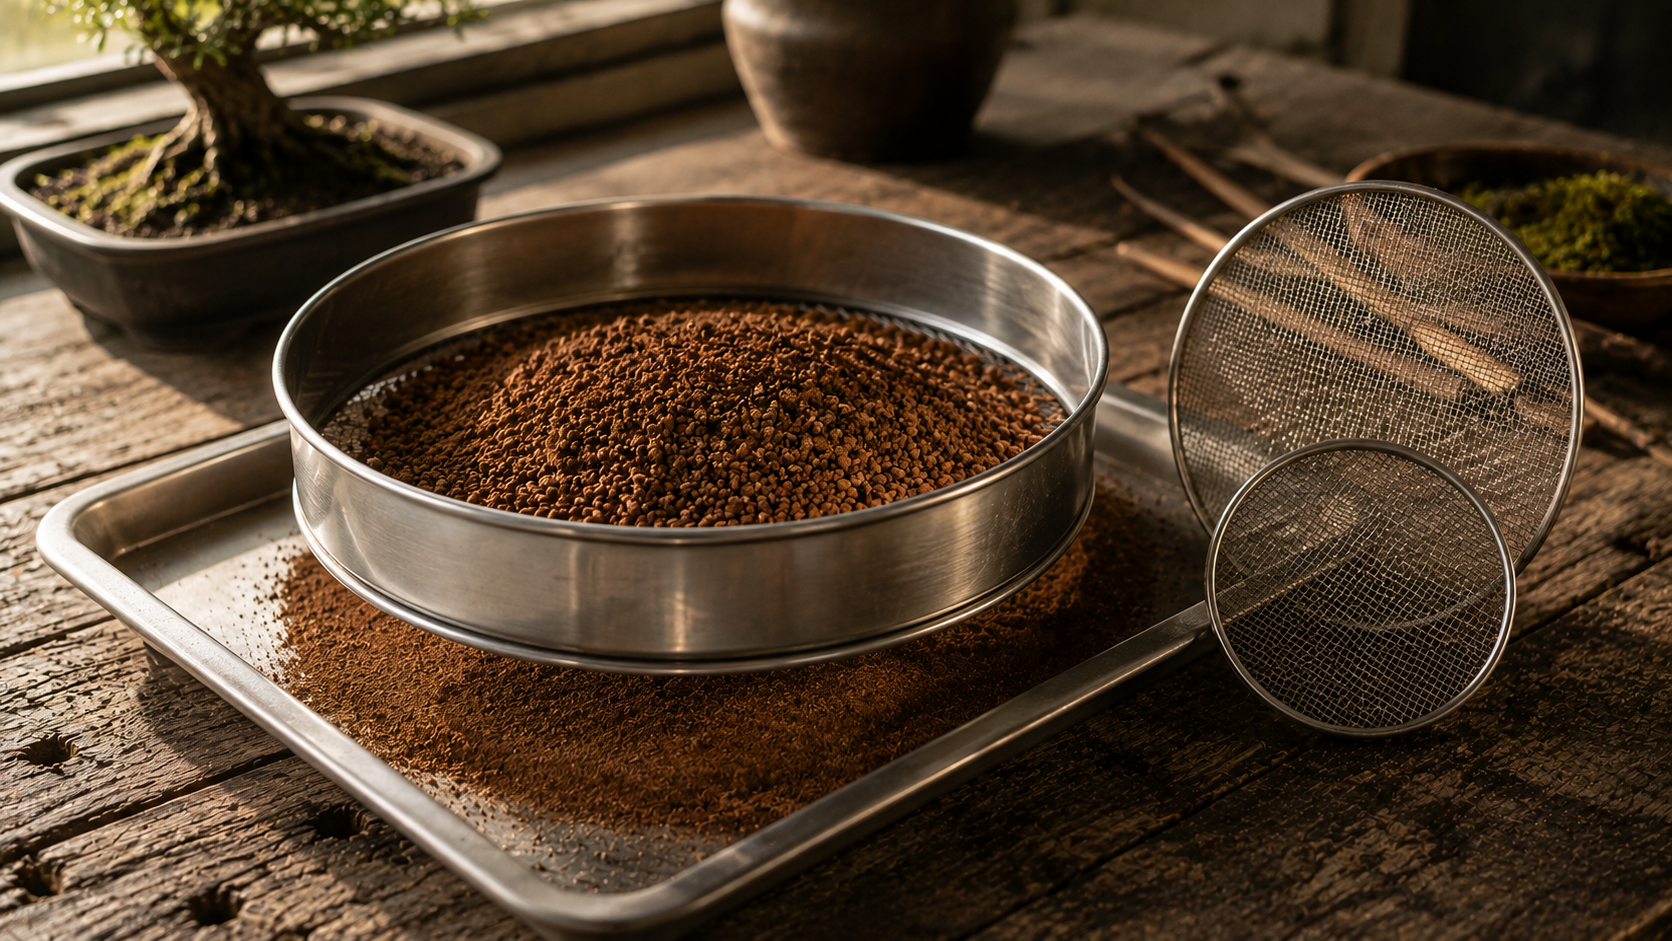
    5. Prepare fresh soil. Sift it to remove dust. Many growers use Japanese akadama as part of their mix.
    6. Repot and work in the soil. Use a chopstick to settle soil around the roots, then water thoroughly.

    How much soil you remove depends on the species, the tree’s health and the time of year. Some trees tolerate heavy root work; others don’t. If you’re not sure, it’s safer to remove less.


    How to care for a bonsai root rake

    Root rakes spend their working life in wet soil, so a little care goes a long way.

    • Wash off soil after use. Dried soil is abrasive and holds moisture against the steel.
    • Dry it completely. Especially carbon steel and cast iron.
    • Oil it lightly before storage. A thin coat of tool oil prevents rust between repotting seasons.
    • Check the prongs. If a prong is bent, gently straighten it before it snags roots.
    • Keep wooden handles dry. Don’t leave the tool sitting in water or wet soil.

    Common bonsai root rake mistakes

    Pulling too hard. Heavy pressure tears fine roots. Let the prongs do the work.

    Starting at the trunk. Always start at the edges and bottom, then work inward.

    Using one size for everything. A big rake is too rough for shohin. A tiny hook is too slow on big trees.

    Letting roots dry out. Exposed fine roots can dry quickly. Mist them or work in the shade.

    Forgetting the tool after repotting. A rake left with wet soil on it will rust quickly.


    Conclusion: a simple tool that makes repotting gentler

    A bonsai root rake isn’t a glamorous tool, but it changes how repotting feels. Instead of picking at a hard root ball and tearing roots, you comb it out cleanly, see exactly what you’re working with, and give the tree a better start in fresh soil.

    For most people, the Kaneshin 2 Prong Root Hook is the best single tool: handmade in Japan, balanced and built to last. If you’d rather start cheaper, Bonsai Tonight’s Japanese hooks and rakes give you plenty of size options. And if you work with collected trees, a heavy-duty Kaneshin rake is worth adding.

    Whichever you choose, start from the outside, use light pressure, and keep the roots moist.

    Ready for repotting season? Check the Kaneshin 2 Prong Root Hook at Niwaki, or browse Japanese root hooks and rakes at Bonsai Tonight.
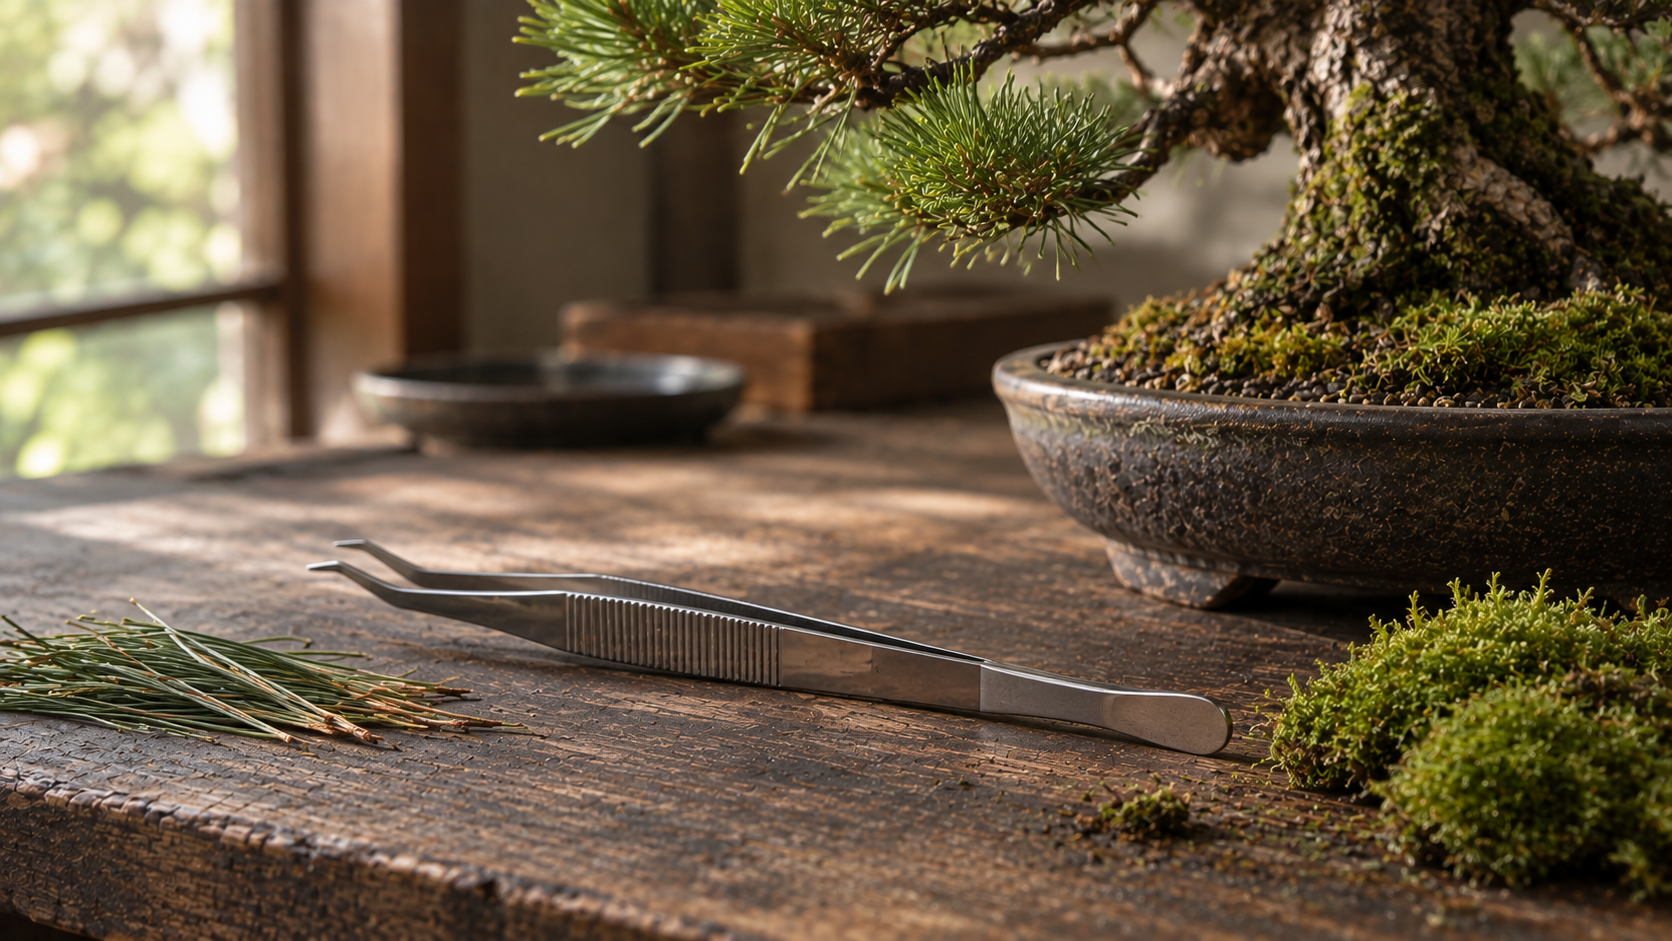
  • Best Bonsai Tweezers in 2026: 6 Japanese Picks, From $10 Spatula Tweezers to Masakuni

    Best Bonsai Tweezers in 2026: 6 Japanese Picks, From $10 Spatula Tweezers to Masakuni

    Affiliate disclosure: Some links on this page are affiliate links. If you buy through them, Aribonsai may earn a small commission at no extra cost to you. It doesn’t change what we recommend or how we rank anything.


    The small tool you’ll use every single week

    Bonsai tweezers don’t look like much. They’re not as exciting as a concave cutter or a hand-forged pair of shears. But ask experienced growers which tool they pick up most often, and tweezers are near the top of the list.

    You use them to pull a weed from between roots. To pluck old pine needles one by one. To remove a spent flower, a dead leaf, a caterpillar. To tuck moss into place before a show, or comb out the surface of the soil after repotting.

    The problem is that most beginners start with whatever tweezers came in a cheap kit. They bend, they don’t line up at the tip, and they slip off the exact needle you’re trying to grab. It’s a small frustration, but it adds up when you’re working on a dense pine for an hour.

    In my experience, a good pair of bonsai tweezers is one of the cheapest real upgrades you can make. Even the best Japanese models cost far less than a good cutter. This guide explains what to look for, then compares six Japanese tweezers, from a $10 everyday pair to premium Masakuni.


    Who this bonsai tweezers guide is NOT for

    It’s not for cutting. Tweezers pull and place. If you’re trimming leaves or shoots, you need bonsai shears.

    It’s not for heavy root work. Tweezers help tidy fine roots and the soil surface. For combing out a root ball, a root rake or root hook does the job better.

    It’s not for electronics or general craft tweezers. Those can work in a pinch, but this guide is about tools designed for bonsai, with features like a spatula end and stronger tips.

    Still with us? Let’s go.


    How we picked these (3 things that actually matter)

    1. Tip shape

    This decides what the tweezers are good at.

    • Straight, fine tips are precise. They’re good for plucking individual needles and small leaves.
    • Bent or angled tips let you reach into dense foliage and work at a comfortable angle, without your hand blocking your view.
    • Extended or notched tips grip better. A longer gripping surface holds slippery needles and moss more securely.

    There’s no single best shape. Many growers keep one straight pair and one bent pair.

    2. Spatula end or not

    Many Japanese bonsai tweezers have a small flat spatula on the other end. It’s surprisingly useful. You can press down soil after repotting, smooth and pat moss into place, scrape away surface algae, and lightly comb the top of the root ball.

    If you only buy one pair, a spatula end is worth having. Tweezers without one are usually specialized for plucking work.

    3. Steel, length and comfort

    Most bonsai tweezers are made of stainless steel, which resists rust and is easy to wipe clean. Some traditional pairs are hand-forged carbon steel, which needs a little more care but has a nice, solid feel.

    Length matters too. Longer tweezers (around 21–24 cm) reach into the middle of a tree more easily. Shorter ones (around 18 cm) are easier to control on small trees. And if you spend long sessions plucking pine needles, an ergonomic pair can make a real difference to hand fatigue.

    A few tweezer habits that matter more than the brand

    None of these cost anything.

    • Pluck, don’t yank. When removing pine needles, pull gently in the direction they grow. Yanking can tear bark.
    • Work from the inside out. Clear old needles and dead leaves from the interior first, so you can see the structure.
    • Grip near the base. Grab needles and weeds close to where they attach, for a cleaner pull.
    • Use the spatula for moss. Press, don’t rub. Rubbing tears the moss.
    • Don’t pry with the tips. Using tweezers as a lever is the fastest way to misalign them.
    • Wipe off sap. Pine sap builds up fast and makes tips stick. A damp cloth usually takes it off.
    • Store them closed and protected. Bent tips rarely line up perfectly again.

    Bonsai tweezers comparison table

    TweezersTipSpatulaLengthMaterialApprox. price
    Kaneshin No.61ABentYes~8.3 in (21 cm)Stainless~$10
    Kaneshin No.58Straight, fineYes (curved)21.5 cmHand-forged carbon steel~£18 (UK)
    Kaneshin No.64KSurgical, extended notchedNo7 in (18 cm)Black stainless~$32
    Kaneshin No.64HJErgonomicNo240 mmBlack stainless~$42
    Wazakura Tweezers with SpatulaCurvedYes21 cmStainless~£28 (UK)
    Masakuni Series 8000AngledNo200 mmCoated steel~€85 (EU)

    Prices are approximate and vary by country and seller. Always check the current price before buying.


    The 6 best bonsai tweezers, reviewed

    1. Kaneshin No.61A Bent Nose Tweezers – the best first pair

    If you want one pair of bonsai tweezers that does almost everything, start here.

    The Kaneshin No.61A is handcrafted in Japan from stainless steel, with bent tips on one end and a spatula on the other. Bonsai Tonight lists it at about $10, which is remarkable for a Japanese-made bonsai tool.

    It’s designed especially for smaller trees. The listed uses cover most everyday jobs: removing flowers, buds and leaves, weeding and cleaning the soil surface, light root work, and tucking moss edges. The spatula end helps with moss placement and light root combing.

    Pros

    • Made in Japan by a top bonsai tool brand
    • Bent tips plus spatula end
    • Stainless steel, easy to clean
    • Very affordable

    Cons

    • Bent tips aren’t ideal for every plucking job
    • Better suited to small and medium trees than very large ones

    Best for: beginners and anyone who wants one versatile pair.

    Check the Kaneshin No.61A at Bonsai Tonight


    2. Kaneshin No.58 Tweezers with Spatula – best traditional straight pair

    This is the classic straight version. The Kaneshin No.58 has fine, straight points on one end and a curved spatula on the other.

    What makes it different is the steel. It’s hand-forged carbon steel, made in Japan, and weighs about 45 g. Burford describes the straight tips as good for plucking needles and removing leaves, and the spatula for weeding and pressing down soil and moss.

    Carbon steel needs a little more care than stainless. Wipe it dry after use and give it a light coat of oil from time to time. Our bonsai tool maintenance guide covers the basics.

    Pros

    • Hand-forged in Japan
    • Fine straight tips for precise plucking
    • Curved spatula for soil and moss
    • Traditional look and solid feel

    Cons

    • Carbon steel can rust if neglected
    • Easier to find in the UK and Europe than in the US

    Best for: growers who prefer straight tips and traditional carbon steel tools.

    Check the Kaneshin No.58 at Burford


    3. Kaneshin No.64K Surgical Black Tweezers – best grip for needle work

    These look more like medical tweezers than traditional bonsai tools, and that’s the point.

    The Kaneshin No.64K is a 7-inch pair in black-dyed stainless steel, with an extended notched tip. That longer gripping surface holds small, slippery things securely, which is exactly what you want when you’re removing needles, buds or debris. Bonsai Tonight lists uses including removing spent flowers and buds, weeding and soil cleanup, and light root work.

    There’s no spatula end, so it’s a precision tool rather than an all-rounder. A plain stainless version, the No.64A, is also available.

    Pros

    • Extended notched tip for a secure grip
    • Black stainless steel, easy to clean
    • Compact length for detailed work
    • From Kaneshin, a maker with a long history

    Cons

    • No spatula end
    • Shorter length won’t reach deep into big trees

    Best for: detailed plucking work on small and medium trees.

    Check the Kaneshin No.64K at Bonsai Tonight · Check the No.64A


    4. Kaneshin No.64HJ Ergonomic Tweezers – best for long pine sessions

    If you grow pines, you already know how long needle plucking can take. This is the pair made for that.

    The Kaneshin No.64HJ is a 240 mm pair in black-dyed stainless steel, designed to reduce hand fatigue. Bonsai Tonight lists uses including plucking needles one at a time, peeling fine bark and wood fibers, and even live vein carving.

    The longer length also helps you reach into the middle of a large tree. At around $42, it’s not cheap for tweezers, but it’s still much less than most cutters, and your hand will thank you after a long session.

    Pros

    • Designed to reduce hand fatigue
    • Long 240 mm reach
    • Also useful for fine deadwood and bark work
    • Black stainless steel

    Cons

    • No spatula end
    • Pricier than basic tweezers

    Best for: pine growers and anyone who does long detail sessions.

    Check the Kaneshin No.64HJ at Bonsai Tonight


    5. Wazakura Tweezers with Spatula – best value from a Japanese artisan brand

    Wazakura works with local artisans and blacksmiths in Japan, and this pair is made in Sanjo, one of Japan’s best-known metalworking towns.

    It’s 21 cm long, with curved tips on one end and a spatula on the other. Made In Japan UK lists uses including removing dead leaves, weeds, insects and debris, positioning moss, and pressing, smoothing and leveling soil or moss during repotting. The listing describes it as stainless steel, though the care notes also mention carbon steel, so check with the seller if that matters to you.

    It was listed as sold out at Made In Japan UK when we checked, so look at other sellers too.

    Pros

    • Made in Sanjo, Japan
    • Curved tips plus spatula end
    • Good everyday length
    • Nicely finished for the price

    Cons

    • Steel type isn’t described consistently
    • Stock varies by seller

    Best for: growers who want an artisan-made, all-round pair at a fair price.

    Shop Wazakura bonsai tweezers

    *Tip: Use code **ARIBONSAI** at checkout for 10% off at Wazakura.*


    6. Masakuni Series 8000 Tweezers – the premium pick

    Masakuni is often considered the top end of Japanese bonsai tools, and its tweezers are priced accordingly.

    The Series 8000 tweezers are 200 mm long with an angled tip. Bonsai.de describes them as made from Swedish steel with a durable, stainless metal coating, which makes them rust- and corrosion-resistant. It recommends them especially for removing individual leaves from dense branches, and notes that sap wipes off easily with a damp cloth.

    At around €85, they cost many times more than the Kaneshin No.61A. Do you need them? Probably not. But if you already own Masakuni cutters and want a matching set, or you simply enjoy using the best tools, they’re a pleasure to work with. If you’re deciding between the two brands, our Kaneshin vs Masakuni comparison breaks down the differences.

    Pros

    • Premium Masakuni quality
    • Rust-resistant coated steel
    • Angled tip for dense foliage
    • Sap wipes off easily

    Cons

    • Expensive for tweezers
    • No spatula end

    Best for: collectors and advanced growers building a premium toolkit.

    Check the Masakuni Series 8000 at Bonsai.de


    Which bonsai tweezers should you buy? (By use case)

    You want one pair for everything: Kaneshin No.61A. Bent tips, spatula end, Japanese quality, about $10.

    You prefer straight tips and traditional steel: Kaneshin No.58.

    You do a lot of precise plucking on small trees: Kaneshin No.64K.

    You grow pines and spend hours plucking needles: Kaneshin No.64HJ.

    You want an artisan-made all-rounder: Wazakura Tweezers with Spatula.

    You want the best and don’t mind paying for it: Masakuni Series 8000.

    You’re repotting and need to tidy the surface: any pair with a spatula end. Pair it with a bonsai soil sieve for a clean, even soil surface.

    A simple two-pair setup

    Many growers end up with two pairs: an all-rounder with a spatula end (like the No.61A or Wazakura) for soil, moss and general cleanup, and a precision pair without a spatula (like the No.64K or No.64HJ) for plucking needles and leaves. That combination covers nearly every job.


    What you’ll use bonsai tweezers for through the year

    It helps to know when tweezers actually come out, because it shows which features matter most for your trees.

    Spring: Repotting season. You’ll use the spatula end to press soil into place and level the surface, and the tips to pull out old moss and weeds before the new soil goes in. Fine-tipped tweezers also help remove spent flowers on azaleas and flowering trees.

    Summer: Weeding and cleanup. Weeds grow fast in bonsai pots, and pulling them early, before roots spread, is much easier with tweezers than with fingers. This is also the time to pick off pests you spot on leaves.

    Autumn: Pine work. Many growers pluck old needles and thin out pines in autumn and early winter. This is where long, comfortable tweezers like the No.64HJ really earn their price.

    Winter: Detail and preparation. With leaves gone on deciduous trees, you can clean out dead leaves and debris from the interior, and tidy moss before a winter show.

    If most of your work happens in spring and summer, a spatula pair matters most. If you grow mostly pines, prioritize a long, comfortable plucking pair.


    How to care for bonsai tweezers

    Tweezers are simple, but a little care keeps the tips lined up for years.

    • Wipe them after use. Sap, soil and moss residue build up quickly.
    • Dry them completely. Especially if they’re carbon steel.
    • Oil carbon steel occasionally. A light coat prevents rust.
    • Check the tips. If they no longer meet evenly, they won’t grip small needles well.
    • Don’t drop them. A fall onto concrete can bend the tips permanently.
    • Store them in a tool roll. It protects the tips and keeps them from knocking against other tools.

    Common bonsai tweezers mistakes

    Buying the cheapest kit tweezers and stopping there. They work at first, but soft steel bends easily.

    Using tweezers as a lever. Prying soil or roots with the tips is the fastest way to ruin them.

    Pulling pine needles too hard. Gentle, steady pulls protect the bark.

    Rubbing moss instead of pressing it. Press gently with the spatula so the moss stays intact.

    Ignoring sap buildup. Sticky tips don’t grip well and get harder to clean over time.


    Conclusion: cheap upgrade, big difference

    Bonsai tweezers are one of the least expensive tools in your kit, and one of the most used. A good Japanese pair makes plucking, weeding and moss work faster, more precise and much less frustrating.

    For most people, the Kaneshin No.61A is the obvious first pair: Japanese-made, versatile and very affordable. If you grow pines, the No.64HJ is a smart second pair. And if you want a premium tool to match the rest of your kit, the Masakuni Series 8000 is hard to beat.

    Whichever you choose, keep the tips clean, don’t use them as a lever, and they’ll last for years.

    Ready to upgrade? Check the Kaneshin No.61A at Bonsai Tonight, or compare more Japanese tweezers on Amazon before your next repotting session.

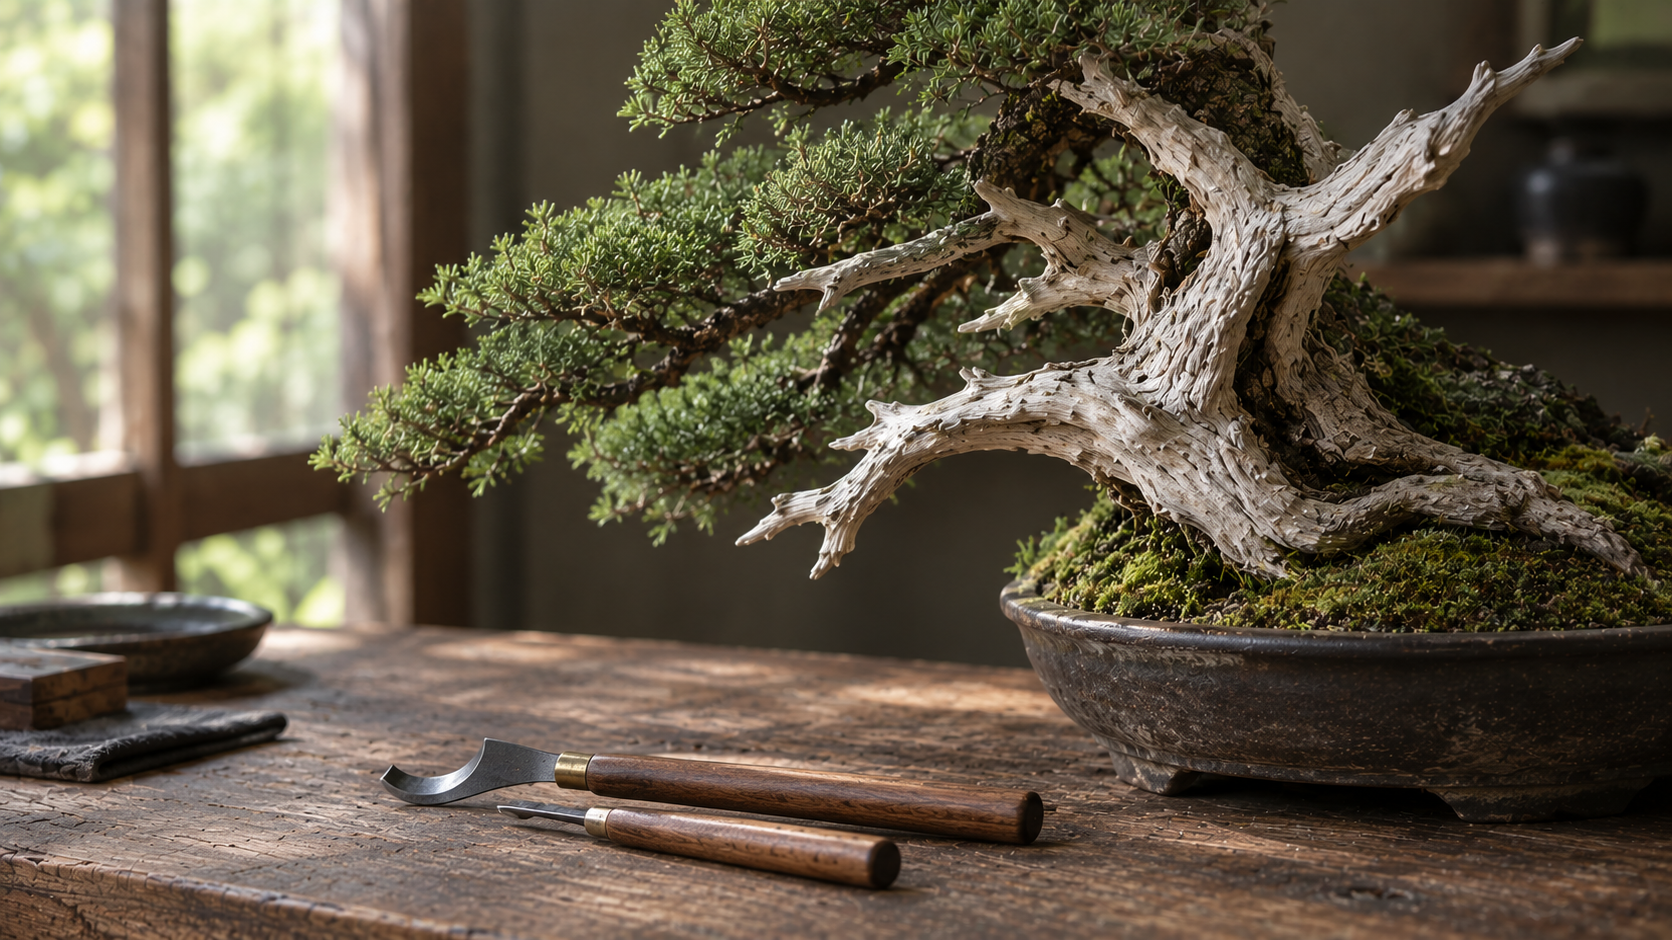
  • Best Bonsai Carving Tools in 2026: 6 Picks for Jin and Shari, From Japanese Jin Knives to Power Carving

    Best Bonsai Carving Tools in 2026: 6 Picks for Jin and Shari, From Japanese Jin Knives to Power Carving

    Affiliate disclosure: Some links on this page are affiliate links. If you buy through them, Aribonsai may earn a small commission at no extra cost to you. It doesn’t change what we recommend or how we rank anything.


    Deadwood is where bonsai starts to look old

    Bonsai carving tools are what turn a stub into a story.

    Look at almost any famous juniper or pine and you’ll see deadwood: bleached jin at the branch tips, long shari running down the trunk, hollows and grain that make the tree look like it’s survived a century on a mountainside. That character doesn’t happen by accident. Most of it is carved.

    The trouble is that carving looks intimidating from the outside. Do you need a power tool? A set of chisels? Special Japanese knives? And how do you avoid ending up with something that looks gouged rather than weathered?

    The good news is you can start small. A single jin knife and a little patience will take you surprisingly far. Power carving comes later, if at all.

    In my experience, the people who struggle most with deadwood aren’t the ones with cheap tools. They’re the ones who reach for the biggest tool first and remove too much wood in one go. This guide explains what actually matters, then compares six bonsai carving tools, from simple Japanese jin knives to rotary bits for heavy work.


    Who this bonsai carving tools guide is NOT for

    It’s not for wiring or stripping small branches. For peeling bark off thin jin and crushing fibers, bonsai jin pliers are usually the better tool. Carving tools come in when you’re shaping wood, not just stripping it.

    It’s not a full power-carving guide. We’ll cover the basics and one rotary option, but serious power carving (die grinders, chainsaw wheels) is a separate skill with real safety risks.

    It’s not for general woodworking. Some of these tools look like woodworking chisels, but this guide is about using them on living trees and deadwood.

    Still with us? Let’s go.


    How we picked these (3 things that actually matter)

    1. Hand tools or power tools

    This is the big decision.

    • Hand carving tools (jin knives, gouges, chisels, draw knives) are quiet, cheap and very controllable. They’re best for stripping bark, defining the lifeline, and refining detail. They’re slow on large areas.
    • Power carving tools (rotary bits in a Dremel-type tool or die grinder) remove wood quickly. They’re best for big trunks, hollows and heavy shaping. They’re also much easier to overdo, and they need eye protection, gloves and practice.

    Most experienced carvers use both. On bonsai forums, a common pattern is power tools for rough shaping, and hand tools and scrapers for the final detail that makes deadwood look natural.

    2. Blade shape and job

    Each hand tool has a job.

    • Jin knives remove bark and mark the edge between living and dead tissue (the lifeline).
    • Gouges (U-shaped blades) scoop out grooves and hollows.
    • V-parting tools cut sharp grooves that follow the grain.
    • Draw knives pull long strips of wood and bark, useful for making jin.
    • Skew chisels clean up flat areas and edges.

    You don’t need all of them. Start with a jin knife, then add a gouge or two as you need them.

    3. Steel, sharpness and origin

    Sharp tools are safer than dull ones, because you use less force. Look for tools that come pre-sharpened, and check whether the blade is stainless (rust-resistant) or carbon steel (often easier to sharpen, but needs oiling).

    Origin varies. Several tools here are made in Japan by bonsai specialists. Others are sold under bonsai brands without a clear country of origin. We’ve labeled each one as clearly as we can.

    A few carving habits that matter more than the tool

    None of these cost anything.

    • Carve less than you think. You can always remove more wood. You can’t put it back.
    • Follow the grain. Natural deadwood splits and weathers along the grain. Carving against it looks artificial.
    • Protect the lifeline. Never carve into the living strip of bark that feeds the branch above. Mark it clearly before you start.
    • Tear, don’t just cut. Many carvers pull fibers with pliers after cutting, so the wood looks broken by nature rather than sliced.
    • Work on dry deadwood where possible. Several Japanese tool makers describe their jin and shari tools as ideal for dry wood.
    • Finish before you treat. Lime sulfur and other deadwood treatments go on after carving, not before.
    • Practice on scrap. A dead branch from the garden is a free place to learn how each tool behaves.

    Bonsai carving tools comparison table

    ToolTypeBest forOriginApprox. price
    Kikuwa Jin Knife (2281 / 2282)Hand, jin knifeStripping bark, lifelinesJapan~$28
    Kaneshin Jin & Shari Tip (190 mm)Hand, jin toolDebarking, pulling jinJapan~€39 (EU)
    Japanese gouges & draw knife (Bonsai Tonight)Hand, gouges/knivesGrooves, hollows, long jinJapanCheck current price
    Wazakura 3-Piece Chisel KitHand, chiselsGrooves and detail on a budgetJapan (Miki)Check current price
    Ryuga Hand Carving ToolsHand, scrapersJin, shari and flaky barkNot stated~£7.50 each / £80 set of 6 (UK)
    Rotary shapers for Dremel-type toolsPower, rotary bitsHollows and heavy shapingNot stated~€26–100 per bit (EU)

    Prices are approximate and vary by country and seller. Always check the current price before you buy.


    The 6 best bonsai carving tools, reviewed

    1. Kikuwa Jin Knife – the best first carving tool

    If you buy one carving tool, make it a jin knife. And Kikuwa’s jin knives, sold in the US by Bonsai Tonight, are a very good place to start.

    They’re made in Japan, double-sided and come pre-sharpened. The 8.25-inch models have stainless steel blades, so they resist rust, which matters when you’re working on wet bark. Bonsai Tonight describes them as tools for removing bark completely, defining the lifeline, and creating deadwood.

    There are two versions: a standard jin knife (2281) and a narrow-tip version (2282). The narrow tip is better in tight areas and for fine lifeline work. Longer 10-inch versions are also listed.

    Pros

    • Made in Japan, pre-sharpened
    • Stainless steel blade resists rust
    • Standard and narrow-tip options
    • Affordable for a Japanese specialist tool

    Cons

    • Slow on large areas of wood
    • Sharp double-sided blade needs careful handling

    Best for: beginners and anyone starting jin and shari work.

    Check the Kikuwa Jin Knife at Bonsai Tonight


    2. Kaneshin Jin & Shari Tip – best Japanese debarking tool

    Kaneshin is one of the best-known Japanese bonsai tool makers, and its jin and shari tools are aimed at experienced growers.

    The 190 mm Jin & Shari Tip has a blade designed to pull and debark branches when creating jin. The seller describes it as ideal for working on dry bonsai wood and labels it a professional tool for experts. There’s also a 260 mm wide-blade version for larger areas, though it was out of stock when we checked.

    It’s easier to find in Europe than in the US, at around €39.

    Pros

    • Made in Japan by a leading bonsai tool brand
    • Designed specifically for jin and shari
    • Wide-blade version available for bigger trees

    Cons

    • Harder to find in the US
    • More specialized than a standard jin knife

    Best for: experienced growers who already use Kaneshin tools and want a dedicated deadwood tool.

    Check the Kaneshin Jin & Shari Tip at Pollice Verde


    3. Japanese gouges, carving knives and draw knife – best for building a real kit

    Once you’ve used a jin knife for a while, you’ll want tools that can shape wood, not just strip bark. Bonsai Tonight sells a range of Japanese-made hand carving tools for this.

    The range includes spoon gouges (rounded and pointed tips), curved and pointed carving knives, and a draw knife. The gouges scoop out grooves and hollows. The pointed knife can strip upper bark layers while leaving live tissue below, if used carefully. The draw knife pulls long strips of wood and can be used to create jin.

    All of them come pre-sharpened. Bonsai Tonight also offers a discounted basic carving kit if you’d rather not choose tool by tool.

    Pros

    • Made in Japan
    • Covers grooves, hollows and long jin
    • Pre-sharpened
    • Starter kit available

    Cons

    • Buying several tools adds up
    • Takes practice to learn which tool does what

    Best for: intermediate growers ready to go beyond a single jin knife.

    Check carving tools at Bonsai Tonight


    4. Wazakura 3-Piece Chisel Kit – best value Japanese chisel set

    Wazakura is a Japanese brand of bonsai and garden tools, and this kit comes from an artisan workshop in Miki, Hyogo, a region known for blade making.

    The set includes three tools: a V-parting chisel with a 90-degree triangular blade, a single-bevel skew chisel, and a round gouge. Together, they cover the main hand-carving jobs: sharp grooves along the grain, cleaning edges and flat areas, and scooping out rounded hollows.

    It’s a good way to try several carving shapes without buying each tool separately. Prices vary between sellers, so compare before you buy.

    Pros

    • Made in Miki, Japan
    • Three useful shapes in one kit
    • Good value for Japanese-made tools

    Cons

    • Smaller than professional gouges, so better for detail than heavy work
    • Availability and price vary by seller

    Best for: beginners and value-minded growers who want a small Japanese chisel set.

    Shop Wazakura bonsai chisel kit

    *Tip: Use code **ARIBONSAI** at checkout for 10% off at Wazakura.*


    5. Ryuga Hand Carving Tools – budget scrapers for jin, shari and bark

    Ryuga is a bonsai tool brand sold by several European retailers. Its hand carving tools are inexpensive and practical, though the listings we checked don’t state where they’re made.

    Bonsai4me sells a single 160 mm Ryuga carving tool, described as great for making jin and shari and for peeling off flaky bark, for around £7.50. A set of six 160 mm tools with wooden handles is also available for about £80, and longer 190–195 mm versions are listed too.

    They’re a low-risk way to try hand carving, or to add a few extra shapes to a kit.

    Pros

    • Very affordable single tools
    • Set of six available
    • Useful for jin, shari and flaky bark

    Cons

    • Origin and steel not stated
    • Mainly sold in Europe and the UK

    Best for: budget-conscious growers, especially in the UK and Europe.

    Check Ryuga carving tools at Bonsai4me


    6. Rotary shapers for Dremel-type tools – best for heavy shaping (advanced)

    At some point, hand tools become slow. If you’re working on a big collected juniper or hollowing a thick trunk, rotary carving bits are how most carvers speed things up.

    Bonsai specialty shops sell a wide range of these. Bonsai.de, for example, lists milling heads and shapers with 3 mm shanks (for Dremel-type rotary tools) and 6 mm shanks (for larger tools), at roughly €26–100 per bit. Some are described for use with “the Dremel and similar tools.” Brush wheels in brass, steel and horsehair are also sold for cleaning and finishing deadwood.

    On bonsai forums, experienced carvers often describe a Dremel as a detail tool and a die grinder as the tool for heavier work, with a strong warning to practice on scrap wood first. Power tools remove wood very fast, and they can kick back.

    Pros

    • Much faster than hand tools
    • Wide range of shapes and sizes
    • Brush wheels help finish deadwood

    Cons

    • Easy to overdo and leave tool marks
    • Needs eye protection, gloves, and dust protection
    • Origin of most bits isn’t stated
    • You also need the rotary tool itself

    Best for: advanced growers working on large trunks, hollows and collected trees.

    Check carving bits at Bonsai.de · Search rotary carving bits on Amazon


    Which bonsai carving tools should you buy? (By use case)

    You’re new to deadwood: Kikuwa Jin Knife. Add a pair of jin pliers and you can make convincing jin on most branches.

    You want a Japanese tool for debarking: Kaneshin Jin & Shari Tip.

    You’re ready to carve grooves and hollows: Japanese gouges and a draw knife from Bonsai Tonight, or the starter kit.

    You want a small Japanese chisel set on a budget: Wazakura 3-Piece Chisel Kit.

    You’re in the UK or Europe and want cheap tools to experiment with: Ryuga hand carving tools.

    You’re working on big collected trees: Rotary shapers in a Dremel-type tool or die grinder, followed by hand tools for refinement.

    You want a “pro” setup: A jin knife, two or three gouges, jin pliers, and a rotary tool with a few bits. That covers almost every deadwood job.

    A simple starter kit

    For most growers, a sensible first kit is a jin knife, a pair of jin pliers and one small gouge. That’s enough to make jin, define shari, and add a little texture. Add power tools only once you’re comfortable with hand carving and have a tree that really needs them. If you’re still building your basic toolkit, our bonsai starter tool set guide is a good place to begin.


    How to care for bonsai carving tools

    Carving tools take a lot of punishment. A few habits keep them sharp and safe.

    • Clean off sap and debris after every session. Sap dulls blades and attracts rust.
    • Dry and oil carbon steel blades. Even stainless blades benefit from a wipe and a light coat of oil. Our bonsai tool maintenance guide covers oils, rust erasers and sharpening stones.
    • Hone little and often. A few strokes on a fine stone keeps an edge much better than occasional heavy sharpening.
    • Protect the edges. Store tools in a roll or with blade covers so they don’t knock against each other.
    • Clean rotary bits. Resin and wood fibers clog bits. A brass brush helps.

    Common bonsai carving mistakes

    Carving too much, too soon. The most common mistake by far. Take a little, step back, look, then decide.

    Cutting into the lifeline. A slip with a sharp tool can kill a branch. Mark the lifeline and keep your tools away from it.

    Leaving tool marks. Smooth, regular cuts look man-made. Tear fibers and follow the grain for a more natural finish.

    Using power tools without protection. Eye protection is not optional. Wood chips and broken bits travel fast.

    Treating deadwood before you’re finished. Finish carving first, then apply lime sulfur or other treatments.


    Conclusion: start with a knife, earn the power tools

    Bonsai carving tools can look like a big investment, but you don’t need a full kit to start. A good Japanese jin knife and a pair of jin pliers will handle most early deadwood work and teach you how wood behaves.

    For most people, the Kikuwa Jin Knife is the right first tool. Add Japanese gouges or the Wazakura chisel kit as you start shaping grooves and hollows. And if you eventually take on big collected trees, rotary bits will save hours, as long as you use them carefully and finish by hand.

    Whichever tools you choose, go slowly, follow the grain and protect the lifeline. Good deadwood isn’t about how much wood you remove. It’s about making the tree look like nature did it.

    Ready to start carving? Check the Kikuwa Jin Knife at Bonsai Tonight, or browse Japanese carving tools before your next deadwood session.

  • Best Bonsai Saw in 2026: 6 Japanese Folding Saws, From Pocket Size to Trunk Chops

    Best Bonsai Saw in 2026: 6 Japanese Folding Saws, From Pocket Size to Trunk Chops

    Affiliate disclosure: Some links on this page are affiliate links. If you buy through them, Aribonsai may earn a small commission at no extra cost to you. It doesn’t change what we recommend or how we rank anything.


    When your cutters aren’t enough

    Sooner or later, every bonsai grower hits a branch that’s too thick to cut.

    You line up your concave cutter, squeeze, and nothing happens. Or worse, it bites halfway and you start twisting the handles. That’s how good tools get damaged, and how trees end up with crushed, torn wounds that take years to heal.

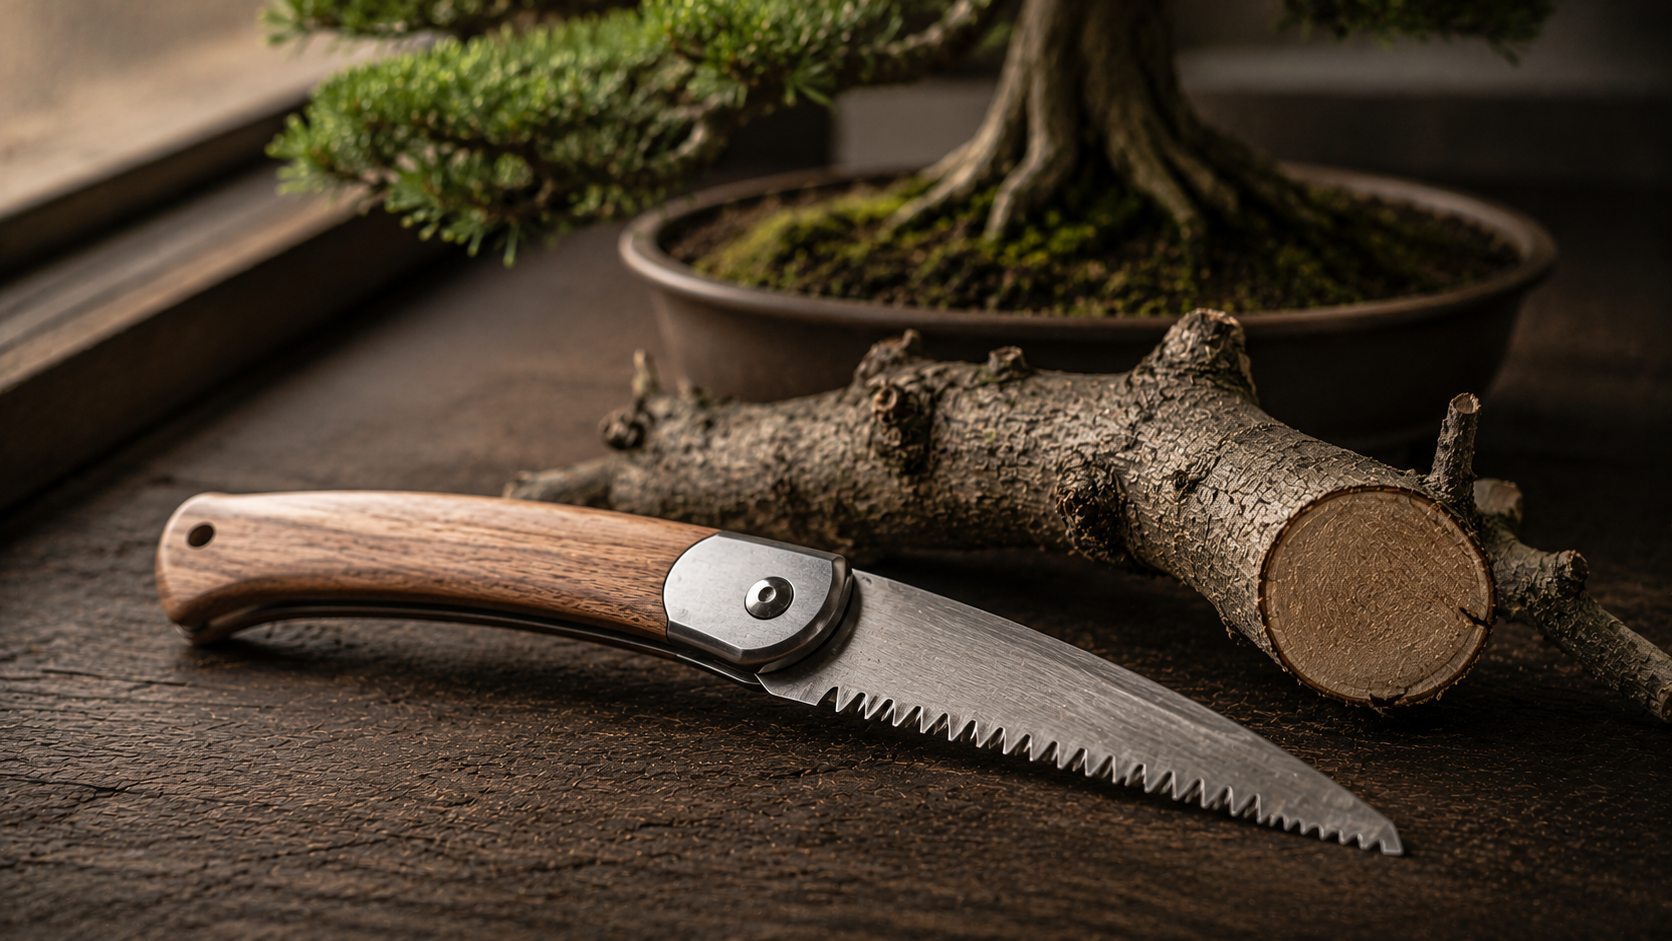
    That’s what a bonsai saw is for. It handles the thick branches, trunk chops and stubborn roots that cutters shouldn’t be asked to do. And because Japanese saws cut on the pull stroke, they leave a clean, controlled cut, even in tight spaces between branches.

    The problem is choice. Search for a “bonsai saw” and you’ll find tiny folding saws, ikebana saws, general garden pruning saws, and big saws made for tree surgeons. Some are clearly made in Japan, some aren’t, and the blade lengths range from about 10 cm to over 20 cm.

    In my experience, the most common mistake is buying a saw that’s too big. A large pruning saw is great in the garden, but it won’t fit between the branches of a small tree. This guide explains what actually matters, then compares six Japanese folding saws, from compact bonsai-specific models to bigger saws for heavy work.


    Who this bonsai saw guide is NOT for

    It’s not for carving deadwood. Saws make straight cuts. If you want to create jin and shari, you’ll need carving tools, and our bonsai jin pliers guide covers the hand tools for that.

    It’s not for air-layering tools. Some Japanese makers sell special saws and rasps for air layering. Those are a different tool with a different job.

    It’s not for landscape tree work. If you’re cutting down garden trees or large limbs, you need a full-size pruning saw. This guide is about saws sized for bonsai.

    Still with us? Let’s go.


    How we picked these (3 things that actually matter)

    1. Blade length and shape

    This is the big one.

    • Short blades (about 10–13 cm) fit between branches and are easy to control. They’re ideal for most bonsai work, especially on smaller trees.
    • Medium blades (about 15–18 cm) cut faster and handle thicker wood, but need a bit more room.
    • Long blades (20 cm and up) are for heavy work: trunk chops, collected trees, big roots. They’re overkill for most everyday bonsai jobs.

    Shape matters too. A narrow blade reaches tight spots more easily. A slightly curved blade can pull itself into the cut. Some bonsai saws have an angled blade, which helps with awkward positions.

    2. Tooth size

    Finer teeth give a smoother cut but work more slowly. Coarser teeth cut faster but leave a rougher surface.

    For bonsai, smooth is usually better. A clean cut heals more neatly, and it’s easier to tidy with a knife or concave cutter afterward. That’s why most bonsai-specific saws use fine teeth, while general pruning saws often use medium or coarse teeth.

    3. Folding, locking and quality

    Almost every saw here folds, which protects the blade and your hands. Check that it locks firmly open, because a blade that wobbles makes control harder.

    Origin and steel matter too. Japanese saw makers are known for impulse-hardened teeth and high-carbon steel blades. Some Japanese saws also offer replacement blades, which means you can keep the handle for years. We’ve noted where we could confirm origin and details.

    A few bonsai saw habits that matter more than the brand

    None of these cost anything.

    • Let the pull stroke do the work. Japanese saws cut when you pull. Pushing hard just bends the blade.
    • Use light pressure. A sharp saw needs very little force. Pressing hard makes the cut wander.
    • Cut long, then refine. Many growers leave a short stub with the saw, then clean it up with a concave cutter or knob cutter. It’s safer than trying to make a perfect flush cut in one go.
    • Support the branch. Hold or support heavy branches so they don’t tear bark as they fall.
    • Undercut first on bigger limbs. A small cut on the underside first helps stop bark tearing.
    • Clean the blade after use. Sap builds up quickly on saw teeth. Wipe it off, dry the blade, and oil it before storing.
    • Seal big wounds. After a large cut, many growers use a cut paste to protect the wound.

    Bonsai saw comparison table

    SawBlade lengthTeethBest forOriginApprox. price
    Kaneshin Bonsai Saw~10–11 cmFineEveryday bonsai workJapan~$25–36
    Kaneshin Narrow Folding Saw (KN84D)15.5 cmFineTight spots, awkward anglesJapan~€42 (EU)
    ARS IK-10-R~12.7 cm (5 in)FineSmall trees, precise cutsJapan~$30
    Silky Pocketboy 13013 cmMediumAll-round use, faster cuttingJapan~$25–45
    Wazakura Bonsai Folding Saw25 cm overallFineValue Japanese pickJapan (Miki)~£30 (UK)
    Silky Gomboy 21021 cmMediumTrunk chops, collected treesJapan~$64

    Prices are approximate and vary by country and seller. Always check the current price before buying.


    The 6 best bonsai saws, reviewed

    1. Kaneshin Bonsai Saw – the standard choice for most people

    Kaneshin is one of the best-known Japanese bonsai tool makers, and its small folding saw is the one you’ll see in a lot of bonsai tool rolls.

    The blade is short, around 10 cm (Niwaki lists 100 mm, and Wigert’s lists 108 mm). It cuts on the pull stroke with fine teeth, which leave a clean surface. Niwaki describes the blade as impact-hardened carbon steel with a rust-resistant coating and beech handles, and the whole saw weighs under 60 g. Folded, it fits in a pocket.

    Because the blade is short, it’s not the fastest saw for very thick wood. But for the cuts most bonsai growers make, it’s easy to control and fits where bigger saws can’t.

    Pros

    • Sized specifically for bonsai
    • Fine teeth leave a clean cut
    • Very light and compact
    • Made in Japan by a well-known bonsai brand

    Cons

    • Short blade is slow on very thick branches
    • Replacement blade availability isn’t clearly listed

    Best for: almost everyone, especially if you want one dedicated bonsai saw.

    Check the Kaneshin saw at Wigert’s Bonsai · Check it at Niwaki


    2. Kaneshin Narrow Folding Saw (KN84D) – best for tight spots

    This is Kaneshin’s longer, narrower option. The blade is 155 mm, and it’s set at a slightly inclined angle, which Laos Garden says helps it reach difficult areas of the tree.

    That combination is useful on dense trees, where a branch you want to remove is surrounded by others. The narrow blade slips into small gaps, and the angle makes it easier to keep the saw straight without hitting nearby branches.

    It’s easier to find in Europe than in the US. If you’re in North America, check bonsai specialty shops or search for the model number.

    Pros

    • Narrow blade reaches tight spaces
    • Angled design helps in awkward positions
    • Longer than the standard Kaneshin saw, so it cuts faster

    Cons

    • Harder to find in the US
    • Pricier than the basic Kaneshin model

    Best for: growers with dense, mature trees who need to reach inside the canopy.

    Check the Kaneshin KN84D at Laos Garden


    3. ARS IK-10-R – best compact saw for small trees

    ARS is a Japanese maker of pruning tools, and this compact folding saw is sold for ikebana and bonsai. The blade is 5 inches long and straight, with fine teeth designed for clean, precise cuts on delicate plants. It weighs about 0.31 lb.

    It’s a good fit for smaller trees and shohin, where you need precision more than speed. Gemplers lists it at around $30 in the US.

    ARS also makes a larger bonsai folding saw with a 7-inch blade, which Bonsai Learning Center sells. That one is a good step up if you want more cutting power from the same brand.

    Pros

    • Compact and precise
    • Fine teeth for clean cuts
    • Reasonably priced and easy to find in the US
    • Larger ARS model available if you need more length

    Cons

    • Small blade is slow on thick wood
    • Less bonsai-specific branding than Kaneshin

    Best for: shohin and small-tree growers who want a precise, affordable saw.

    Check the ARS IK-10-R at Gemplers · Check the 7-inch ARS bonsai saw at Bonsai Learning Center


    4. Silky Pocketboy 130 – best all-rounder for faster cuts

    Silky is one of the best-known Japanese saw brands, popular with arborists, gardeners and hikers. The Pocketboy also comes up in bonsai forums as a recommended saw for branch cutting.

    The 130 mm version has a slightly curved blade with medium teeth. That makes it faster than the fine-toothed bonsai saws, but the cut is a little rougher. The blade opens to two positions and locks in place, so it’s comfortable to use at different angles. A longer 170 mm version is also available.

    It’s a great choice if you also do garden pruning, or if you want one saw that handles both bonsai and general tree work.

    Pros

    • Faster cutting than fine-tooth bonsai saws
    • Locks in two positions
    • Trusted Japanese saw brand
    • Useful beyond bonsai

    Cons

    • Medium teeth leave a rougher surface, so plan to clean up the cut
    • Slightly bulkier than bonsai-specific saws

    Best for: growers who want one versatile saw for bonsai and garden work.

    Search Silky Pocketboy on Amazon


    5. Wazakura Bonsai Folding Saw – best value Japanese pick

    Wazakura is a Japanese brand of garden and bonsai tools, and this folding saw is made in Miki, Hyogo, a region famous for blade making.

    The saw is 25 cm long when open and 14.5 cm folded. It uses an SK5 steel blade with finely sharpened teeth and a natural birch handle. The maker positions it for both bonsai branch pruning and general garden maintenance, and it’s light enough to keep in a tool bag.

    At around £30 in the UK, it’s an affordable way to get a Japanese-made saw. It was listed as sold out at Made In Japan UK when we checked, so check other sellers too.

    Pros

    • Made in Miki, a traditional Japanese blade-making region
    • SK5 steel with fine teeth
    • Good value
    • Natural wood handle

    Cons

    • Blade length on its own isn’t clearly listed
    • Stock varies by seller

    Best for: beginners and value-minded growers who want a Japanese-made saw.

    Check the Wazakura Bonsai Folding Saw at Wazakura →*Tip: Use code **ARIBONSAI** at checkout for 10% off at Wazakura.*


    6. Silky Gomboy 210 – best for trunk chops and heavy work

    This is the “big gun” of the list. The Silky Gomboy 210 has an 8.3-inch high-carbon steel blade with medium teeth. It’s made for real pruning work, not delicate trimming.

    You won’t use it every week. But if you work on collected trees, raw nursery stock, or big trunk chops, a small saw quickly becomes frustrating. The Gomboy gets through thick wood much faster. It weighs about 0.7 lb.

    It’s also the most expensive saw on this list, at around $64 in the US. For most hobbyists, it’s a second saw, not a first.

    Pros

    • Cuts thick wood quickly
    • Strong high-carbon steel blade
    • Excellent for collected trees and nursery stock
    • Replacement blades are sold separately

    Cons

    • Too big for fine work inside a tree
    • Medium teeth leave a rougher cut
    • Highest price here

    Best for: advanced growers working with collected trees, big trunk chops or heavy root work.

    Check the Silky Gomboy 210 at Knife Country USA · Search Silky Gomboy on Amazon


    Which bonsai saw should you buy? (By use case)

    You want one bonsai saw for most jobs: Kaneshin Bonsai Saw. It’s the standard choice for a reason.

    You grow shohin or small trees: ARS IK-10-R. Compact, precise and affordable.

    Your trees are dense and hard to reach inside: Kaneshin Narrow Folding Saw (KN84D).

    You want one saw for bonsai and garden pruning: Silky Pocketboy 130.

    You’re on a budget but still want a Japanese saw: Wazakura Bonsai Folding Saw.

    You work on collected trees or big nursery stock: Silky Gomboy 210, paired with a small bonsai saw for detail work.

    You’re cutting thick roots during repotting: a small saw works well for big roots that are too thick for a root cutter. A medium-tooth saw like the Pocketboy handles soil and grit a little better than a fine-tooth one.

    A simple two-saw setup

    If you’re serious about bonsai, two saws cover almost everything: a small fine-toothed bonsai saw (like the Kaneshin or ARS) for detail work, and a larger saw (like the Pocketboy or Gomboy) for heavy cuts. Most growers start with the small one and only add the big one when they start working with raw material.


    How to care for a bonsai saw

    A good Japanese saw lasts a long time if you treat it well.

    • Wipe off sap after every use. Sap hardens quickly and makes the teeth less effective.
    • Dry the blade completely. Moisture causes rust, especially on carbon steel.
    • Oil it before storage. A light coat of tool oil protects the blade. Our bonsai tool maintenance guide covers oils and rust erasers.
    • Don’t cut wire, stone or metal. Hard materials damage the teeth quickly.
    • Store it folded. It protects the teeth and your fingers.
    • Replace the blade when it’s dull. Japanese saw teeth are usually hardened and hard to sharpen at home. If your saw takes replacement blades, that’s often the easiest option.

    Common bonsai saw mistakes

    Using cutters on wood that’s too thick. It damages both the tool and the tree. If it doesn’t cut easily, switch to a saw.

    Pushing instead of pulling. Japanese saws cut on the pull. Pushing bends the blade.

    Trying to make a flush cut in one go. Leave a little stub, then refine with a cutter.

    Buying a saw that’s too big. It won’t fit inside the tree, and you’ll end up hitting other branches.

    Forgetting to clean the blade. Sap and moisture shorten a saw’s life more than anything else.


    Conclusion: start small, then add power

    A bonsai saw isn’t an exciting tool. But it protects your cutters, and it gives you clean cuts on branches that would otherwise end up crushed or torn.

    For most people, the Kaneshin Bonsai Saw is the right first choice: small, precise and made for bonsai. If you grow small trees, the ARS IK-10-R is a great alternative. And once you start working with collected trees or big nursery stock, adding a larger saw like the Silky Gomboy 210 makes heavy cuts much easier.

    Whichever you choose, use light pressure, let the pull stroke do the work, and clean up the cut afterward. That’s what turns a big cut into a scar nobody notices.

    Ready to upgrade your toolkit? Check the Kaneshin bonsai saw at Wigert’s Bonsai, or compare Silky saws on Amazon before your next big pruning session.

  • Best Bonsai Cut Paste in 2026: 6 Wound Sealants Compared, From Kiyonal to Top Jin M

    Best Bonsai Cut Paste in 2026: 6 Wound Sealants Compared, From Kiyonal to Top Jin M

    Affiliate disclosure: Some links on this page are affiliate links. If you buy through them, Aribonsai may earn a small commission at no extra cost to you. It doesn’t change what we recommend or how we rank anything.


    You made the big cut. Now what?

    Bonsai cut paste is one of those supplies nobody thinks about until the moment they need it.

    You’ve just removed a thick branch with a concave cutter. The cut is clean, the tree looks better already, and then you notice the wound. It’s wet. It’s bigger than you expected. And on a small tree, a scar that size is going to be visible for years.

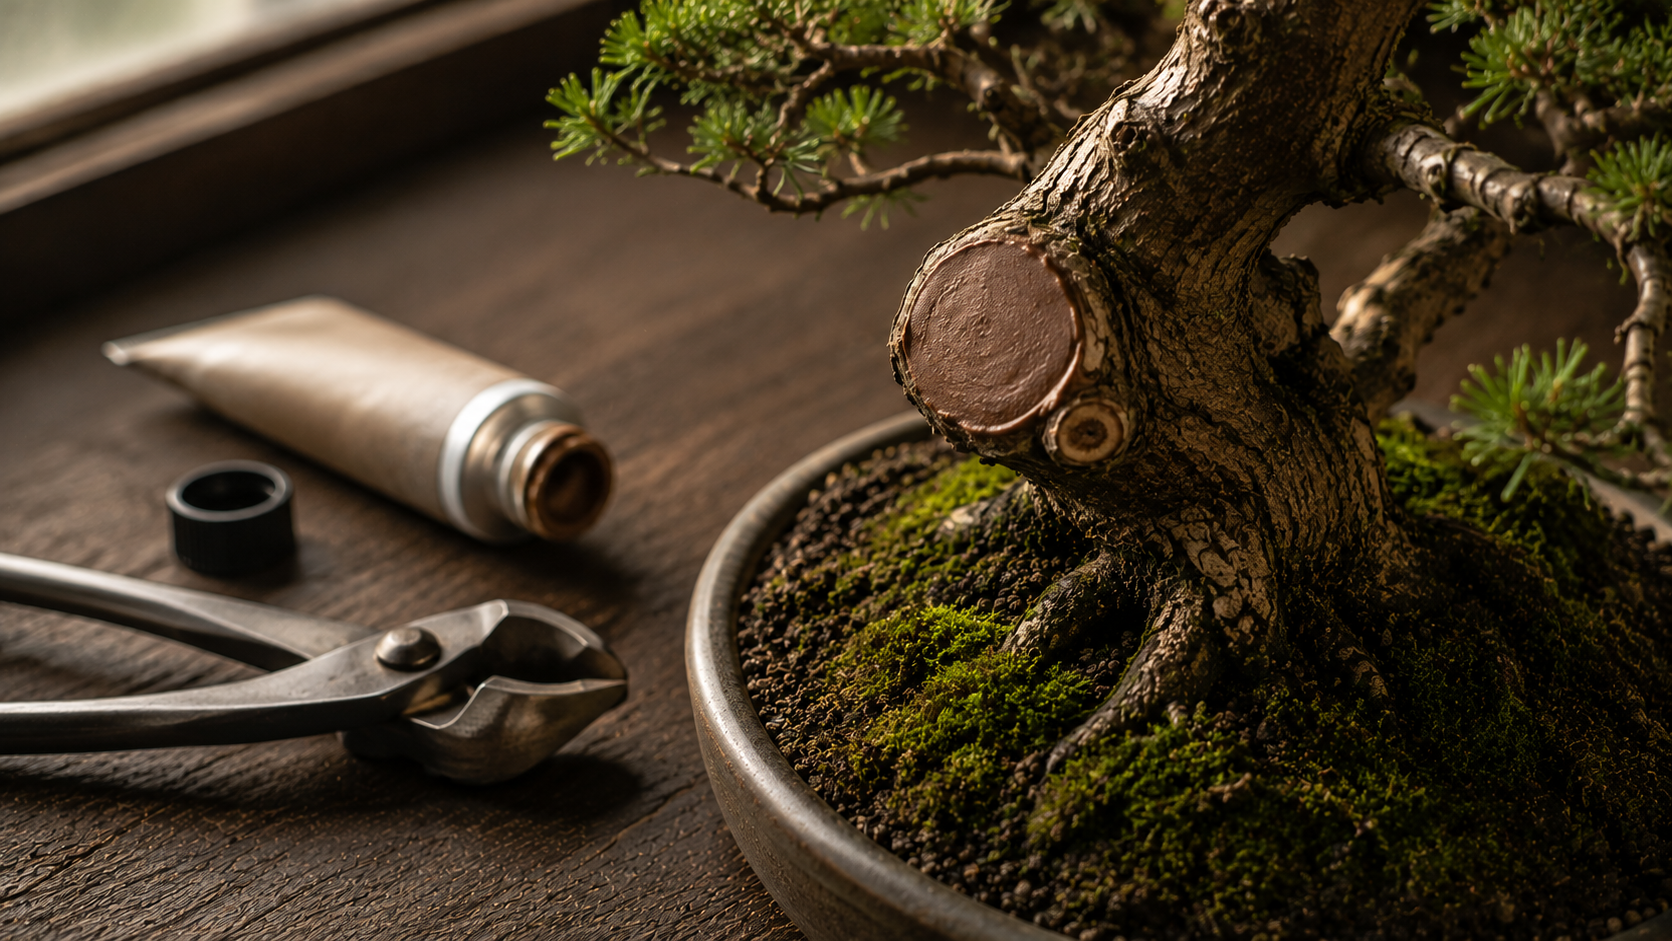
    That’s the job of a bonsai cut paste. It covers the fresh wound, keeps it from drying out and cracking, and helps the tree roll a smooth callus over the cut. On a landscape tree, a scar doesn’t matter much. On a bonsai, where every inch of trunk is on show, it matters a lot.

    The tricky part is that “cut paste” isn’t one product. There are soft putties you press on with your fingers, liquid sealers you brush on, pastes that stay soft for a year, and ones that dry hard. Some contain fungicides. Some are made for specific trees, like junipers or azaleas. And the names don’t help: Kiyonal, Kiyonaru, Cut Paste Hi, Top Jin M, Callus Mate, Kirikuchi-Naoru.

    In my experience, most people buy whichever tube their local shop has, then wonder why it cracked, or why it looks bright orange on a dark pine. This guide sorts out the main types, then compares six bonsai cut paste options, from everyday all-rounders to species-specific Japanese sealers.


    Who this bonsai cut paste guide is NOT for

    It’s not for landscape or orchard trees. Many arborists advise against wound dressings on garden trees and prefer to let them seal naturally. Bonsai is a different situation, because the goal is a clean, nearly invisible scar on a small trunk. This guide is written for bonsai only.

    It’s not a pest or disease treatment guide. Some of these pastes contain fungicides or insecticides, but they’re wound sealers, not cures. If a tree is already sick, a paste won’t fix it.

    It’s not for people who never make big cuts. If you only pinch shoots and trim twigs, you can probably skip paste for now. It becomes important once you start removing branches, carving, or doing heavy root work.

    Still here? Let’s go.


    How we picked these (3 things that actually matter)

    1. Putty or liquid

    This is the main choice, and it affects everything else.

    • Putty (clay-type) cut paste is thick and soft, a bit like modeling clay. You roll a small piece between your fingers and press it into the wound. It’s best on large cuts and hollows, and most types stay soft for a long time, so they flex as the tree grows.
    • Liquid (or semi-liquid) cut paste comes in a tube or bottle, sometimes with a brush. It spreads thinly and gets into small cuts easily. Some liquids stay slightly soft; others dry hard.

    As a general rule, retailers recommend putty for big wounds and liquid for both large and small ones. Many serious hobbyists keep one of each.

    2. Soft-setting or hard-setting

    This matters more than people expect.

    A bonsai cut paste that stays soft (or semi-dry) is less likely to crack as the callus grows underneath. A paste that dries hard forms a tougher shell, which some growers prefer for certain species, but it can split as the wound edges swell. Several of the Japanese products below are designed to stay tacky for a while for exactly this reason.

    There’s also the question of what’s inside. Some pastes include fungicides or insecticides. That’s useful protection, but it also means you should read the label, keep it away from kids, and check that the product can be legally shipped to your country.

    3. Color and the species you grow

    Color sounds cosmetic, but on a bonsai it’s practical. A bright paste on a dark trunk draws the eye straight to the wound for months.

    Japanese makers have responded with species-specific products. There are pastes colored for juniper and pine bark, pastes designed for satsuki azaleas, and formulas aimed at deciduous trees. You don’t need one for every species, but if most of your collection is one type, a matched paste is a nice upgrade.

    A few cut paste habits that matter more than the brand

    None of these cost anything, and they make a bigger difference than switching products.

    • Cut cleanly first. Paste works best on a clean, sharp cut. A ragged wound heals poorly no matter what you cover it with. A sharp bonsai concave cutter or knob cutter does half the work.
    • Clean up the edges. Many growers tidy the bark edges around a big cut with a sharp knife before applying paste, so the callus has a smooth line to grow from.
    • Seal soon after cutting. Most manufacturers say to apply paste to fresh wounds. Waiting a few days lets the exposed wood dry out.
    • Cover the edge, not just the middle. The living layer just under the bark, at the edge of the wound, is what heals. Make sure the paste covers it.
    • Keep it thin with liquids. Thick globs of liquid paste can crack. Some makers recommend just 1–2 mm.
    • Wet your finger. Several Japanese pastes suggest smoothing the surface with a damp finger, which keeps it neat and stops it sticking to you.
    • Check it after a few months. If the paste has split as the callus grows, add a little more.

    Bonsai cut paste comparison table

    ProductTypeSetsBest forTypical sizeApprox. price
    KiyonalLiquid / soft paste (green)Semi-dry, flexibleAll-round everyday use100 g tube~$15–40, varies by seller
    Cut Paste HiPutty (brown or gray)Stays softLarge cuts, hollows, carving190 g / 500 g tub~$15–16
    Callus MatePaste (dark brown)Quick-dryingJunipers, pines, satsuki100 g / 150 g tube~€14 (EU)
    Top Jin MLiquid (orange)Dries hardAzaleas, deciduous, tropicalsTube / 200 ml~$20
    Kirikuchi-NaoruLiquid (green) or puttyLiquid dries hardHard-to-heal trees like quinceVariesCheck seller
    Lac BalsamPaste, “artificial bark”HardensRoot wounds, budget backup150–200 g tube~€7 (EU)

    Prices are approximate and vary a lot between countries and sellers. Always check the current price before you buy.


    The 6 best bonsai cut paste options, reviewed

    1. Kiyonal – the all-rounder most people should start with

    If you only buy one bonsai cut paste, Kiyonal is the usual answer. It’s a Japanese wound paste sold by bonsai shops across Europe and the US, and you’ll also see it spelled “Kiyonaru.”

    It’s a green paste with a little tack. Retailers describe it as quick-drying on the surface but staying semi-dry for a while, which helps prevent cracking. The paste contains insecticides and fungicides, and it’s designed to fall off by itself once the callus has formed, so you don’t have to remove it.

    The standard 100 g tube is the common size. Larger sizes are also sold, mostly in Europe. Some sellers also offer a related product, Kiyonal Ace, but descriptions vary, so check the listing if you see it.

    Pros

    • Works on most species and wound sizes
    • Flexible, semi-dry finish that resists cracking
    • Falls away naturally as the wound heals
    • Widely available outside Japan

    Cons

    • Green color can stand out on dark bark
    • Prices vary a lot between sellers
    • Contains pesticides, so check shipping rules where you live

    Best for: beginners and anyone who wants one reliable tube for everything.

    Check Kiyonal at Bonsai Plaza · Search Kiyonal on Amazon


    2. Cut Paste Hi (putty) – best for big wounds and carving

    This is the classic Japanese clay-type cut paste, the one that comes in a round tub rather than a tube. US retailers like Bonsai Tonight and Wigert’s Bonsai list it, usually just as “Cut Paste.”

    It’s an all-purpose brown putty with a soft, plasticine-like texture. You pinch off a piece, roll it, and press it over the wound. Wigert’s describes it as keeping the cut area soft and protected for a year or longer. It’s often sold in two colors: a green-lid version with a brown tint, and a white-lid version with a gray tint, so you can match darker or lighter bark.

    Because it’s thick, it’s especially good for large branch removals, fresh hollows and carved areas. For small cuts, most retailers point you to a liquid sealer instead.

    Pros

    • Excellent for big wounds and filling hollows
    • Stays soft for a long time, so it flexes with the callus
    • Two colors for dark and light bark
    • Good value for the amount you get

    Cons

    • Too bulky for small, neat cuts
    • Can look obvious on a show tree until it’s trimmed back or covered

    Best for: anyone doing serious branch removal, trunk chops or carving.

    Check Cut Paste at Wigert’s Bonsai · Check Cut Paste at Bonsai Tonight


    3. Callus Mate – best for junipers, pines and satsuki

    Callus Mate is a Japanese wound paste made with darker bark in mind. The juniper version is a dark brown paste, and the product description says it’s especially unobtrusive on satsuki and conifers like pine and shimpaku.

    It dries quickly, sticks well, and helps stop sap bleeding. Like Kiyonal, it contains insecticides and fungicides. The suggested method is to apply it to a clean wound and smooth it with a wet finger. The color darkens over time, so it blends in even more as the months pass.

    It’s sold in 100 g and 150 g tubes. In Europe, the 150 g tube is around €14 at Bonsai Plaza; in the US, Bonsai Tonight lists Callus Mate among its sealers.

    Pros

    • Dark color blends well on conifers and satsuki
    • Quick-drying with good adhesion
    • Darkens with time, so the wound fades from view

    Cons

    • More specialized than an all-rounder
    • Not as easy to find in the US as Kiyonal

    Best for: juniper, pine and satsuki growers who are tired of bright green wounds.

    Check Callus Mate at Bonsai Plaza · Check sealers at Bonsai Tonight


    4. Top Jin M – best medicated liquid for azaleas and deciduous trees

    Top Jin M is a bright orange liquid sealer from Japan. It’s one of the more “medicated” options: Bonsai Tonight notes that it contains thiophanate-methyl, a fungicide, and that it’s often used on azaleas and tropical plants.

    It dries hard and forms what sellers describe as a rain-resistant, antibacterial film. Besides pruning cuts, it’s also used on wounds from sunburn, frost damage or wire marks. A semi-liquid 200 ml version is sold in Europe and is recommended especially for deciduous trees.

    The big downside is the color. Bright orange on a trunk is very visible, so it’s better suited to areas that won’t be on display, or to trees where protection matters more than looks.

    Pros

    • Includes a fungicide for extra protection
    • Hard, rain-resistant film
    • Works on many types of wounds, not just cuts
    • Popular for azaleas and tropicals

    Cons

    • Bright orange, so it’s very noticeable
    • Hard-setting formula can crack as the callus swells
    • Contains a fungicide, so check local rules before ordering

    Best for: azalea, deciduous and tropical growers who want a medicated sealer.

    Check Top Jin M at Bonsai Learning Center · Search Top Jin M on Amazon


    5. Kirikuchi-Naoru – the niche pick for hard-to-heal trees

    The name roughly means “cut-surface healer,” and it’s a niche product most Western hobbyists haven’t tried. It comes in two forms: a green liquid and a putty.

    The liquid is the interesting one. According to Bonsai Tonight, it dries hard and heals wounds quickly, but it can produce a thick callus. That’s why it’s often used on species that are slow or difficult to heal, such as quince. The putty version is suggested for conifers and deciduous species.

    This isn’t a first purchase. But if you grow flowering quince, or other species where wounds tend to stay open for a long time, it’s worth knowing about.

    Pros

    • Fast healing on stubborn species
    • Available in both liquid and putty forms
    • A specialist option most collections don’t have

    Cons

    • Thick callus can be a problem where you want a flat scar
    • Harder to find; price and sizes vary by seller

    Best for: advanced growers with quince or other slow-healing trees.

    Check sealers at Bonsai Tonight


    6. Lac Balsam – the Western backup for roots and budget use

    Lac Balsam isn’t Japanese. It’s a European wound dressing sold for general tree care, and it’s included here because many bonsai growers already own a tube, and because it’s cheap.

    It works like an artificial bark. It hardens after application, which bonsai.de says makes it well suited to wounds in the root area. For trunk and branch wounds, the same retailer only partly recommends it, because it doesn’t stay elastic and can crack and fall off as the tree grows. The tube comes in 150–200 g sizes, and some versions include a brush.

    In practice, that makes it a decent backup: useful for root work during repotting, or as a cheap sealer while you wait for a Japanese paste to arrive. It’s not the best choice for a visible trunk wound on a show tree.

    Pros

    • Inexpensive and easy to find in Europe and North America
    • Good for root wounds
    • Some tubes come with a brush

    Cons

    • Hardens and isn’t flexible, so it can crack on trunks
    • Not designed specifically for bonsai

    Best for: root wounds during repotting, or a budget backup tube.

    Check Lac Balsam at TreeStuff · Search Lac Balsam on Amazon


    Which bonsai cut paste should you buy? (By use case)

    You’re new and want one tube: Kiyonal. It handles most wounds on most species, stays flexible, and falls away when the job is done.

    You’re about to remove a big branch or chop a trunk: Cut Paste Hi (putty). Pair it with Kiyonal for the smaller cuts.

    Your collection is mostly junipers and pines: Callus Mate. The dark color makes a real difference on a conifer you’d like to show.

    You grow satsuki azaleas: Callus Mate is designed with satsuki bark in mind. Top Jin M is the medicated alternative if you don’t mind the orange.

    You grow azaleas, deciduous or tropical trees and want extra protection: Top Jin M.

    You have quince or other trees that heal slowly: Kirikuchi-Naoru liquid, used carefully on cuts where a slightly thicker callus is acceptable.

    You’re repotting and cutting thick roots: Lac Balsam or a putty-type paste works well for root wounds. Our bonsai root cutter guide covers the tools for that job.

    You want a “pro” kit: Many experienced growers keep three sealers on hand: a putty for big wounds, an all-round liquid like Kiyonal, and one species-matched paste for their main trees.

    A simple starter combination

    If you’re building your first kit, one tube of Kiyonal and one small tub of putty-type cut paste will cover almost every situation. Add a species-specific paste later, once you know which trees you grow most. If you’re still putting together your basic tools, our bonsai starter tool set guide is a good place to start.


    How to store bonsai cut paste so it lasts

    A tube or tub of bonsai cut paste usually lasts a long time, because you only use small amounts. But it can dry out if you’re careless.

    • Close it tightly after every use. Air is the main reason pastes harden in the container.
    • Keep it cool and dry. Most makers recommend a cool, dry place, away from direct sun.
    • Keep it away from children and pets. Many of these pastes contain fungicides or insecticides.
    • Wipe the nozzle or lid. Dried paste around the opening makes it hard to close properly next time.
    • Wrap putty if needed. If the tub lid doesn’t seal well, some growers wrap the putty in plastic film inside the tub.

    Common bonsai cut paste mistakes

    These come up again and again in bonsai forums and clubs.

    Using liquid on a huge hollow. Liquid paste is great for clean cuts, but a deep hollow needs putty to fill it.

    Piling on too much. A thick layer of a hard-setting paste is more likely to crack. Thin, even coverage is usually better.

    Covering the whole bark, not the wound. Paste should cover the wound and its edges, not large areas of healthy bark.

    Choosing color last. On a show tree, a bright paste is visible for a long time. Think about color before you buy.

    Forgetting to check. As the callus grows, many pastes split. A quick check every few months lets you top them up.


    Conclusion: start simple, then match your trees

    Bonsai cut paste isn’t a glamorous purchase. But once you start making big cuts, it’s one of the cheapest ways to protect years of work, and the difference between a smooth, rolled-over scar and an ugly crack.

    For most people, Kiyonal is the right place to start. Add a putty-type Cut Paste Hi when you start removing larger branches or carving. And if your collection leans toward junipers, pines or satsuki, Callus Mate is a small upgrade that makes wounds much less noticeable.

    Remember that no bonsai cut paste can save a rough cut. Sharp tools and clean technique come first. The paste is the finishing step.

    Ready to stock up? Check Kiyonal at Bonsai Plaza, or compare putty-type cut paste at Wigert’s Bonsai, and keep a tube next to your cutters before your next big pruning session.

  • Best Bonsai Display Stands in 2026: 6 Picks, From Simple Tables to Japanese Jita Boards

    Best Bonsai Display Stands in 2026: 6 Picks, From Simple Tables to Japanese Jita Boards

    Affiliate disclosure: Some links on this page are affiliate links. If you buy through them, Aribonsai may earn a small commission at no extra cost to you. It doesn’t change what we recommend or how we rank anything.


    The tree is finished. Now where does it go?

    A bonsai display stand is the last piece of a finished tree, and the one most people forget.

    You spend years on a tree. You wire it, prune it, repot it into the right pot. Then you bring it inside for guests, or into a show, and set it straight down on a shelf or a tablecloth. Somehow it looks smaller than it does on the bench, and a little unfinished.

    In Japan, a tree on display almost always sits on something: a wooden table with legs (a shoku), a thin wooden board (a jita), or a slab of natural wood. The stand lifts the tree, separates it from its surroundings, and frames it. It’s the same idea as putting a picture in a frame rather than taping it to the wall.

    The confusing part is the range. A simple bonsai display stand can cost under $20. A handmade Japanese jita board can cost several hundred euros. And many of the nicest pieces are one-offs, sold secondhand, with no clear information about who made them or where.

    In my experience, the most common mistake isn’t buying a cheap stand. It’s buying one that’s the wrong size or style for the tree. This guide explains what to look for, then compares six options, from simple everyday stands to Japanese handcrafted boards.


    Who this bonsai display stand guide is NOT for

    It’s not for you if you’re looking for a work turntable. Stands for working on a tree are a different tool. Our bonsai turntable guide covers those.

    It’s not about outdoor benches. Benches for keeping a collection outside are a separate project. Display stands are mainly for showing a tree indoors or at an exhibition.

    It’s not a full guide to formal display. Japanese display (with scrolls, accent plants and tokonoma alcoves) has its own traditions. We’ll touch on the basics, but this guide is about choosing the stand itself.

    Still with us? Let’s go.


    How we picked these (3 things that actually matter)

    1. Table or board

    There are two main kinds of bonsai display stand.

    • Shoku (display tables) have legs and lift the tree noticeably. They suit most upright trees and give a more formal look. Taller versions are used for cascade trees, where the trunk hangs below the pot.
    • Jita (display boards) are thin, flat boards or natural slabs. They lift the tree only slightly and give a quieter, more natural feel. They’re popular for shohin, literati trees and informal displays.

    Neither is better. It depends on the tree and the feeling you want to create.

    2. Size and proportion

    This is where most mistakes happen.

    A display stand should be a little larger than the pot, so there’s a visible margin all around. Too small and the pot looks like it’s about to fall off. Too large and the tree looks lost on it. Height matters too: a tall stand under a small, delicate tree can feel top-heavy.

    A simple approach is to bring the potted tree with you, or measure the pot carefully, and choose a stand that leaves a modest border on every side.

    3. Style, finish and origin

    As a general convention, darker, more formal tables with straight legs tend to suit conifers and formal upright trees. Lighter, softer shapes and natural slabs often suit deciduous and informal trees. These aren’t strict rules, just a useful starting point.

    Origin is worth checking carefully. Some stands are clearly labeled as made in Japan. Many others are “imported” with no country listed. And many nice pieces are handmade by makers outside Japan. We’ve labeled each one as clearly as we can.

    A few display habits that make any stand look better

    None of these cost anything, and they make a bigger difference than an expensive stand.

    • Clean the pot first. Wipe away soil, water marks and white mineral deposits. A clean pot on a modest stand looks better than a dirty pot on a beautiful one.
    • Tidy the soil surface. A light top dressing or a little moss makes the whole display feel finished.
    • Place the tree slightly off-center if it leans. Many growers set the pot a little toward the side opposite the tree’s main movement, so the tree feels balanced on the stand.
    • Keep the background plain. A neutral wall behind the tree lets the tree, pot and stand be seen clearly.
    • Protect the stand from water. Water the tree well before bringing it inside, let it drain fully, and put it back on the stand only once the pot has stopped dripping.

    Looking after wooden stands. Display stands are furniture, not garden tools. Keep them indoors, out of direct sun and away from standing water. Wipe up spills straight away. Lacquered and varnished finishes in particular can mark or cloud if water sits on them, which is one reason many growers keep a small cloth or mat handy for watering days.

    Prices below are approximate and were checked in October 2026. Many display stands are one-of-a-kind, so exact listings change often.


    Bonsai display stand comparison table

    StandTypeSizeMaterialOriginApprox. priceBest for
    Wazakura Small Wooden Plant & Bonsai StandSmall table12.8 × 12.8 × 6.3cmScorched plywoodMade in Japan~$15Mame and desk display
    Eastern Leaf Rosewood Display StandTable11″ × 8″RosewoodNot listed~$49Everyday indoor display
    Bonsai Outlet Cascade Display Stand (No. 010)Tall tableNot listedDark wood, polished round topImported, country not listed~$28–40Cascade and semi-cascade trees
    Maillot handcrafted exhibition tablesTable~16–30cmLacquered woodHandcrafted in Europe (country not stated)~€28–45European readers, shows
    Maillot Japanese jita boardsBoard~15–40cmVarnished wood / fruitwoodMade in Japan or Japanese handcrafted~€220–375Special trees, exhibitions
    Vintage Japanese-made slabs (secondhand)Slab / boardVariesVariesListed as Japanese made~$128 + shipping (example)Collectors, unique pieces

    Bonsai display stand reviews

    1. Wazakura Small Wooden Plant & Bonsai Stand

    The simplest and cheapest way to get a Japanese-made stand.

    Wazakura’s small stand is 12.8 × 12.8cm and 6.3cm tall, made in Japan from lightly scorched plywood with a dark finish that still shows the wood grain. It holds up to 3kg and assembles by sliding the two legs together and adding the top. It’s listed at $14.99, with free shipping to the US, UK, Canada, the EU and other regions, though it was sold out when we checked.

    It’s designed for succulents, mini bonsai and small pots on a desk, shelf or windowsill. It’s not a show stand, but it’s a nice everyday way to lift a mame tree off a flat surface.

    Pros

    • Made in Japan at a very low price
    • Simple, modern look
    • Free shipping to several regions

    Cons

    • Only suits very small trees (3kg max)
    • Plywood rather than solid wood
    • Often out of stock

    Who it’s for: Mame and small shohin growers who want a simple, inexpensive stand for everyday display at home.


    2. Eastern Leaf Rosewood Display Stand (11″ × 8″)

    An affordable, classic-looking bonsai display stand for everyday use.

    Eastern Leaf sells an 11″ × 8″ rosewood display stand for $49, describing it as an “ultrasleek rosewood stand.” The listing doesn’t state the country of origin.

    This is the kind of stand most people start with: a small, dark wooden table that lifts a medium tree and gives it a more finished look indoors. It’s a big step up from setting a pot straight on a shelf.

    Pros

    • Affordable for a solid wood stand
    • Classic dark look suits many trees
    • Easy to buy in the US

    Cons

    • Origin isn’t listed
    • One size only
    • Not a specialist exhibition piece

    Before ordering, check the size against your pot. An 11″ × 8″ top suits a pot a little smaller than that on each side. If your pot is close to 11 inches long, this bonsai display stand will be too small, and you’ll want something larger.

    Who it’s for: Anyone who wants a good-looking, affordable stand for displaying a medium tree indoors.


    3. Bonsai Outlet Cascade Bonsai Display Stand (No. 010)

    A taller stand for trees that hang down.

    Bonsai Outlet sells this cascade display stand from $27.95 to $39.95, depending on the option. It’s dark wood with a polished circular top. The store describes its stands generally as “handcrafted, imported,” without naming a country.

    Cascade and semi-cascade trees need height, because the trunk falls below the rim of the pot. On a low table, the tip of the cascade ends up touching the surface. A tall, narrow stand solves that and lets the tree’s shape read properly.

    In my experience, a cascade on the right tall stand looks completely different from the same tree on a shelf. It’s one of the cases where the stand really changes how the tree is seen.

    Pros

    • Gives cascade trees the height they need
    • Affordable
    • Polished round top suits round pots

    Cons

    • Size isn’t clearly listed
    • Origin isn’t stated
    • Only suited to cascade-style trees

    Because the size isn’t clearly listed, measure your pot and check the options carefully before ordering. A cascade stand needs a top wide enough to hold the pot securely, since tall stands are less forgiving if a pot hangs over the edge.

    Who it’s for: Anyone displaying a cascade or semi-cascade bonsai.


    4. Maillot Handcrafted Exhibition Tables

    A good-value option for readers in Europe.

    French retailer Maillot sells a series of lacquered wooden exhibition tables, handcrafted by a named maker, in sizes from about 162 × 162mm up to 300 × 205mm and heights of about 32–70mm. Prices run from about €28 to €45. The page doesn’t state the country of origin.

    These are simple, well-proportioned tables at a reasonable price, in several sizes. That makes it easier to find one that fits your pot properly, which matters more than anything else.

    Pros

    • Several sizes to match different pots
    • Handcrafted by a named maker
    • Reasonable prices
    • Convenient for European buyers

    Cons

    • Not Japanese-made
    • Shipping outside Europe may be expensive
    • Limited information on wood type

    Who it’s for: European growers looking for affordable, handcrafted tables in a range of different sizes.


    5. Maillot Japanese Jita Boards

    Japanese handcrafted boards for special trees.

    Maillot also sells a small range of Japanese jita boards. Two are listed as “Made in Japan,” in solid varnished wood with sculpted edges: about 29 × 21cm (€265) and 38 × 28cm (€270). Five more are described as Japanese handcrafted, made of varnished fruitwood with carved edges and signed by a Japanese maker, in sizes from about 150 × 120mm (€220) to 405 × 270mm (€348), with some at €375. Several are one-of-a-kind.

    These are display pieces for trees that deserve them: exhibition trees, a favorite shohin, or a literati tree that needs something quiet underneath.

    Pros

    • Clearly Japanese-made or Japanese handcrafted
    • One-of-a-kind pieces with carved edges
    • Range of sizes, including small ones for shohin

    Cons

    • Expensive
    • One-offs sell quickly
    • Shipping from France adds cost outside Europe

    Who it’s for: Serious growers and collectors who want a genuine Japanese jita for exhibition or a special tree.


    6. Vintage Japanese-Made Slabs (Secondhand)

    Where many unique pieces come from.

    A lot of beautiful Japanese display slabs and stands are sold secondhand, often by collectors. As an example, one eBay listing from a US seller offers a “Japanese Made Slab Jitta” for shohin, about 6 inches long, at $128 or best offer plus $15.85 shipping. The seller notes the pieces are unsigned and that any small defects are shown in the photos.

    This route can turn up genuinely special pieces. The trade-off is that information is often limited. Material, exact size and maker may not be listed.

    Pros

    • Unique, often older Japanese pieces
    • Sometimes better value than new handmade boards
    • Good for finding something distinctive

    Cons

    • Limited information on maker and material
    • Condition varies, so photos matter
    • Returns can be less straightforward

    If you go this way, ask the seller for measurements and extra photos before buying, especially of the underside and any cracks. A slab that looks perfect from above can have a split or warp that only shows from the side.

    Who it’s for: Collectors who enjoy searching for one-of-a-kind display pieces.


    Best bonsai display stand by use case

    “I have a mame or tiny shohin on my desk.” Wazakura Small Wooden Stand.

    “I want one affordable stand for indoor display.” Eastern Leaf Rosewood Display Stand.

    “I have a cascade tree.” Bonsai Outlet Cascade Display Stand.

    “I’m in Europe and need a stand that fits my pot.” Maillot handcrafted exhibition tables.

    “I’m showing a special tree and want a Japanese jita.” Maillot Japanese jita boards.

    “I like hunting for unique pieces.” Vintage Japanese-made slabs, checked carefully from photos.


    Conclusion: choosing a bonsai display stand that fits

    Here’s the short version.

    A bonsai display stand is how a finished tree becomes a finished display. Start with size: choose a stand slightly larger than the pot, with a margin all around. Then think about style: a table for most upright trees, a tall stand for cascades, and a board or slab for shohin and informal trees.

    If you only have one bonsai display stand, choose a simple, dark, medium-sized table. It will suit more trees than a highly decorative piece, and you can move it from tree to tree as different ones come into their best season.

    You don’t need an expensive stand to make a difference. A simple, well-proportioned table already does most of the work. Save the handcrafted Japanese pieces for the trees, and the occasions, that deserve them.

    And the stand works best with the right pot on top. Our Japanese bonsai pots guide covers how to choose a pot that suits the tree.

    Ready to choose?

  • Best Bonsai Soil Sieves and Scoops in 2026: 5 Picks for Cleaner, Easier Repotting

    Best Bonsai Soil Sieves and Scoops in 2026: 5 Picks for Cleaner, Easier Repotting

    Affiliate disclosure: Some links on this page are affiliate links. If you buy through them, Aribonsai may earn a small commission at no extra cost to you. It doesn’t change what we recommend or how we rank anything.


    The dust at the bottom of the bag

    A bonsai soil sieve is the least exciting tool on the bench, and one of the most useful.

    Here’s why. Open a bag of akadama, pumice or lava, and tip it out. Most of it looks great: clean, even grains. But at the bottom there’s always a layer of dust and broken bits. Pour that straight into a pot and it settles between the grains, fills the air gaps, and slowly turns a free-draining mix into something closer to mud.

    Sifting fixes that. Shake the soil through a screen, and the dust falls out while the usable grains stay behind. With a few screen sizes, you can also sort soil into small, medium and large grains for different trees.

    Then there’s getting the soil into the pot. A regular garden trowel is too big and too clumsy for most bonsai pots. A narrow soil scoop lets you pour soil exactly where you want it, between roots and into the gaps under the trunk, without spilling it across the bench.

    In my experience, these two tools make more difference to repotting than most people expect. Not because they’re clever, but because they make the careful way of doing things the easy way.

    This guide compares two soil sieve sets and three soil scoop sets, and explains what to look for. We’ve kept it to tools you can buy outside Japan, and noted clearly where each one is made, because a “Japanese” brand name doesn’t always mean a Japanese factory.


    Who this bonsai soil sieve guide is NOT for

    It’s not for you if you only use pre-sifted, ready-made bonsai soil. Some soils are sold already sifted. You’ll still benefit from a scoop, but a sieve matters less.

    It’s not a repotting tutorial. We’ll mention how these tools fit into repotting, but timing, root pruning and aftercare are separate topics.

    It’s not about large garden riddles. Big soil riddles for vegetable beds work, but they’re usually too coarse and too large for bonsai soil. A kitchen colander isn’t a great substitute either. The holes are usually too uneven to sort grains by size, though it can remove the worst of the dust in a pinch.

    Still here? Let’s go.


    How we picked these (3 things that actually matter)

    1. Screen sizes that match your soil

    This is what makes a bonsai soil sieve useful.

    Bonsai soil grains are usually sold in sizes like 1–3mm, 3–5mm and 5–7mm, with larger grains for big trees. A good sieve set has several screens so you can:

    • remove dust and fines (anything smaller than about 1–2mm),
    • separate small grains for shohin and small pots,
    • separate larger grains for bigger trees or the bottom drainage layer.

    Some sets give the openings in millimeters. Others use “mesh” numbers, which count holes per inch. As a rough guide, a 4-mesh screen has openings of about 4.75mm, a 5-mesh screen about 4mm, and a 10-mesh screen about 2mm. The higher the mesh number, the finer the screen.

    2. Size and build

    Smaller sieves (around 210mm, or 8 inches) are easy to handle and store, and fine for a few trees. Larger sieves (around 12 inches) process more soil at once, which helps when you’re repotting several trees in a day.

    Stainless steel frames last well outdoors. Check what the screens themselves are made of. Some sets use iron mesh, which can rust if left wet.

    3. Scoop size and shape

    Soil scoops usually come in sets of three sizes. Small scoops are for shohin and filling tight gaps. Larger scoops move more soil quickly into bigger pots.

    Two features are worth looking for:

    • A narrow, rounded tip, so you can direct soil precisely between roots.
    • A built-in mesh in the larger scoop, which filters a little dust as you pour.

    A simple sifting routine

    You don’t need a complicated system. This is how most growers use a bonsai soil sieve on repotting day:

    1. Start with the finest screen. Shake the soil through it over a bucket or tray. Everything that falls through is dust and fines.
    2. Move up a size if you’re sorting grains. Put what stayed on the first screen through the next screen. The grains that pass through are your small size. The ones that stay behind are your medium or large size.
    3. Keep each size in its own container. A few buckets or tubs, labeled by size, save a lot of time later.
    4. Mix only what you need. Blend your sifted components just before potting, so you can adjust the mix for each tree.
    5. Sift outdoors or over a tray. Akadama dust in particular gets everywhere.

    It helps to sift dry soil. Wet soil clumps and clogs the screens, and the fines stick to the larger grains instead of falling through.

    What to do with the fines? Don’t throw them straight in the bin. Many growers use the sifted-out dust in ordinary garden beds or containers for non-bonsai plants, where fine particles aren’t a problem. Just keep them out of your bonsai pots.

    Prices below are approximate and were checked in October 2026. Stock changes often for these items.


    Bonsai soil sieve and scoop comparison table

    ProductTypeSizeScreens / piecesMaterialApprox. priceBest for
    Wazakura 3-Piece Soil Sieve SetSieve210mm3 screens: 1mm, 3mm, 5mmStainless frame, iron mesh~$50Small collections, compact storage
    Bonsai Outlet 12″ Soil Sieve SetSieveAbout 12″3 screens: 4, 5 and 10 meshStainless frame~$24Sifting larger batches
    Japanese Heavy Duty Soil Scoop Set (House of Bonsai)Scoops6.25″ / 6.5″ / 6.75″3 scoops, large with meshStainless, made in Japan~$25 + shippingAll-round repotting
    Kaneshin Stainless Mini Soil Scoops No.1514ScoopsSmall / medium / large3 scoopsStainless~¥4,800Small bonsai
    Wazakura Curved Mini Soil ScoopDouble-ended scoop255mm overall1 tool, 2 scoop endsStainless, made in Japan~$25Shohin and tight spaces

    Bonsai soil sieve and scoop reviews

    1. Wazakura 3-Piece Soil Sieve Set (210mm)

    A compact bonsai soil sieve with three interchangeable screens.

    Bunton Bonsai lists this set at $49.95. It’s 210mm across and 65mm high, weighs 245g, and comes with screens of 1mm, 3mm and 5mm. The frame is stainless steel and the mesh is iron. It was sold out when we checked.

    One thing to note: product listings don’t agree on where it’s made. Some marketplace listings describe it as made in Japan, while Bunton Bonsai lists it as manufactured in China for Wazakura. If origin matters to you, check the listing you buy from.

    Pros

    • Three useful screen sizes in millimeters
    • Compact, light and easy to store
    • One frame with interchangeable screens

    Cons

    • Iron mesh can rust if left wet
    • Small diameter means more batches for big repotting days
    • Origin varies between listings, and stock can run out

    The 1mm screen is the standout feature. It’s fine enough to remove most dust without losing usable grains, which is exactly what you want when sifting akadama for small pots. To keep the iron mesh in good shape, let the screens dry fully before storing them.

    Who it’s for: Growers with a small collection who want a compact, easy-to-use bonsai soil sieve.


    2. Bonsai Outlet 12″ Soil Sieve Set

    A larger bonsai soil sieve for bigger batches.

    Bonsai Outlet sells this set for $24. It’s about 12 inches across with a stainless steel frame and three interchangeable screens: 4 mesh, 5 mesh and 10 mesh. The listing describes it as made for sorting aggregates like pumice, lava rock and pine bark by particle size, and for removing dust and fines that can hurt drainage. It doesn’t state the country of origin.

    Using our rough conversion, the screens are about 4.75mm, 4mm and 2mm. That’s good for removing fines and separating medium from larger grains, though there’s no very fine screen for shohin soil.

    Pros

    • Larger diameter for faster sifting
    • Lower price than the smaller Wazakura set
    • Stainless frame

    Cons

    • Mesh sizes are fairly coarse for shohin soil
    • Origin isn’t stated
    • Takes more space to store

    In my experience, a bigger sieve is one of those things you don’t think you need until your first big repotting day. Sifting a whole bag through an 8-inch screen, a handful at a time, gets tedious quickly.

    Who it’s for: Growers who repot several trees at once and want to sift soil quickly, without spending much.


    3. Japanese Stainless Steel Heavy Duty Soil Scoop Set (House of Bonsai)

    A practical, Japanese-made scoop set for everyday repotting.

    House of Bonsai sells this 3-piece set for $25 before tax, with shipping listed at about $9–9.50. The scoops are 6.25″, 6.5″ and 6.75″ long, made in Japan from stainless steel. The largest has a mesh screen inside to filter out fine dust as you pour.

    The retailer describes the tapered, cylindrical shape as easier to grip and less prone to spilling, with a rounded tip for placing soil precisely around the trunk.

    Pros

    • Made in Japan
    • Built-in mesh in the large scoop
    • Rounded tip for precise pouring
    • Stainless steel, so it won’t rust easily

    Cons

    • Shipping adds noticeably to the price
    • Sizes are close together, so less range than some sets
    • Larger trees may still need a bigger scoop

    The built-in mesh is a nice touch, but it isn’t a replacement for a proper bonsai soil sieve. It catches a little dust at the last moment, which helps, but sifting the whole batch first still makes the bigger difference.

    Who it’s for: Most growers who want one good, Japanese-made scoop set for general repotting.


    4. Kaneshin Stainless Mini Soil Scoops, 3-Piece Set (No.1514)

    Small scoops for small trees.

    Kaneshin’s store lists this stainless 3-piece mini scoop set at about ¥4,800, with individual scoops also sold separately. They’re designed for small bonsai. The listing notes that they’re made outside Japan but produced under the Kaneshin brand.

    Kaneshin also lists other scoop options, including black oxide stainless mini scoops, plastic scoops and stainless scoops with mesh, though we couldn’t confirm prices for those.

    Pros

    • Sized for small pots and shohin
    • Stainless steel
    • Can buy individual sizes

    Cons

    • Not made in Japan, despite the Japanese brand
    • Sizes aren’t listed on the page
    • Shipping from Japan adds cost

    Small scoops matter more than they seem with shohin. In a pot only a few centimeters deep, a normal scoop pours far too much soil at once, and it ends up on the bench or piled against the trunk. A small scoop lets you add soil a little at a time and work it in around the roots.

    Who it’s for: Shohin growers and anyone working mainly with small or very shallow pots.


    5. Wazakura Curved Mini Bonsai Soil Scoop (255mm)

    One tool, two scoop ends, designed for precision.

    Wazakura’s curved mini scoop is made in Japan from stainless steel. It’s 255mm long overall, with a 125mm handle and scoops of 85mm and 60mm on each end, and it weighs just 60g. It’s listed at $24.99 with free shipping to the US, Canada, the UK and Hong Kong, though it was sold out when we checked.

    The angled ends are the point. They’re good for filling tight gaps between roots and the pot wall, which is exactly where larger scoops struggle.

    Pros

    • Made in Japan
    • Two scoop sizes in one tool
    • Very light and precise
    • Free shipping to several regions

    Cons

    • Small capacity, so slow for large pots
    • Only one tool, not a set
    • Stock can run out

    It also works well for top dressing, where you only want to add a thin, even layer of fine soil or moss substrate to the surface. The smaller end gives you a lot of control for that kind of finishing work.

    Who it’s for: Shohin growers, and anyone who wants a precise scoop alongside a larger set.


    Best bonsai soil sieve and scoop by use case

    “I have a few trees and want something simple.” Wazakura 3-Piece Soil Sieve Set plus the House of Bonsai scoop set.

    “I repot a lot of trees at once.” Bonsai Outlet 12″ Soil Sieve Set for faster sifting.

    “I mostly grow shohin.” Wazakura sieve for its fine 1mm screen, plus Kaneshin mini scoops or the Wazakura curved mini scoop.

    “I want Japanese-made tools specifically.” House of Bonsai scoop set and Wazakura curved mini scoop, both listed as made in Japan.

    “I want the cheapest way to start.” Bonsai Outlet sieve set at $24. Add a scoop set later.

    “I already own a sieve and just need better scoops.” House of Bonsai scoop set for general use, plus the Wazakura curved mini scoop for detail work.


    Conclusion: sift first, then pour carefully

    Here’s the short version, for anyone who skipped straight to the end.

    A bonsai soil sieve is the simplest way to keep your soil draining well. Shake out the dust before every repotting, and sort grains by size if you grow trees of different sizes. A good scoop set then lets you place that soil exactly where it’s needed, without spills.

    Neither tool is expensive. Together, they make repotting cleaner, faster and kinder to the roots.

    If you’re only buying one thing, make it the bonsai soil sieve. Clean, sifted soil helps every tree you repot, every year. A scoop makes the job neater, but you can get by with a spoon for a while. Skipping the sifting step is the one shortcut that tends to show up later, as slow drainage and weaker roots.

    If you haven’t chosen your soil yet, our akadama and Japanese bonsai soil guide compares the main options and explains why sifting matters for akadama in particular. And for cutting back roots during repotting, see our root cutter guide.

    Ready to choose?

  • Best Bonsai Fertilizer in 2026: 5 Japanese Organic Picks, From BioGold to Rapeseed Cakes

    Best Bonsai Fertilizer in 2026: 5 Japanese Organic Picks, From BioGold to Rapeseed Cakes

    Affiliate disclosure: Some links on this page are affiliate links. If you buy through them, Aribonsai may earn a small commission at no extra cost to you. It doesn’t change what we recommend or how we rank anything.


    Small pot, hungry tree

    A bonsai lives in a very small amount of soil. And most bonsai soil, especially granular mixes based on akadama, pumice and lava, holds very little food on its own.

    So everything the tree needs to grow, it gets from you. Too little feeding and growth stalls, leaves get small and pale, and the tree slowly weakens. Too much, or the wrong kind at the wrong time, and you get long, coarse shoots that undo a season of refinement.

    That’s where Japanese organic fertilizers come in. Walk through any Japanese bonsai nursery and you’ll see little brown cakes or pellets sitting on the soil surface of almost every tree, sometimes under small plastic baskets. They release food slowly every time you water, for weeks at a time.

    Outside Japan, the choice is confusing. BioGold, rapeseed cakes, Tamahi, Hanagokoro, flowering formulas. Pellets, cakes, baskets. NPK numbers that don’t seem to match between retailers.

    In my experience, the right fertilizer matters less than feeding consistently through the growing season. But a good slow-release organic fertilizer makes consistency much easier. This guide compares five Japanese options you can buy outside Japan, and explains which suits which tree.


    Who this article is NOT for

    It’s not a feeding schedule guide. When to feed, and when to stop, depends a lot on the species, the tree’s stage of development and your climate. We’ll mention general patterns, but always check guidance for your specific trees.

    It’s not about synthetic liquid fertilizers. Many growers use them successfully, often alongside organic feeds. This guide focuses on Japanese organic solid fertilizers.

    It’s not for you if your tree is sick, freshly repotted or recently collected. Those trees usually need recovery time before heavy feeding. Ask an experienced grower or your local club first.

    Still with us? Let’s go.


    How we picked these (3 things that actually matter)

    1. Slow-release and organic

    Japanese bonsai fertilizers are mostly organic: rapeseed meal, bone meal, fish meal, blood meal and similar ingredients, often fermented. They break down gradually as you water, feeding the tree a little at a time.

    That slow release is the main appeal. You place the fertilizer on the soil and it keeps working for weeks. Retailers list around 50 days for rapeseed cakes, about two months for BioGold, and two to three months for Tamahi cakes.

    One nice side effect: granular soils like akadama work well with this approach. Bonsai Tonight describes akadama as able to “hold and release fertilizer,” which is part of why the two are often used together. Our akadama and Japanese bonsai soil guide covers soil choice in more detail.

    2. NPK balance

    NPK is the ratio of nitrogen (N), phosphorus (P) and potassium (K).

    • Nitrogen drives leaf and shoot growth.
    • Phosphorus supports roots, flowers and fruit.
    • Potassium supports overall health and hardiness.

    Rapeseed cakes are usually higher in nitrogen, which is why they’re popular for spring and summer growth. Flowering fertilizers are lower in nitrogen and higher in phosphorus, so they don’t push long shoots at the expense of flowers.

    One caution: retailers don’t always agree. BioGold, for example, is listed as 3.5-3.7-3.3 by Eastern Leaf, 4-5-4 by Bonsai Tonight, and 5.5-6.5-3.5 by a UK retailer. Check the bag you actually receive.

    3. Odor, mold and practicality

    Organic fertilizers can smell, especially when first wet, and some develop surface mold. That’s usually normal. One Hanagokoro seller says it doesn’t deteriorate even when it looks moldy, and a Tamahi listing says its slight initial odor disappears after the first watering.

    For indoor trees, low odor matters a lot more. For outdoor benches, birds and animals sometimes move cakes around, which is why many growers use fertilizer baskets: small plastic cups that hold the cake in place on the soil. They also make it easy to remove old fertilizer and replace it.

    A few habits that matter more than the brand.

    • Space it out on the soil. Place cakes or pellets evenly around the pot, a little away from the trunk, rather than in one pile. That spreads the feeding across the root system.
    • Replace, don’t pile on. When the old cakes have broken down, remove what’s left before adding new ones. Stacking new fertilizer on top of old makes it hard to tell how much the tree is actually getting.
    • Keep notes. Write down when you fed each tree. With slow-release fertilizer lasting six to ten weeks, it’s easy to lose track.
    • Watch the tree, not the calendar. Healthy color and steady growth suggest the feeding is about right. Very long, coarse shoots on a tree you’re refining can be a sign to ease off.
    • Store it dry and sealed. Organic fertilizer can absorb moisture and clump in storage. A sealed bag or tub in a cool, dry place keeps it usable.

    A note on fertilizer baskets. Baskets aren’t essential, but they solve a few small problems at once. They stop birds from picking at cakes, keep pellets from washing to the edge of the pot, and make it obvious where the fertilizer is when it’s time to replace it. Some growers also like that they keep the soil surface cleaner on display trees.

    Prices below are approximate and were checked in October 2026 at retailers outside Japan.


    Comparison table

    FertilizerTypeNPK (as listed)SizeApprox. priceBest for
    BioGold OriginalFermented organic pelletsListed from 3.5-3.7-3.3 to 5.5-6.5-3.5240g / 900g (also 2.4kg, 5kg)~$17 (240g) / ~$30 (900g)All-round feeding, low odor
    Maruta Rapeseed CakesRapeseed cakes5-2-1500g~$17 (sale)Spring and summer growth
    Tamahi Rapeseed Cake + BasketsRapeseed and bone meal5-4-1500g + 10 baskets~$24Starting with baskets
    HanagokoroOrganic piecesAbout 5-4-2About 500g~C$25Root development, steady feeding
    Hanasaku HiryoFlowering fertilizer1.5-9-4.510 oz pouch~$12–30Flowering and fruiting trees

    Individual reviews

    1. BioGold Original

    The most popular Japanese bonsai fertilizer outside Japan, and our pick for most people.

    BioGold is a made-in-Japan organic fertilizer, fermented with microorganisms and sold as small pellets of about 12.7mm. Eastern Leaf sells 240g for $16.95 and 900g for $29.95. Bonsai Tonight sells 900g for $30, plus larger 2.4kg and 5kg bags.

    You can use it two ways. Bonsai Tonight explains that you can sprinkle the pellets on the soil, where they stay effective for about two months. Or you can dissolve two or three pellets in a liter of water as a liquid feed that lasts about ten days, useful when you want a quicker effect.

    It’s also known for being relatively low in odor. Bonsai Tonight’s customer reviews specifically mention the lack of smell.

    Pros

    • Widely available from US and UK retailers
    • Low odor compared with traditional rapeseed cakes
    • Can be used as pellets or dissolved as a liquid feed
    • Sizes from 240g up to 5kg

    Cons

    • NPK figures vary between retailer listings
    • Pellets are small, so birds can sometimes move them
    • More expensive per kilo than bulk rapeseed cakes

    The liquid option is worth remembering. It’s handy for trees that need a quicker boost, or for indoor trees where you’d rather not leave pellets sitting on the soil for weeks.

    Who it’s for: Almost anyone. A safe first Japanese fertilizer for outdoor trees, and a reasonable choice indoors thanks to the low odor.


    2. Maruta Rapeseed Bonsai Fertilizer Cakes

    The classic Japanese rapeseed cake.

    Stone Lantern sells Maruta rapeseed cakes, made in Japan, at $16.95 per 500g bag (on sale from $22.95). They’re about 1″ across, listed as 5-2-1, and last about 50 days. The retailer suggests 4–6 cakes for an 8″ bonsai pot.

    Stone Lantern notes that the higher nitrogen makes rapeseed especially useful in spring and summer, while being mild enough to use year-round.

    In my experience, rapeseed cakes are what most people picture when they think of Japanese bonsai fertilizer. They’re simple and reliable. The main downside is that they’re more noticeable, both in smell and on the soil surface.

    Pros

    • Traditional, proven fertilizer
    • Higher nitrogen for active growth
    • Clear guidance on how many cakes per pot size
    • Affordable, especially on sale

    Cons

    • More odor than BioGold, especially when first wet
    • Larger cakes are more visible on display trees
    • Can attract birds or animals without baskets

    They’re also a good way to understand how organic feeding works. You can see each cake slowly soften and shrink over the weeks, which makes it easy to tell when it’s time to replace them.

    Who it’s for: Outdoor trees in active growth, especially during spring and summer.


    3. Tamahi Original Rapeseed Cake + 10 Baskets

    The easiest way to get started with cakes and baskets together.

    Cali Bonsai Depot sells a 500g bag of Tamahi rapeseed cake fertilizer with 10 fertilizer baskets for $23.99. It’s a product of Japan, made from rapeseed meal and bone meal, listed as 5-4-1. The pellets are about 25mm. The baskets come with covers, are made in Japan and include anti-UV ingredients.

    The listing suggests scattering pellets on the soil or placing them in a basket, not too close to the roots, and watering over the basket for slow release. One application lasts about two to three months. It also notes a slight initial odor that disappears after the first watering.

    House of Bonsai also sells Tamahi in a 7kg bulk size, for growers with large collections.

    Pros

    • Comes with 10 baskets with covers
    • Bone meal adds phosphorus compared with plain rapeseed
    • Long-lasting, around two to three months
    • Bulk size available

    Cons

    • Slight initial odor
    • Larger pellets than BioGold
    • Baskets are small, so very large pots may need several

    Ten baskets is enough for a small collection, and once you see how convenient they are, it’s easy to pick up more as you add trees.

    Who it’s for: Growers who want to try the traditional cake-and-basket approach without buying baskets separately.


    4. Hanagokoro

    A rapeseed-based fertilizer with a broader mix of ingredients.

    The Garden Cafe in Canada sells Hanagokoro at C$25 for about 500g (C$20 each when buying three or more). It lists ingredients as rapeseed oil, blood meal, bone meal, rice bran and algae extracts, with an NPK of about 5:4:2. The seller says the algae extracts help fine root development. The page describes it as traditionally used in Japan, though it doesn’t say where this particular product is made.

    The seller gives a clear guide by pot size: 3–4 pieces for a 5″ pot, 4–5 for a 6″ pot, 5–7 for a 7″ pot and 6–8 for an 8″ pot, replaced about every 50 days in summer. It also says it’s “nearly impossible to overfeed” with it, because it releases slowly. As always, take that as the seller’s view and follow the label.

    Pros

    • Broad mix of organic ingredients
    • Clear dosage by pot size
    • Steady, slow release

    Cons

    • Origin isn’t stated on the listing we checked
    • Repackaged by the retailer in smaller amounts
    • Canadian retailer, so shipping elsewhere may cost more

    Who it’s for: Growers who want a well-rounded organic feed with clear dosing, especially in Canada where shipping is simplest.


    5. Hanasaku Hiryo (Japanese Flowering Fertilizer)

    The specialist pick for flowering and fruiting trees.

    Bonsai Outlet sells Hanasaku Hiryo, a Japanese flowering fertilizer, in a 10 oz pouch, listed between $11.90 and $29.90 depending on the option. Its NPK is 1.5-9-4.5, much lower in nitrogen and much higher in phosphorus than rapeseed cakes.

    That balance is the point. Too much nitrogen on a flowering tree pushes leafy growth instead of flowers. A low-nitrogen, high-phosphorus feed supports flowering without encouraging long, coarse shoots. Bonsai Outlet also sells it in a “Flowering Feeding Bundle” with fertilizer cups.

    Pros

    • Formulated for flowering trees
    • Low nitrogen avoids pushing excess shoots
    • Small pouch, easy to try

    Cons

    • Not an all-purpose fertilizer
    • Pricing depends on the option you pick
    • Mostly useful for specific species

    Many growers use a flowering fertilizer for part of the year and a general one for the rest, rather than one or the other. If you have a mixed collection, a small pouch alongside a bag of BioGold covers most needs.

    Who it’s for: Growers with azaleas, flowering quince, crabapples and other flowering or fruiting bonsai.


    Recommendation by use case

    “I just want one good fertilizer for most of my trees.” BioGold Original. Start with 240g or 900g.

    “My trees are growing outdoors and I want strong spring growth.” Maruta Rapeseed Cakes or Tamahi.

    “I want to try fertilizer baskets.” Tamahi + 10 Baskets.

    “I want clear dosing by pot size.” Hanagokoro or Maruta, both of which give per-pot guidance.

    “I grow flowering or fruiting trees.” Hanasaku Hiryo for the flowering period, with a general fertilizer at other times.

    “I keep trees indoors.” BioGold, for its lower odor. The liquid method is an option if you’d rather not leave pellets on the soil.


    Conclusion: feed steadily, and match the fertilizer to the tree

    Here’s the short version.

    For most people, BioGold is the easiest place to start. It’s low in odor, widely available, and flexible. Rapeseed cakes are a classic, cheaper choice for outdoor trees in active growth. A flowering fertilizer is worth adding if you grow azaleas or fruiting trees.

    Whatever you choose, consistency matters more than brand. Organic fertilizers release a little at a time as you water, which is why good watering habits and good feeding go together. Our bonsai watering guide covers the tools that make watering easier and more even.

    If you’re just starting out, keep it simple. One general fertilizer, applied steadily through the growing season, will do more for your trees than a shelf of specialist products used occasionally. Add a flowering feed or baskets later, once you know what your trees need.

    And always follow the label. Retailer guidance is a good starting point, but the instructions on the bag you actually buy should come first.

    Ready to stock up?

  • Best Bonsai Watering Cans and Nozzles in 2026: 6 Picks, From Simple Cans to Japanese Copper

    Best Bonsai Watering Cans and Nozzles in 2026: 6 Picks, From Simple Cans to Japanese Copper

    Affiliate disclosure: Some links on this page are affiliate links. If you buy through them, Aribonsai may earn a small commission at no extra cost to you. It doesn’t change what we recommend or how we rank anything.


    Watering is the job you do most, and think about least

    Ask a bonsai teacher what kills the most trees, and the answer usually isn’t pests or bad pruning. It’s watering.

    Too little, too much, or simply done badly. A regular garden hose on full blast blasts soil out of a shallow pot. A cheap watering can with big holes pours a stream that runs straight off the surface and out the drainage holes, leaving the middle of the root ball dry. Moss gets washed away. Fine top dressing ends up on the bench.

    That’s why Japanese bonsai watering tools look the way they do. Long spouts to reach into the middle of a bench. Very fine roses (the perforated head at the end of the spout) that turn water into a soft shower. Copper and brass that last for decades.

    The catch is the price. A good Japanese copper watering can easily costs more than a premium concave cutter. So the question is whether you actually need one, or whether something simpler does the job.

    In my experience, the right answer depends mostly on how many trees you have. A couple of trees on a windowsill and a full outdoor bench are completely different watering problems.


    Who this article is NOT for

    It’s not for you if you’re looking for an automatic watering system. Drip lines, timers and misting systems are useful, especially when you travel, but they’re a separate topic.

    It’s not a watering schedule guide. How often to water depends on the tree, the soil, the pot, the weather and the season. We’ll talk about tools, not timing.

    It’s not for you if you only want the cheapest can that holds water. Plenty of basic cans work. We include one practical option, but most of this guide is about tools made for bonsai.

    Still here? Let’s go.


    How we picked these (3 things that actually matter)

    1. Can or hose nozzle

    This is the first decision, and it depends on your collection.

    A watering can is best for indoor trees, a few trees on a balcony, or careful watering of small and delicate trees. You control the flow precisely, and you don’t need a tap nearby.

    A hose-end watering nozzle (or wand) is how most serious growers water a full bench. Kaneshin sells a whole range of brass and copper watering nozzles that attach to a hose, some with a built-in tap (“cock”) to control the flow. Eastern Leaf in the US also sells Japanese-made watering wands. Once you have more than a dozen trees, carrying a can back and forth gets old quickly.

    Many people end up with both: a nozzle for daily watering and a small can for delicate jobs.

    2. How fine the water is

    This matters more than anything else about the tool.

    A fine rose turns the water into a soft shower. It soaks the soil evenly without washing it out of the pot or splashing it around. That’s especially important with granular bonsai soils like akadama, which can be displaced by a heavy stream, and with moss or fine top dressing.

    The finest nozzles are remarkable. Kaneshin’s KYOZEN copper nozzle, for example, has 1,261 tiny holes of about 0.18–0.2mm, and the maker says the water is “very soft and gentle on plants” with minimal soil splashing.

    3. Material, capacity and weight

    Copper is the traditional choice for Japanese watering cans. It’s durable, develops a patina over time and looks beautiful. It’s also expensive and heavier than plastic. One Japanese seller of a Kaneshin copper can claims copper “has a bactericidal action, so you can always keep fresh water in the bonsai.” Treat that as the seller’s description rather than a proven benefit.

    Brass is common for hose nozzles. It’s durable and cheaper than copper.

    Capacity is a balance. A bigger can means fewer trips to the tap, but water is heavy. A full 4L can holds about 4kg of water before you add the weight of the can itself.

    A few habits that matter more than the tool.

    • Water in two passes. Give each tree a light watering, move on to the next, then come back for a second, thorough pass. The first pass wets the surface so the second soaks in instead of running off.
    • Check the drainage holes. Water should run out of the bottom of the pot. If it doesn’t, the root ball hasn’t been fully soaked.
    • Aim at the soil, not the foliage. A fine spray over the leaves can be useful for rinsing dust, but the roots are what need the water.
    • Let the tap water sit if you use a can. Many growers fill cans and leave them for a while before watering, so the water isn’t ice-cold from the tap in winter or hot from a sun-baked hose in summer.
    • Watch the weather, not the calendar. A hot, windy day can dry a shallow pot far faster than a cool, still one. Checking the soil before watering beats watering on a fixed schedule.

    None of this needs expensive equipment. But a fine spray makes every one of these habits easier.

    Prices below are approximate and were checked in October 2026. Yen prices are from Japanese stores before international shipping.


    Comparison table

    ToolTypeMaterialSizeApprox. priceBest for
    Haws Handy Watering CanCanMetal (British brand)1 pint~$27Indoor trees, budget
    Japanese Copper Watering Can (Eastern Leaf)CanCopper, made in Japan0.9L~$179Small collections, a Japanese can at a lower price
    Japanese Copper Longreach (Eastern Leaf)CanCopper, made in Japan2L / 4L~$429 / ~$529Reaching across a bench
    Masakuni Copper Watering Can No.6CanCopperAbout 970mm long, 1,030g~¥45,400Premium traditional can
    Kaneshin Brass and Copper Watering NozzlesHose nozzleBrass or copper330–610mm~¥3,000–14,000Watering a full bench
    Kaneshin KYOZEN Copper NozzleHose nozzleCopperShort / medium~¥19,000 / ¥21,000The finest spray, shohin

    Individual reviews

    1. Haws Handy Watering Can (1 pint)

    The practical budget pick, and the only one here that isn’t Japanese.

    Eastern Leaf sells the Haws Handy watering can in several colors for $26.95. It’s a small metal can holding about a pint. Haws is a British watering can maker, and Bonsai Outlet also carries its Heritage plastic can with a fine brass-faced rose for $26.95.

    A small can like this is perfect for a few indoor trees. It’s light, easy to control and doesn’t take up space.

    Pros

    • Affordable
    • Small and easy to control indoors
    • From a long-standing watering can maker
    • Several colors

    Cons

    • Small capacity, so not practical for outdoor benches
    • Not Japanese, if that matters to you
    • No long reach

    Who it’s for: Growers with a few indoor or windowsill trees. It also works as a second can for careful jobs, even if you water your bench with a hose.


    2. Japanese Copper Watering Can, 0.9L (Eastern Leaf)

    The most affordable Japanese copper can we found from a US retailer.

    Eastern Leaf lists a 0.9L Japanese copper watering can at $179, made in Japan. That’s a lot for a small can, but it’s far below the price of the long-reach copper cans.

    For a small collection, 0.9L is enough to water several small or medium trees in one fill. And it gives you the feel and fine control of a proper Japanese can without the larger investment.

    Pros

    • Japanese copper can, sold by a US retailer
    • Small enough to handle easily
    • Much cheaper than long-reach copper cans
    • Will last for many years with care

    Cons

    • Still expensive for its capacity
    • Small, so frequent refills for bigger collections
    • Copper needs some care to manage patina

    A note on copper care: copper darkens and develops a patina over time. That’s normal and many people like it. Niwaki, describing another Japanese copper can, notes that wiping it dry after use slows the process. If you want to keep it bright, dry it after watering. If you like the aged look, just let it be.

    Who it’s for: Growers with a small collection who want a real Japanese watering can.


    3. Japanese Copper Longreach, 2L / 4L (Eastern Leaf)

    The classic long-spouted bonsai can.

    Eastern Leaf sells Japanese copper long-reach cans in 2L ($429) and 4L ($529), made in Japan. The long spout lets you reach the back of a bench and water from a distance, without leaning over and knocking branches.

    These are serious purchases. But for growers with a full bench who prefer hand watering, a long-reach can is a tool you buy once.

    In my experience, the long spout is what people notice most when they switch. You stop reaching over trees, and you start watering more carefully because the flow lands exactly where you aim it.

    Pros

    • Long spout for reaching across a bench
    • Two capacities
    • Made in Japan, sold by a US retailer
    • A traditional tool that can last decades

    Cons

    • Very expensive
    • Heavy when full, especially the 4L
    • Overkill for small collections

    Who it’s for: Growers with an outdoor bench who prefer watering by hand, and who see watering as part of the hobby rather than a chore.


    4. Masakuni Copper Watering Can No.6

    The premium traditional option from Japan.

    A Japanese export store lists Masakuni’s copper watering can Size No.6 at about ¥45,400. It’s about 970mm long, weighs 1,030g, and comes with two copper nozzles. Check the capacity with the seller before buying, as the listing we saw didn’t make it clear.

    This is the kind of can you see in Japanese bonsai gardens. It’s also bulky, so shipping from Japan will add a fair amount.

    Pros

    • Masakuni’s craftsmanship and reputation
    • Long reach
    • Two copper nozzles included
    • A tool that can last a lifetime

    Cons

    • Expensive, plus international shipping
    • Large and heavy
    • Capacity isn’t clearly stated on the listing we saw

    Who it’s for: Serious growers and collectors who want a traditional Japanese can and already trust Masakuni.


    5. Kaneshin Brass and Copper Watering Nozzles

    The practical choice for anyone watering a full bench.

    Kaneshin sells a long list of hose-end watering nozzles. A few examples from its Japanese store:

    • Brass nozzle No.125A / No.125B (330mm / 545mm): about ¥3,000
    • Brass nozzle with tap No.127C / No.127D (375mm / 580mm): about ¥9,000
    • Copper nozzle No.125BS / No.125BL (330mm / 500mm): about ¥9,000
    • Copper nozzle with tap No.126BS / No.126BL (350mm / 550mm): about ¥14,000

    A built-in tap lets you stop the water between trees without walking back to the tap. Longer models help you reach across a bench.

    If you’re in the US, Eastern Leaf also sells Japanese-made watering wands: a chrome-plated version at $39, and brass and copper versions at $129.

    Pros

    • Much cheaper than a copper can
    • No refilling, so ideal for many trees
    • Options with a built-in tap
    • Wide range of lengths and materials

    Cons

    • Needs a hose and tap nearby
    • Less precise than a can for very delicate work
    • Shipping from Japan adds cost; US options cost more

    Who it’s for: Anyone with more than a handful of trees outdoors. If you’re unsure where to start, a basic brass nozzle is an inexpensive way to find out how much easier hose watering is.


    6. Kaneshin KYOZEN Copper Watering Nozzle

    The finest spray on this list.

    KYOZEN comes in a short version (No.124, about ¥19,000) and a medium version (No.1241, about ¥21,000). It attaches to a hose. Kaneshin says it’s handcrafted by professional bonsai artists, with 1,261 micropores of about 0.18–0.2mm, and designed for shohin and delicate plants. Replacement mesh is sold separately.

    This is a specialist tool. For most trees, a regular fine nozzle is plenty. But for shohin in tiny pots, seedlings, moss or very fine soil, a spray this soft makes a real difference.

    Pros

    • Extremely fine, gentle spray
    • Minimal soil splashing
    • Made for shohin and delicate plants
    • Replacement mesh available

    Cons

    • Expensive for a hose nozzle
    • Slower to water large trees thoroughly
    • Needs a hose connection

    It’s also worth thinking about if you’ve recently repotted into fine, freshly sifted soil. That’s when soil is most easily disturbed, and a softer spray helps it settle without washing out of the pot.

    Who it’s for: Shohin growers and anyone with very delicate plantings.


    Recommendation by use case

    “I have a few indoor trees.” Haws Handy Watering Can. Simple, cheap and easy to control.

    “I want a real Japanese watering can without spending a fortune.” Japanese Copper Watering Can, 0.9L from Eastern Leaf.

    “I have an outdoor bench and like watering by hand.” Japanese Copper Longreach (2L or 4L).

    “I have a lot of trees and want to water quickly.” Kaneshin hose nozzle, ideally one with a tap.

    “I grow shohin in tiny pots.” Kaneshin KYOZEN nozzle, or a small can with a fine rose.

    “I want a lifetime traditional can.” Masakuni Copper Watering Can No.6.


    Conclusion: buy for the number of trees you water

    Here’s the short version.

    The best watering tool is the one that makes it easy to water well, every day, without rushing. A few indoor trees don’t need a $500 copper can. A small, simple can with a fine rose is enough. A full outdoor bench is where a hose nozzle with a fine spray, or a long-reach copper can, really earns its place.

    Whatever you use, the most important thing is a soft, even flow. Water gently, water thoroughly, and check that water is actually running out of the drainage holes. Shallow Japanese pots dry out faster than you’d expect, which is one more reason to get this right. Our Japanese bonsai pots guide covers how pot depth affects this. And if your trees sit on a turntable, some models can be watered on directly, as covered in our bonsai turntable guide.

    Ready to choose?

  • Best Akadama and Japanese Bonsai Soil in 2026: 6 Picks You Can Buy Outside Japan

    Best Akadama and Japanese Bonsai Soil in 2026: 6 Picks You Can Buy Outside Japan

    Affiliate disclosure: Some links on this page are affiliate links. If you buy through them, Aribonsai may earn a small commission at no extra cost to you. It doesn’t change what we recommend or how we rank anything.


    Every bag says “akadama.” They’re not all the same.

    If you’ve started looking at proper bonsai soil, you’ve probably hit this.

    Every bonsai book and video mentions akadama. So you search for it, and suddenly there are bags called Double Line, Triple Red Line, Ryusen, Ho Yoku, Gun Poh and “super hard.” Prices range from about $30 to $70 a bag. Some say heat-treated. Some come in “shohin grain.” Some are mixed with something called kiryu. And then someone in a forum tells you akadama turns to mud after a year and you should just use lava rock.

    Soil is the one part of bonsai you can’t see once the tree is potted. But it affects everything: how often you water, how well the roots grow, and how long you can go between repots.

    In my experience, the biggest mistakes with Japanese soil aren’t about brand. They’re about grain size, about using akadama in a climate where it breaks down quickly, and about buying one bag and expecting it to suit every tree.

    This guide explains what the main Japanese soils actually do, then compares six bags you can buy from retailers outside Japan.


    Who this article is NOT for

    It’s not for you if you want to order soil straight from Japan. Soil is restricted for import in many countries, so Japanese stores generally won’t ship it overseas. Every product here is sold by a retailer outside Japan.

    It’s not for you if you grow only indoor tropical trees in a dry home. Akadama can work indoors, but many indoor growers prefer mixes based on pumice, lava or other inorganic materials. That’s a different discussion.

    It’s not a complete soil science guide. We’ll cover the basics you need to choose a bag. Detailed mixes for every species are beyond one article.

    Still with us? Let’s go.


    How we picked these (3 things that actually matter)

    1. What the soil is, and what it’s for

    There are three Japanese soils you’ll see most often outside Japan.

    Akadama is a Japanese clay soil that’s dug, dried and sorted into grains. Bonsai Tonight describes it as something that can “hold and release water, hold and release fertilizer, and support root growth over very long periods.” Roots can also grow into the grains, which is part of why it’s so popular.

    Kanuma is a soft, pale yellow volcanic soil. House of Bonsai describes it as “highly acidic (pH level about 5.5)” and best for acid-loving plants like azaleas and camellias. It’s usually mixed with other soils, not used alone.

    Kiryu (kiryuzuna) is a volcanic aggregate from Japan, often mixed with akadama to improve drainage and aeration.

    Most growers use akadama as part of a mix, not on its own. One commonly shared formula, quoted by Bonsai Empire, is roughly one part lava rock, one part pumice and one part akadama. Deciduous trees are often given more akadama, and conifers less.

    2. Hardness and how long it lasts

    This is the big one. Akadama breaks down over time. Bonsai Empire says it “breaks down over 1 to 2 years, depending on the quality of the akadama, freeze/thaw cycle in your climate and frequency of watering.” As it breaks down, it compacts, drains worse and can hold too much water.

    Harder akadama lasts longer. That’s why you see labels like “hard,” “super hard” and “double line” or “triple line,” which are used to signal quality grades. A simple home test that Bonsai Tonight mentions: soft akadama “crumbles easily between pinched fingers,” while hard grains don’t.

    If you live somewhere with cold, wet winters and frequent freezing and thawing, hardness matters even more.

    3. Grain size and bag price

    Grain size should match your trees. Small grains suit shohin and small pots. Larger grains suit bigger pots and help with drainage. Many bags come in several grain sizes, so check before you buy.

    Price per liter varies a lot. The bags here range from 13 to 18 liters, so compare by volume, not just by price.

    One more thing: most akadama sold outside Japan is heat-treated. Bonsai Tonight notes that heat-treated akadama (around 300°C) is primarily for import compliance, and that it’s different from fully baked akadama, which is fired much hotter and becomes more ceramic-like. Some heat-treated products also produce a bit of dust in shipping, so sifting before use is a good idea.

    A few habits that get more out of any bag.

    • Sift before you use it. Shake the soil through a sieve to remove dust and broken fines. Fine particles fill the gaps between grains and are a big part of why akadama mixes stop draining well.
    • Store it dry. Keep opened bags out of the rain and off damp ground. Akadama that sits wet for months starts breaking down before it ever reaches a pot.
    • Do the pinch test. Before using a new bag, squeeze a few grains between your fingers. If they crumble easily, use a lower percentage in your mix, or save that bag for trees you repot often.
    • Label your mixes. If you blend your own, write the ratio on the bag or bucket. It’s surprisingly easy to forget what’s in a mix by the next repotting season.
    • Watch how it behaves. After a season, check how quickly the soil dries out and whether the surface has started to look muddy. That tells you more about whether a bag suits your climate than any label does.

    Prices below are approximate and were checked at US retailers in October 2026. Prices and stock in other countries will differ.


    Comparison table

    SoilTypeBagGrain sizesApprox. priceBest for
    Double Line Ibaraki AkadamaHard akadama, heat-treated14LSmall (~6mm), Shohin~$59All-round quality akadama
    Ryusen AkadamaAkadama14LSmall (~6mm)~$59Alternative premium brand
    Ho Yoku Hard Premium AkadamaHard akadama, heat-treated18L1–3mm, 3–5mm, 5–7mm~$55Choice of grain sizes, larger bag
    Gun Poh Super Hard AkadamaSuper hard akadama, heat-treated14L3–6mm, 6–10mm, 10–18mm~$32Best value
    Double Line Akadama + Kiryu Blend~70% akadama, ~30% kiryu13L8–10mm+~$46Ready-to-use mix
    KanumaAcidic volcanic soil18L6–7mm+~$42Azaleas and acid-loving trees

    Individual reviews

    1. Double Line Ibaraki Akadama (14L)

    One of the best-known hard akadama brands sold outside Japan.

    Eastern Leaf sells the small grain (about 6mm) for $59 per 14L bag, roughly 20 lbs. It’s made in Japan and heat-treated. Eastern Leaf describes it as having “bonsai level hardness that prevents deterioration and compaction.” A finer shohin grain is also available at the same price.

    Eastern Leaf also lists Triple Red Line akadama at $69, which it positions as a premium grade above Double Line, and a “Japanese Super Hard Akadama” at $59.

    Pros

    • Well-known brand with a reputation for hardness
    • Shohin grain available for small trees
    • Easy to buy from a US retailer
    • Heat-treated for import

    Cons

    • One of the pricier options per liter
    • Limited grain sizes compared to some brands
    • Like all akadama, it will still break down eventually

    Who it’s for: Growers who want a reliable, well-known hard akadama for general use. If you only buy one bag of akadama this year, this is a safe choice.


    2. Ryusen Akadama (14L)

    Ryusen is another premium akadama brand, also sold by Eastern Leaf.

    The small grain (about 6mm) is $59 per 14L bag. Eastern Leaf says it’s made by the same company that produces Double Red Line akadama. It was out of stock when we checked.

    Eastern Leaf notes it’s often blended with fine lava rock or similar materials to improve drainage and root growth, which is good general advice for any akadama.

    Pros

    • Premium brand from a known producer
    • Same price as Double Line
    • Good for mixing with lava or pumice

    Cons

    • Stock can be patchy
    • Only one grain size listed
    • Similar price per liter to other premium bags

    Who it’s for: Growers who want a premium akadama and are happy to use Ryusen or Double Line, depending on what’s in stock.


    3. Ho Yoku Hard Premium Akadama (18L)

    The pick if you want a bigger bag and more grain sizes.

    Bonsai Outlet sells Ho Yoku hard premium akadama for $54.95 per 18L bag. It’s imported from Japan and comes in three grain sizes: small (1–3mm) for shohin, standard (3–5mm) for general use, and large (5–7mm) for bigger trees.

    Bonsai Outlet says it has been heat-treated to about 400 degrees, which makes it more durable, but that it can produce some dust during shipping. They suggest sifting before use, especially for small pots or fine mixes.

    In my experience, having the same brand in three grain sizes is more useful than it sounds. You can build mixes for different trees without your soil behaving differently from bag to bag.

    Pros

    • Larger 18L bag for a similar price
    • Three grain sizes, including very fine for shohin
    • Heat-treated for durability

    Cons

    • Can arrive with dust, so sifting is recommended
    • Less brand recognition than Double Line
    • Grain sizes are on the small side for very large trees

    Who it’s for: Growers with a mix of tree sizes who want consistent akadama in several grains.


    4. Gun Poh “Super Hard Quality” Akadama (14L)

    The value pick.

    Wigert’s Bonsai sells Gun Poh super hard akadama for $32 per 14L bag. It’s imported from Japan and heat-treated, and it comes in small (3–6mm), medium (6–10mm) and large (10–18mm) grains.

    That’s roughly half the price of the premium brands for the same volume. And it covers larger grain sizes than most, which is useful for big trees and for improving drainage.

    Pros

    • Much cheaper per liter than the premium brands
    • Wide range of grain sizes, including large
    • Labeled super hard and heat-treated

    Cons

    • Less widely known than Double Line or Ryusen
    • Mainly sold by one US retailer
    • Quality can vary between batches with any akadama

    A cheaper bag is also a sensible way to find out whether akadama suits your climate at all. If it breaks down too fast where you live, you’ll know after a season without having spent premium money to learn it.

    Who it’s for: Growers who use a lot of akadama, or who want to try it without paying premium prices.


    5. Double Line Hard Akadama + Kiryuzuna Blend (13L)

    The easiest option if you don’t want to mix your own.

    House of Bonsai sells this blend for $46 per 13L bag (about 20 lbs). It’s roughly 70% Double Line akadama and 30% kiryuzuna, in a medium 8–10mm grain. The retailer calls it “a great all purpose blend that’s ready to use on all sizes of bonsai trees,” though the medium grain is better suited to standard trees than tiny ones.

    It also changes color as it dries, from reddish brown when wet to a lighter golden brown when dry, which makes it easier to see when it’s time to water.

    Pros

    • Ready to use, no mixing needed
    • Kiryu adds drainage to the akadama
    • Color change helps with watering

    Cons

    • Only one grain size
    • Too coarse for shohin
    • You can’t adjust the ratio for different trees

    Who it’s for: Growers who want a good Japanese mix without buying several bags and blending.


    6. Kanuma (18L)

    The specialist soil for azaleas.

    House of Bonsai sells kanuma in an 18L bag for $42, in a medium 6–7mm grain. It’s made in Japan and described as soft and highly acidic, with a pH of about 5.5. It’s best for acid-loving plants like azaleas, camellias and gardenias.

    The retailer recommends mixing it with akadama or other bonsai soil rather than using it alone. Adding more kanuma increases acidity for plants that need it.

    Pros

    • The standard soil for satsuki and other azaleas
    • Good water retention with drainage
    • Large 18L bag

    Cons

    • Only useful for acid-loving trees
    • Soft, so it breaks down over time
    • Usually mixed, not used alone

    Its pale yellow color also makes it easy to tell apart from akadama in a mix, and House of Bonsai notes it can be used as a decorative top layer.

    Who it’s for: Anyone growing azaleas or other acid-loving trees.


    Recommendation by use case

    “I want one good akadama for most of my trees.” Double Line Ibaraki Akadama (or Ryusen if it’s in stock).

    “I have trees of different sizes and need several grain sizes.” Ho Yoku Hard Premium Akadama, in two or three grains.

    “I use a lot of soil and want the best value.” Gun Poh Super Hard Akadama.

    “I don’t want to mix my own soil.” Double Line Akadama + Kiryu Blend.

    “I grow azaleas.” Kanuma, mixed with some akadama.

    “I live somewhere with hard freezing winters.” A hard or super hard akadama, used as part of a mix with pumice and lava rather than on its own.


    Conclusion: pick hardness and grain size first, then the brand

    Here’s the short version.

    Akadama is a great part of a bonsai mix, but it isn’t magic, and it doesn’t last forever. Choose a hard grade so it holds up longer. Match the grain size to your trees. And use it in a mix with something that doesn’t break down, like pumice or lava, especially in cold, wet climates.

    Kanuma is for azaleas and other acid-loving trees. Kiryu helps drainage. None of them are must-haves on day one. And a ready-made blend is a perfectly good choice if you’d rather not mix your own.

    Soil goes hand in hand with repotting. When you’re ready to change it, a dedicated root cutter will save your other tools from the grit. And if the tree is moving into a new home, our Japanese bonsai pots guide covers choosing the right size and depth.

    Ready to stock up?

    Sources: Bonsai Empire: To Akadama, or not to Akadama?; Bonsai Tonight: Bonsai soil Q&A