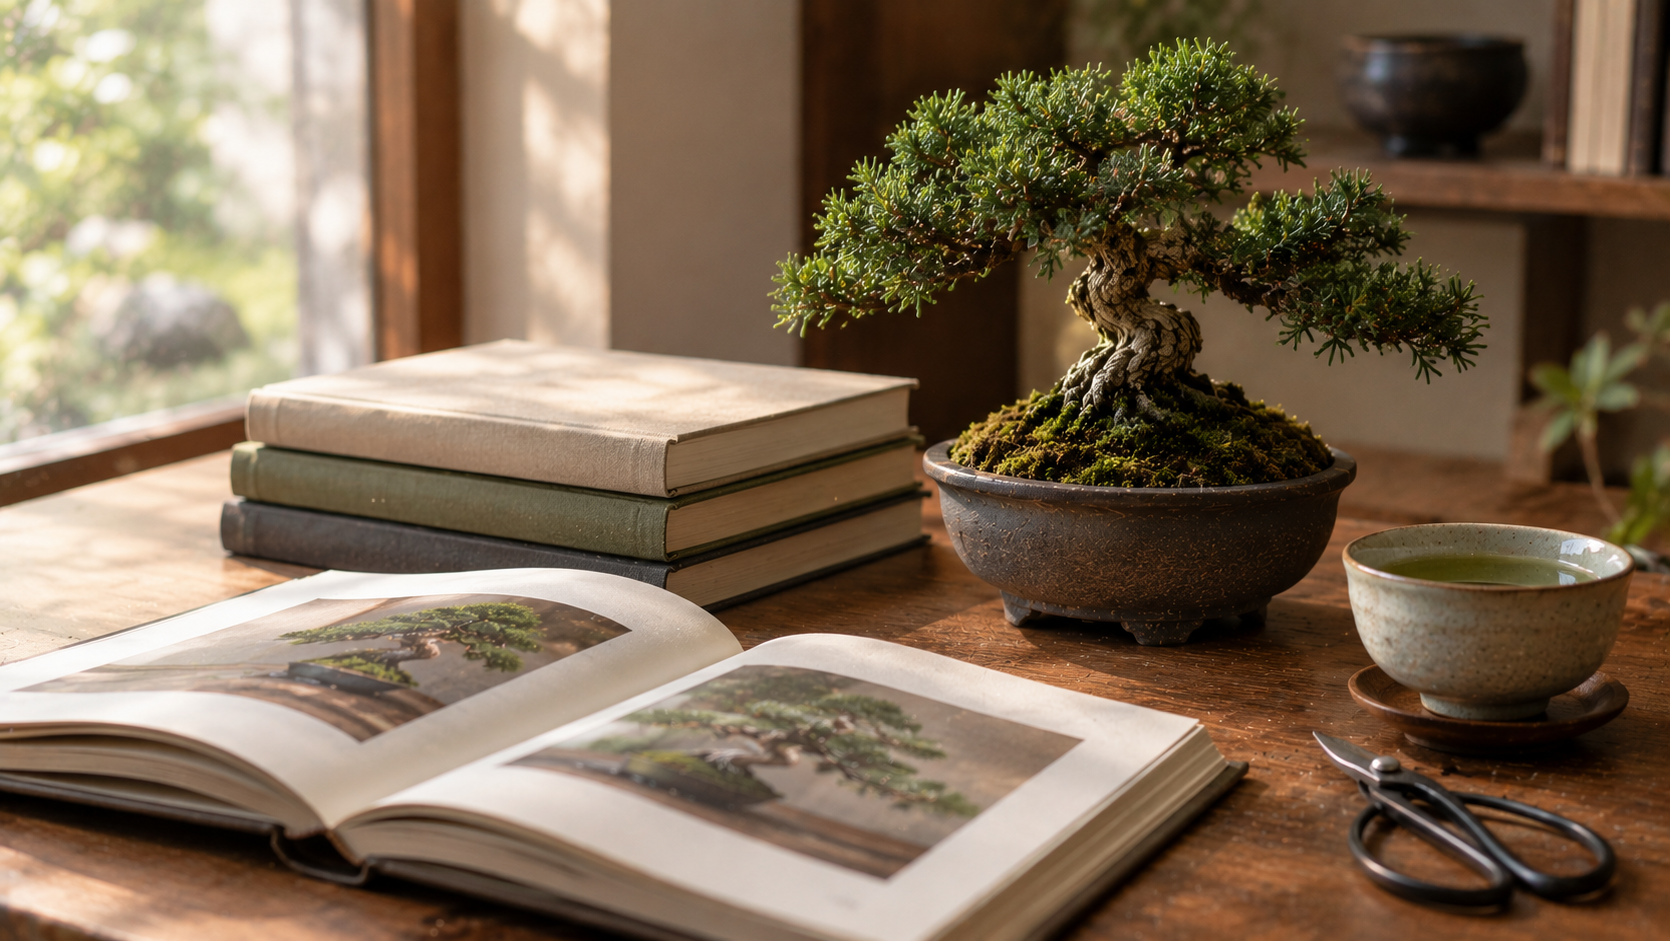
Category: Bonsai Supplies

  • Best Bonsai Books: 6 Must-Reads, From Your First Tree to Japanese Classics

    Best Bonsai Books: 6 Must-Reads, From Your First Tree to Japanese Classics

    Affiliate disclosure: Some links on this page are affiliate links. If you buy through them, Aribonsai may earn a small commission at no extra cost to you. It doesn’t change what we recommend or how we rank anything.


    Why a good book still beats a hundred videos

    There’s more free bonsai information online than ever. Videos, forums, blogs, social media. So why buy a book?

    Because online advice is scattered, often contradictory, and usually missing context. One video says repot every year; another says every five. One forum post says never water in the sun; another calls that a myth. When you’re starting out, it’s hard to know who to trust.

    A good bonsai book gives you a complete, well-organized picture from someone who has spent decades with trees. It explains not just what to do, but why. And the best ones become reference books you return to every season, long after your first tree has grown up.

    The problem is choosing. There are dozens of bonsai books, from beginner guides to deeply technical classics, and many older titles are out of print or hard to find.

    In my experience, most growers need just two or three books: one clear, modern beginner guide, one book that challenges assumptions, and one classic that connects them to bonsai’s Japanese roots. This guide compares the best bonsai books we’d recommend, from your first tree to the classics that shaped bonsai in the West.


    Who this best bonsai books guide is NOT for

    It’s not a list of species-specific monographs. There are excellent books on single species, like Japanese maples or junipers. We mention a few, but this guide focuses on books with broad value.

    It’s not for people who only want quick tips. Books take time. If you want a single answer fast, a focused article may serve you better.

    It’s not a list of every bonsai book ever written. We’ve chosen titles that are widely recommended by experienced growers and clubs.

    Still with us? Let’s go.


    How we picked these (3 things that actually matter)

    1. Your level

    Bonsai books are written for very different readers. A beginner needs clear instructions and photos. An intermediate grower needs explanations of why techniques work. An advanced grower may want history, design philosophy or deep technical detail. We’ve noted which level each book suits.

    2. Who wrote it

    The best bonsai books come from people with deep, hands-on experience: nursery owners, teachers, and artists who trained in Japan. We’ve included each author’s background so you can judge for yourself.

    3. Modern accuracy vs classic value

    Bonsai knowledge has changed a lot. Modern books often reflect current horticultural understanding, especially on soil and watering. Older classics may be weaker on care details but offer irreplaceable insight into design and tradition. A good bookshelf has both.

    A few reading habits that matter more than the book

    None of these cost anything.

    • Read with a tree in front of you. Techniques make far more sense with a real tree.
    • Re-read each season. Spring, summer and autumn chapters mean more when you’re living them.
    • Take notes. Write what you tried and what happened.
    • Compare sources. When books disagree, look at why.
    • Join a club. Many clubs have libraries and recommended reading lists.
    • Adapt to your climate. Books written for one climate may need adjusting for yours.

    Best bonsai books comparison table

    BookAuthorLevelBest forApprox. price
    The Little Book of BonsaiJonas DupuichBeginnerYour first tree~$19 (hardcover)
    The Essential Bonsai BookJonas DupuichBeginner to intermediateBuilding real techniquesCheck price
    Bonsai HeresyMichael HagedornAll levelsQuestioning bonsai mythsCheck price
    Step-by-Step Bonsai (DK)Peter WarrenBeginner to intermediateVisual, Japan-trained guidanceCheck price
    Bonsai Techniques IJohn NakaIntermediateA classic referenceVaries (often secondhand)
    The Japanese Art of Miniature Trees and LandscapesYuji YoshimuraIntermediate to advancedJapanese roots and historyVaries

    Prices vary by edition, format and seller. Older titles may only be available secondhand.


    The 6 best bonsai books, reviewed

    1. The Little Book of Bonsai (Jonas Dupuich) – the best first book

    If you’re buying one book for a beginner, this is it.

    The Little Book of Bonsai was published by Ten Speed Press in 2020. It’s a 112-page illustrated hardcover, listed at around $18.99 by the publisher. It covers the essentials of bonsai care: wiring, watering, pruning, pests and disease, tools, repotting and fertilizing, for both indoor and outdoor trees, along with choosing a container, displaying a bonsai and selecting a species. Step-by-step photos accompany the instructions.

    Jonas Dupuich runs a Northern California bonsai nursery, teaches, and writes the long-running Bonsai Tonight blog. He co-founded the Pacific Bonsai Expo and specializes in growing Japanese black pine from seed. A local bonsai society includes it on its recommended beginner reading list.

    Pros

    • Clear, modern and well illustrated
    • Covers all basic care topics
    • Short enough to actually finish
    • Written by an experienced grower and teacher

    Cons

    • Not a deep design reference
    • Experienced growers may outgrow it

    Best for: beginners and anyone with their first tree.

    Search The Little Book of Bonsai on Amazon


    2. The Essential Bonsai Book (Jonas Dupuich) – the natural next step

    Once the basics feel comfortable, Dupuich’s second book is a logical follow-up.

    The Phoenix Bonsai Society lists The Essential Bonsai Book as its second recommended beginner guide, describing it as covering techniques for creating attractive trees. Where The Little Book of Bonsai focuses on keeping a tree healthy, this one moves toward shaping and developing trees.

    If you liked Dupuich’s clear, practical style in the first book, this is an easy choice.

    Pros

    • Builds on the beginner book
    • Focuses on creating attractive trees
    • Same clear, modern approach

    Cons

    • Overlaps somewhat with the first book’s basics

    Best for: beginners ready to move from care to design.

    Search The Essential Bonsai Book on Amazon


    3. Bonsai Heresy (Michael Hagedorn) – the book that makes you think

    Bonsai Heresy by Michael Hagedorn challenges many beliefs that get repeated in bonsai circles.

    The book is split into a technical section (about two-thirds) and an aesthetic section. A reviewer on the Bonsai Mirai forum describes it questioning ideas such as water droplets burning leaves in sunlight, akadama breaking down uselessly, and the idea that a tree’s hardiness zone reflects how cold-tolerant its roots are in a pot. It also encourages readers to question traditional design “rules” rather than accepting them blindly.

    That reviewer, relatively new to bonsai, called it “an absolute must-read” and the most valuable book of his bonsai journey. Others in the thread agreed it’s worth reading.

    If you’ve read our akadama guide or winter protection guide, you’ll recognize some of the topics Hagedorn digs into.

    Pros

    • Challenges common myths with clear reasoning
    • Valuable for beginners and experienced growers
    • Covers both technique and aesthetics
    • Engaging, illustrated format

    Cons

    • Assumes some interest in the “why”
    • Not a step-by-step care manual

    Best for: anyone who wants to understand bonsai more deeply.

    Search Bonsai Heresy on Amazon


    4. Step-by-Step Bonsai (Peter Warren, DK) – best visual guide with Japanese training

    Peter Warren brings something special to his books: serious training in Japan.

    According to his publisher, Warren completed a six-year apprenticeship in Tokyo under bonsai master Kunio Kobayashi. He now teaches and consults from his studio and nursery in London, has exhibited in Japan, the US and Europe, and writes for bonsai magazines. His DK title Step-by-Step Bonsai was published in 2014, and he has also written Grow Bonsai in DK’s Grow series.

    DK books are known for clear photography and step-by-step layouts, which suit visual learners well.

    Pros

    • Author trained for six years in Japan
    • Visual, step-by-step format
    • Good bridge between beginner and intermediate

    Cons

    • Less technical depth than specialist books
    • Check which edition you’re buying

    Best for: visual learners who want guidance rooted in Japanese training.

    Search Peter Warren bonsai books on Amazon


    5. Bonsai Techniques I (John Naka) – a true classic

    John Naka is one of the most influential figures in Western bonsai, and his Bonsai Techniques books are long-time favorites.

    On Bonsai Nut, many experienced growers list Naka’s volumes among their top picks. One describes Volume I as something that will “take a novice along quite readily,” covering soil uses, soil recipes and a monthly care guide. Volume II is described as more advanced, with inspiring material on grafting and branch placement. Another grower calls the books “bulletproof,” while noting they’re weaker on care information and soil mixes than newer books, and a third points out that some explanations are thin because the books grew from Naka’s personal notes.

    They can be harder to find new, so look for secondhand copies.

    Pros

    • A classic by a legendary teacher
    • Strong on design and technique
    • Widely respected by experienced growers

    Cons

    • Care and soil advice is dated in places
    • Some explanations are brief
    • Often only available secondhand

    Best for: intermediate growers building a serious library.

    Search John Naka Bonsai Techniques on Amazon


    6. The Japanese Art of Miniature Trees and Landscapes (Yuji Yoshimura) – the Japanese foundation

    If you want to understand where Western bonsai came from, this is the book.

    Yuji Yoshimura (1921–1997) was a second-generation Japanese bonsai master born in Tokyo. In 1952 he started the first bonsai course for foreigners in Tokyo, and from 1958 he taught extensively in the United States. His book The Japanese Art of Miniature Trees and Landscapes, published by Tuttle in 1957, was the first comprehensive, practical English-language work on bonsai. It became known as the “Bonsai Bible in English,” went through 37 printings, and was reissued in 1996 as The Art of Bonsai: Creation, Care and Enjoyment.

    Some care details reflect its era, but its grounding in Japanese tradition is unmatched.

    Pros

    • Foundational Japanese bonsai text
    • Written by a Japanese master
    • Huge historical significance
    • Reissued under a newer title

    Cons

    • Older care advice
    • Editions vary

    Best for: readers who want bonsai’s Japanese roots and classical styles.

    Search Yuji Yoshimura The Art of Bonsai on Amazon


    Which bonsai book should you read? (By level)

    You’ve just got your first tree: The Little Book of Bonsai.

    You’re ready to start shaping trees: The Essential Bonsai Book or Peter Warren’s Step-by-Step Bonsai.

    You want to understand why, not just how: Bonsai Heresy.

    You’re building a serious library: John Naka’s Bonsai Techniques I.

    You want bonsai’s Japanese foundations: Yuji Yoshimura’s classic.

    You’re buying a gift: The Little Book of Bonsai for beginners, Bonsai Heresy for experienced growers. Our bonsai gifts guide has more ideas.

    A simple three-book shelf

    For most growers, a great starting library is: The Little Book of Bonsai for care, Bonsai Heresy for understanding, and Yoshimura’s classic for tradition.


    Other bonsai books worth knowing

    These titles also come up often in recommendations from clubs and experienced growers:

    • Bonsai Pocket Guide by Jason Chan, the first beginner book on the Phoenix Bonsai Society’s list.
    • Bonsai Basic Design and Principles of Bonsai Design by David DeGroot, regarded as standard references on design.
    • The Bonsai Workshop by Herb Gustafson, noted for clear explanations and photos.
    • Bonsai: Its Art, Science, History and Philosophy by Deborah Koreshoff, praised by some growers as deeply written, though others find it dated.
    • Bonsai From the Wild by Nick Lenz, recommended for collected trees.
    • Forest, Rock Planting and Ezo Spruce by Saburo Kato, admired for forest plantings.
    • Bonsai with Japanese Maples by Peter Adams, for maple enthusiasts.

    What about Japanese bonsai books and magazines?

    Many of the most beautiful bonsai publications are produced in Japan, and they’re worth knowing about even if you don’t read Japanese.

    Japan has a long tradition of bonsai magazines and exhibition albums. Monthly magazines such as Kindai Bonsai feature high-quality photographs of trees, step-by-step styling sequences and coverage of major exhibitions. The albums published for Japan’s most prestigious exhibitions, such as the Kokufu-ten, are prized by collectors for their photography of top-level trees.

    You won’t follow every caption without Japanese, but the photographs alone are a masterclass in design. Studying how branches are arranged, how pots are matched to trees, and how trees are displayed can teach you a great deal. Many collectors outside Japan buy these publications secondhand for exactly that reason.

    In English, bonsai magazines such as Bonsai Focus also publish detailed work sequences, and Peter Warren is among the writers who contribute to them.

    If you’re serious about Japanese-style bonsai, a mix of English books for explanation and Japanese publications for inspiration is a powerful combination.


    How to get the most from a bonsai book

    1. Read the basics first, even if you’re impatient.
    2. Match chapters to the season. Read repotting chapters in late winter, pruning chapters in spring and summer.
    3. Try one technique at a time on one tree.
    4. Keep a journal with photos.
    5. Compare advice with your local climate and club members.
    6. Return to the book as your trees and skills develop.

    If you’re also building your tool kit, our bonsai tools for beginners guide pairs well with any beginner book.


    Common mistakes when choosing bonsai books

    Starting with a highly technical book. Beginners can get overwhelmed.

    Relying only on old books. Care and soil advice has moved on.

    Ignoring climate differences. Adapt advice to where you live.

    Buying too many at once. Two or three good books go further than ten unread ones.

    Treating any book as the only truth. Even great authors disagree.


    Conclusion: start simple, then go deeper

    The best bonsai books give you something no single video or forum post can: a complete, trustworthy framework from someone who has spent a lifetime with trees.

    Start with The Little Book of Bonsai for clear, modern care. Add Bonsai Heresy when you’re ready to question what you’ve learned. And when you want to understand bonsai’s origins, Yuji Yoshimura’s classic connects you to the Japanese masters who brought bonsai to the West.

    Read with a tree in front of you, adapt to your climate, and keep coming back as your skills grow.

    Ready to start reading? Search The Little Book of Bonsai, or search Bonsai Heresy on Amazon.
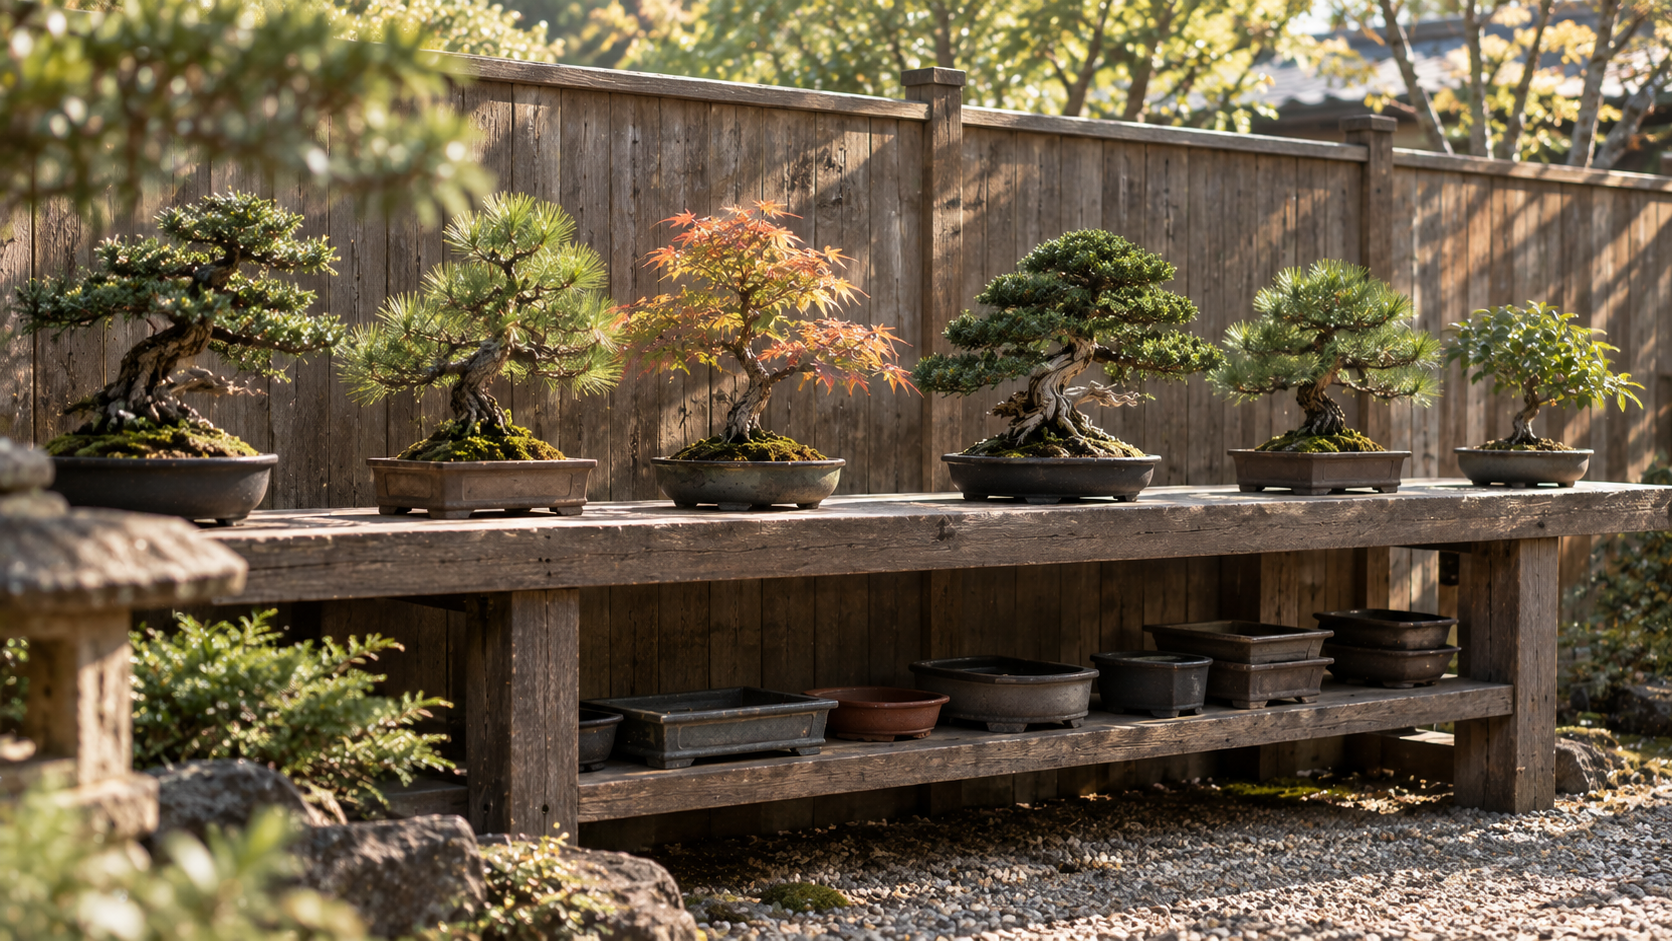
  • Best Bonsai Bench: 6 Bench and Shelf Options, From Cinder Blocks to Galvanized Steel

    Best Bonsai Bench: 6 Bench and Shelf Options, From Cinder Blocks to Galvanized Steel

    Affiliate disclosure: Some links on this page are affiliate links. If you buy through them, Aribonsai may earn a small commission at no extra cost to you. It doesn’t change what we recommend or how we rank anything.


    Your trees deserve to get off the ground

    Most bonsai collections start the same way. One tree on the patio table. Then three on the steps. Then a dozen scattered across the ground, the wall and an old garden chair.

    At some point, you need a proper bonsai bench.

    A good bench does far more than hold pots. It lifts trees off the ground, away from slugs, splashing soil and curious pets. It improves air circulation around the pots. It puts trees at a height where you can actually see them, water them and work on them without bending over all day. And it makes your collection look like a collection, not a pile of pots.

    The choices range from a few cinder blocks and boards to custom timber benches and galvanized steel nursery benches. Some growers swear by cheap wire shelving; others build something that looks like garden furniture.

    In my experience, the biggest bench mistakes are getting the height wrong and choosing something that can’t take the weight of wet pots and soil. This guide explains what matters, then compares six bonsai bench options, from the cheapest DIY build to sturdy metal benches.


    Who this bonsai bench guide is NOT for

    It’s not about indoor display stands. For displaying a single tree indoors or at a show, see our bonsai display stand guide.

    It’s not about work turntables. A turntable sits on top of a bench to help you work on a tree.

    It’s not a full carpentry tutorial. We’ll cover simple builds, but check detailed plans if you’re building something large.

    Still with us? Let’s go.


    How we picked these (3 things that actually matter)

    1. Height

    Bench height affects how you see your trees, how easily you water them and how comfortable you are working on them.

    On the Bonsai Mirai forum, growers suggest around 35 to 40 inches (about 90 to 100 cm) for a general bench. One points out that show tables are about 2.5 feet high, with trees often raised further on stands, so a bench around 3 feet gives a similar viewing height. On Bonsai Nut, members suggest about 30 to 36 inches for most trees, around 36 inches as a working height, and around 48 inches for display benches that bring trees closer to eye level.

    Taller growers may prefer slightly higher benches. Larger, heavier trees often suit lower, wider benches, while small shohin can go higher.

    2. Strength and width

    Wet bonsai pots are heavy. A bench must carry the weight of pots, soil and water without sagging.

    Bench tops of around 17 to 24 inches deep are common, according to forum members, though some growers use wider benches to maximize space. Long benches need extra support: one Bonsai Mirai forum member points out that an 8-foot bench needs a center set of legs.

    3. Material and weather

    • Treated or stained timber looks natural and suits a Japanese-style garden, but needs refinishing every few years.
    • Galvanized steel resists rust and pests and lasts a long time.
    • Wire or plastic shelving is cheap and easy, but less attractive.
    • Concrete blocks are almost indestructible and very cheap.

    A few bench habits that matter more than the bench

    None of these cost anything.

    • Place benches where trees get the right light. Most outdoor bonsai want plenty of sun, with some shade for sensitive species.
    • Leave space between pots for air circulation and easy watering.
    • Keep heavier trees low. It’s safer and easier to lift them.
    • Secure tall or top-heavy trees against wind.
    • Allow water to drain freely. Slatted tops dry faster than solid ones.
    • Leave room to walk around. You’ll want to see trees from all sides.
    • Plan for winter. Benches you can move or empty easily make winter protection simpler.

    Bonsai bench comparison table

    Bench / shelfTypeBest forDurabilityApprox. cost
    Cinder blocks + boardsDIY benchCheapest sturdy benchVery high (blocks), boards need replacingVery low
    DIY timber bench (Douglas fir)DIY benchAttractive garden displayHigh with refinishingModerate
    Chrome wire shelvingShelvingBudget, small treesModerate~$40 per set (forum estimate)
    Heavy-duty plastic shelvingShelvingMovable, weatherproofGoodLow to moderate
    vidaXL Galvanized Steel Plant StandMetal standSmall collections, patiosHighCheck price
    Galvanized tiered nursery benchMetal nursery benchLarge collectionsVery highHigher, quote-based

    Costs are approximate and depend on size, materials and location.


    The 6 best bonsai bench options, reviewed

    1. Cinder blocks and boards – the cheapest sturdy bench

    This is the classic beginner bonsai bench, and plenty of experienced growers still use it.

    On Bonsai Nut, one member describes a simple design: concrete blocks stacked two high, a 2×4 crosspiece, and deck boards on top, for a total height of about 34.5 inches. It’s cheap, quick to build, and the blocks will last essentially forever.

    The downsides are appearance and flexibility. It looks utilitarian, and the boards will eventually need replacing. But for a growing collection on a budget, it’s hard to beat.

    Pros

    • Very cheap
    • Extremely sturdy
    • Quick to build, no tools needed for the blocks
    • Easy to adjust height and length

    Cons

    • Utilitarian look
    • Boards need replacing over time
    • Heavy to move

    Best for: beginners and anyone expanding a collection on a budget.

    Search deck boards and concrete blocks at your local hardware store, or on Amazon


    2. DIY timber bench – the best-looking option

    If your bonsai area is part of your garden, a timber bench makes it look intentional and beautiful.

    Bonsai Empire shares a DIY bench built from Douglas fir and finished with a rosewood stain, about 8 feet wide. Its advice includes using screws with an anti-rust coating, pre-drilling all holes so the wood doesn’t crack, applying two coats of stain before assembly and one after, and expecting to restain about every five years. The design includes a lower level, which adds stability and gives storage for pots plus a shaded spot for accent plants.

    On forums, growers also mention pressure-treated lumber as a practical choice.

    Pros

    • Attractive, natural look
    • Lower shelf adds stability and storage
    • Can be built to any size
    • Suits a Japanese-style garden

    Cons

    • Needs tools and time to build
    • Wood needs restaining every few years
    • Long benches need center supports

    Best for: growers who want a bench that looks like part of the garden.

    Read Bonsai Empire’s DIY bench guide


    3. Chrome wire shelving – the budget shelf for small trees

    Wire shelving units are a popular quick solution, especially for smaller trees and shohin.

    On Bonsai Nut, one member describes chrome-plated wire shelving as inexpensive, at roughly $40 per set, and decent for the price. The open wire design lets water drain and air circulate, and multiple shelves let you fit more trees into a small space.

    Make sure lower shelves still get enough light, and check the weight rating, since wet pots add up quickly.

    Pros

    • Cheap and easy to assemble
    • Open design drains well
    • Multiple levels save space

    Cons

    • Lower shelves may get too little light
    • Can rust over time outdoors
    • Less attractive than wood

    Best for: small trees, shohin and tight spaces.

    Search chrome wire shelving on Amazon


    4. Heavy-duty plastic shelving – the weatherproof, movable option

    Plastic shelving doesn’t look like a traditional bonsai bench, but it has practical advantages.

    On Bonsai Nut, one member notes that heavy-duty plastic shelving doesn’t need painting and won’t rot, and can be moved into a garage for winter. Another grower points out that movable shelving also makes winter protection and pet safety easier.

    It’s less attractive than wood, but for growers who move trees seasonally, it’s very convenient. Our bonsai winter protection guide covers winter storage options.

    Pros

    • Won’t rot or rust
    • Light and movable
    • No painting or maintenance

    Cons

    • Less attractive
    • Lower weight capacity than steel
    • Can become brittle in strong sun over time

    Best for: growers who move trees into a garage or shed for winter.

    Search heavy-duty plastic shelving on Amazon


    5. vidaXL Galvanized Steel Plant Stand – a ready-made metal stand

    If you’d rather buy than build, a galvanized steel plant stand is a sturdy, low-maintenance option.

    vidaXL’s 2-tier plant stand in anthracite measures about 75.5 × 54.5 × 100 cm and is made from galvanized steel, which the retailer describes as strong, stable and better protected against corrosion, making it suitable for outdoor use. Two tiers let you display trees of different sizes.

    The listing doesn’t give a weight capacity, so check that before loading it with large, heavy pots.

    Pros

    • Galvanized steel resists corrosion
    • Ready-made, no carpentry
    • Two tiers for different sizes

    Cons

    • Weight capacity not listed
    • Fixed size
    • Industrial look

    Best for: patios and small collections where you want a ready-made metal stand.

    Search vidaXL galvanized plant stands on Amazon


    6. Galvanized tiered nursery bench – best for large collections

    For a serious collection, a nursery-grade bench is built to last.

    Australian manufacturer Sage Horticultural makes a galvanized steel three-tier bench designed to withstand daily nursery use, with no plastic parts. It stands 1,100 mm high, with tiers at 400, 750 and 1,100 mm, and comes in widths from 610 mm to 3,020 mm. The retailer lists bonsai among the plants it suits, and notes that the open design improves air circulation. Optional lockable casters make it movable. Price is by quote, with freight quoted separately.

    Tiered benches suit mixed collections well: larger trees low, smaller trees higher.

    Pros

    • Nursery-grade galvanized steel
    • Three tiers for mixed collections
    • Many widths
    • Optional casters

    Cons

    • Price by quote
    • Mainly available in Australia
    • Industrial appearance

    Best for: large collections and serious growers in Australia, or anyone wanting a nursery-grade bench.

    Search galvanized tiered nursery benches on Amazon


    Which bonsai bench should you buy? (By situation)

    You’re on a tight budget: cinder blocks and boards.

    You want a beautiful garden display: a DIY timber bench.

    You grow shohin or small trees in a small space: wire shelving.

    You move trees indoors for winter: heavy-duty plastic shelving.

    You want a ready-made, low-maintenance stand: a galvanized steel plant stand.

    You have a large collection: a galvanized tiered nursery bench.

    A practical setup

    Many growers combine benches: a sturdy main bench at about 3 feet for most trees, a higher display bench for favorite trees, and a lower bench for heavy specimens. A bonsai turntable on the main bench makes working on trees much easier.


    Bonsai benches in Japan

    In Japan, bonsai benches are often called tana, a word that simply means shelf or rack. Visit a bonsai nursery there and you’ll usually see long rows of simple, sturdy benches, often made of wood or concrete, holding trees at a comfortable working height with plenty of air around each pot.

    The style is practical rather than decorative. Trees are grouped by species and needs, sun-loving pines in the open and more delicate trees where they get some shade. Benches are built strong, kept clean and spaced so growers can walk around and water easily.

    That’s a useful model for any home bonsai area. A bonsai bench doesn’t need to be fancy. It needs to be strong, at the right height, in the right light, and easy to work around. A few well-placed, simple benches will do more for your trees than one elaborate piece of furniture.


    Bench layout ideas for small spaces

    Not everyone has a large garden. If your space is a balcony, patio or small yard, these ideas help.

    • Go vertical. Tiered stands and shelving let you fit more trees into a small footprint. Keep the sunniest top level for sun-loving trees.
    • Use a narrow bench along a wall or railing. A depth of around 17 inches is often enough for small and medium trees.
    • Mix heights. A low bench for heavy trees and a taller shelf for shohin can share the same space.
    • Check balcony weight limits. Wet soil and ceramic pots are heavy. If you’re on a balcony, keep the load sensible.
    • Secure everything against wind. Balconies and rooftops can be very windy. Tie down or anchor tall shelves and top-heavy trees.
    • Leave a little space between pots. Even in a small area, airflow matters.

    A small, well-organized bonsai bench area can hold more trees than you’d expect, and it’s much easier to care for than pots scattered across the ground.


    How to plan a bonsai bench

    1. Count your trees, and add room to grow.
    2. Measure your space, including walking room around the benches.
    3. Choose the height, usually between about 30 and 40 inches for most trees.
    4. Decide the depth, often 17 to 24 inches.
    5. Check sun and shade throughout the day.
    6. Plan for watering. If you use automatic watering, run lines along the bench. Our bonsai automatic watering system guide covers options.
    7. Build or buy with strength in mind, including center supports on long benches.

    Common bonsai bench mistakes

    Building too low. You’ll bend constantly and won’t see your trees well.

    Building too high. Watering and lifting heavy pots become awkward.

    Ignoring weight. Wet pots are heavy; benches sag or collapse.

    Skipping center supports. Long boards bow over time.

    Crowding trees. Poor airflow encourages pests and disease.

    Placing benches in the wrong light. Sun-loving trees struggle in shade.


    Conclusion: the right height, strong enough, in the right place

    A bonsai bench is one of the best investments you can make for your collection. It protects trees, improves airflow, makes watering easier and lets you actually enjoy what you’ve grown.

    For most beginners, cinder blocks and boards are the simplest start. For a beautiful garden, a timber bench is worth building. And for large collections, a galvanized nursery bench will last for decades.

    Aim for around 3 feet high, build it strong enough for wet pots, and place it where your trees get the light they need.

    Ready to build or buy? Read Bonsai Empire’s DIY bench guide, or compare galvanized plant stands on Amazon.

  • Best Bonsai Gifts: 6 Ideas for Beginners, Growers and Collectors, From $10 to Special Pieces

    Best Bonsai Gifts: 6 Ideas for Beginners, Growers and Collectors, From $10 to Special Pieces

    Affiliate disclosure: Some links on this page are affiliate links. If you buy through them, Aribonsai may earn a small commission at no extra cost to you. It doesn’t change what we recommend or how we rank anything.


    Buying for a bonsai person is harder than it looks

    Shopping for someone who loves bonsai seems easy at first. They love trees, so buy them a tree. Or a tool. Or something “bonsai-themed.”

    Then you start looking. There are hundreds of tools with confusing names. Pots in every size and style. Trees from $30 to several hundred dollars. And a nagging worry: what if they already have it? What if it’s the wrong size, the wrong kind, the wrong quality?

    The most common gift mistakes are predictable. A cheap 12-piece tool kit that a serious grower would never use. A tree that needs conditions the recipient can’t provide. Or a decorative item that ends up in a drawer.

    The good news is that the best bonsai gifts aren’t necessarily expensive. A few well-chosen Japanese tools or accessories are useful at every level, and almost every grower appreciates them.

    In my experience, the safest bonsai gifts are things that get used up, things people rarely buy for themselves, or a quality upgrade of something they already use every week. This guide sorts gift ideas by who you’re buying for, then compares six bonsai gifts from a $10 stocking stuffer to a special piece for a collector.


    Who this bonsai gifts guide is NOT for

    It’s not for buying a valuable specimen tree as a surprise. Serious growers usually want to choose trees themselves. If you want to buy a special tree, consider a gift card from a good nursery instead.

    It’s not for gag gifts. Novelty “bonsai” items rarely get used by real growers.

    It’s not a full tool guide. We link to our detailed guides if you want to compare more options.

    Still with us? Let’s go.


    How we picked these (3 things that actually matter)

    1. Who you’re buying for

    This matters more than anything else.

    • Someone who doesn’t grow bonsai yet: a healthy beginner tree, ideally with a simple kit.
    • A beginner: basic Japanese tools they’ll use every week.
    • An experienced grower: quality accessories or upgrades they’re unlikely to buy for themselves.
    • A collector: something special, like a beautiful stand, pot or premium tool case.

    2. Usefulness over decoration

    The best bonsai gifts get used. Tools, tool storage, watering cans and display pieces all earn their place. If you’re unsure, choose something that works with any tree, rather than something specific to a species or size.

    3. Low risk of duplicates or wrong sizes

    Some gifts are easy to get wrong. Pots need to match a specific tree. Wire comes in many gauges. Cutters come in sizes. Safer gifts include tweezers, tool rolls, watering cans, small stands and gift cards, which work regardless of what the person already owns.

    A few gift-buying habits that matter more than the price

    None of these cost anything.

    • Ask what they grow. Indoor or outdoor, small or large trees.
    • Look at their tools. If they already own a brand, a matching piece is a thoughtful touch.
    • Avoid giant cheap kits. One good tool beats ten poor ones.
    • Think about delivery timing. Live trees don’t like freezing or extreme heat in transit.
    • Include a gift receipt. Especially for tools and pots.
    • When in doubt, choose accessories. They’re useful for every grower.

    Bonsai gifts comparison table

    GiftBest forWhy it worksApprox. price
    Kaneshin No.61A TweezersAnyone who grows bonsaiUsed constantly, cheap, Japanese-made~$10
    Wazakura 3PCS Starter KitBeginnersScissors, tweezers and broom in one box~$70
    A beginner gift treeSomeone new to bonsaiA living start, with care basics~$37 and up
    Kaneshin Bonsai Tool PouchGrowers who travel to workshopsProtects favorite tools, made in Japan~$64
    Small Japanese display standAnyone with a tree indoorsMakes any tree look finished~$15 and up
    Japanese copper watering canExperienced growers and collectorsA beautiful tool few buy for themselves~$179 and up

    Prices are approximate and vary by retailer. Always check current prices before buying.


    The 6 best bonsai gifts, reviewed

    1. Kaneshin No.61A Bent Nose Tweezers – the best gift under $15

    If you need a small gift, a stocking stuffer, or something to add to a bigger present, this is it.

    The Kaneshin No.61A is handcrafted in Japan from stainless steel, with bent tips on one end and a spatula on the other. Bonsai Tonight lists it at around $10. It’s used for removing dead leaves and flowers, weeding, tidying soil and placing moss, so almost every grower will use it every week.

    Even someone who already owns tweezers will appreciate a quality spare, especially from a respected Japanese maker.

    Pros

    • Very affordable
    • Made in Japan by Kaneshin
    • Useful for every grower
    • Almost no risk of a “wrong” gift

    Cons

    • Small gift on its own
    • They may already own a pair

    Best for: stocking stuffers and add-on gifts.

    Check the Kaneshin No.61A at Bonsai Tonight


    2. Wazakura 3PCS Starter Kit – best gift for a beginner

    If the person has just started bonsai, a small set of real Japanese tools is one of the most useful gifts you can give.

    Wazakura’s 3-piece starter kit includes satsuki bonsai scissors in black carbon steel, stainless steel tweezers with a rake end, and a bonsai broom for cleaning the soil surface. It’s made in Sanjo, Niigata, and costs around $70. In our bonsai starter tool set guide, we call it the lightest commitment and a sensible first purchase.

    It doesn’t include a concave cutter or wire cutter, but that’s fine for a first year of trimming and tidying.

    Pros

    • Real Japanese tools at a gift-friendly price
    • Covers everyday tasks
    • Made in Sanjo, Japan

    Cons

    • No cutters for structural pruning
    • Experienced growers may already have these tools

    Best for: beginners in their first year or two.

    Search Wazakura bonsai starter kit on Amazon


    3. A beginner gift tree – best for someone new to bonsai

    For someone who doesn’t grow bonsai yet, a living tree is the classic gift. It’s also the riskiest, so choose carefully.

    Large bonsai nurseries offer trees aimed at beginners and gifts. Brussel’s Bonsai, for example, has a Beginner category of starter trees and gifts, plus pre-assembled gift kits, with listed examples such as a Green Mound Juniper from around $37. Gift-focused shops like Bonsai Boy of New York sell ready-to-give trees in decorative pots.

    Match the tree to where it will live. Junipers and other temperate trees belong outdoors. If the recipient lives in an apartment, an indoor tropical species like a ficus is a much better choice. Our where to buy bonsai trees online guide compares sellers in more detail.

    Pros

    • A memorable, living gift
    • Beginner and gift options at many price points
    • Can spark a lifelong hobby

    Cons

    • Needs the right conditions to thrive
    • Shipping in extreme weather is risky
    • Gift trees are often young starter material

    Best for: someone who has shown interest in bonsai but doesn’t grow yet.

    Visit Brussel’s Bonsai


    4. Kaneshin Bonsai Tool Pouch – best gift for an active grower

    Experienced growers often have good tools but carry them around loose in a bag. A quality tool case is something many never get around to buying for themselves.

    The Kaneshin Bonsai Tool Pouch is made in Japan from tough, water-resistant synthetic leather with a soft felt lining. The small size is about 10 × 5.4 inches and costs around $64 at Niwaki. It’s ideal for carrying core tools to workshops and club meetings.

    If you’d like a larger or more luxurious option, our bonsai tool roll guide compares canvas rolls, a 12-pocket Japanese roll and a leather folio.

    Pros

    • Made in Japan
    • Protects tools from knocks
    • Useful at any level
    • Something people rarely buy themselves

    Cons

    • Compact, holds only a few tools
    • Larger size discontinued

    Best for: growers who attend workshops, clubs or classes.

    Check the Kaneshin Bonsai Tool Pouch at Niwaki


    5. A small Japanese display stand – best gift for indoor display

    A display stand makes any bonsai look finished, and it’s a gift that works for almost any tree.

    Small stands start at very affordable prices. Wazakura sells a small wooden stand made in Japan, about 12.8 × 12.8 cm, for around $15, which suits mame and desk-sized trees. Larger tables and handcrafted Japanese boards cost more. Our bonsai display stand guide explains how to choose the right size and style.

    Size matters: a stand should be a little larger than the pot. If you don’t know the pot size, a small stand is the safer choice, since it suits many smaller trees.

    Pros

    • Affordable small options
    • Makes any tree look more refined
    • Works for indoor display

    Cons

    • Needs to match the pot size
    • Collectors may be particular about style

    Best for: anyone who displays a tree indoors.

    Search Wazakura small bonsai stand on Amazon


    6. Japanese copper watering can – the special gift for a serious grower

    If you want to give something truly special, a Japanese copper watering can is a beautiful choice. Few growers buy one for themselves, but many dream of owning one.

    Japanese copper cans have fine roses that give a soft, gentle spray, ideal for bonsai soil. In our bonsai watering can guide, a Japanese-made 0.9-liter copper can from Eastern Leaf costs around $179, while long-reach versions and Masakuni’s traditional copper can cost considerably more.

    Copper develops a natural patina over time, so the can becomes more beautiful with use.

    Pros

    • Beautiful, traditional Japanese craftsmanship
    • Gentle spray suited to bonsai
    • Lasts for many years
    • A true “treat” gift

    Cons

    • Expensive
    • Smaller cans hold limited water

    Best for: serious growers and collectors, or a milestone gift.

    Search Japanese copper watering cans on Amazon


    Which bonsai gift should you buy? (By recipient and budget)

    Under $20: Kaneshin No.61A tweezers, or a small Japanese display stand.

    Under $75: Wazakura 3PCS Starter Kit, or the Kaneshin Bonsai Tool Pouch.

    For someone new to bonsai: a beginner gift tree, ideally with the Wazakura starter kit.

    For an active grower: Kaneshin tool pouch or a quality tool roll.

    For a collector: a Japanese copper watering can, or a handcrafted display stand.

    When you’re not sure: tweezers plus a gift card from a bonsai nursery.

    A simple gift bundle idea

    For a beginner, a lovely bundle is: a healthy starter tree suited to their home, the Wazakura starter kit, and a small display stand. It gives them everything they need to start and to show off their first tree.


    Other bonsai gifts worth considering

    The six gifts above are our main picks, but a few other ideas are well worth considering, especially for growers who seem to have everything.

    A workshop or class. Many bonsai nurseries and clubs run hands-on workshops. An experience gift like this is memorable, and the recipient learns from an expert while working on a real tree.

    A bonsai club membership. Local clubs usually charge modest annual fees and offer meetings, demonstrations, plant sales and friendly advice. It’s a lovely gift for someone just getting serious.

    A bag of quality Japanese soil. Growers go through soil every repotting season, and good akadama or kanuma isn’t cheap. It’s a practical, consumable gift that never goes to waste.

    Tool care products. Camellia oil, a rust eraser or a small sharpening stone are inexpensive, useful and often overlooked.

    A gift card from a bonsai nursery. It isn’t the most exciting present, but it lets the recipient choose exactly the tree, pot or tool they want. For experienced growers, it’s often the most appreciated option.

    A bonsai book. A well-chosen book on styling or species care can be a good companion gift alongside a tree or tool.


    How to find out what they need without spoiling the surprise

    If you’re buying for a bonsai grower, a little quiet research makes the gift much better.

    • Look at their tool collection. Notice which brand they use, and whether tools are stored loose or in a roll.
    • Notice what they complain about. Growers often mention things like “my tweezers are bent” or “I need a better watering can.”
    • Check their trees. Indoor or outdoor? Small shohin or larger trees? That tells you which gifts will fit.
    • Ask a friend from their club. Fellow growers often know exactly what someone wants.
    • Check their wish lists. Many people keep online wish lists for hobby items.

    Even a few minutes of observation can turn a generic present into the kind of bonsai gift they’ll actually use for years.


    Gift timing and delivery tips

    • Order early in the holiday season. Popular items and tools sell out.
    • Be careful with live trees in winter. Many nurseries limit tree shipping in cold weather. Consider giving a gift card or a “promise” of a spring tree.
    • Check shipping regions. Some sellers only ship within their own country.
    • Keep receipts. Tools and pots are easier to exchange than trees.

    Common bonsai gift mistakes

    Buying a big cheap tool kit. Many pieces go unused, and quality is often poor.

    Choosing a tree that doesn’t suit their home. Outdoor trees struggle indoors.

    Guessing pot sizes. Pots need to match a specific tree.

    Shipping trees in freezing weather. Trees can be damaged in transit.

    Buying decorations instead of tools. Most growers prefer things they’ll use.


    Conclusion: practical, quality, and suited to their level

    The best bonsai gifts are practical things the person will use, in better quality than they might buy for themselves. For a small gift, Japanese tweezers are hard to beat. For beginners, a small Japanese starter kit is ideal. Active growers will appreciate a quality tool pouch, and collectors will treasure a Japanese copper watering can.

    If you’re buying a tree, choose one that suits the recipient’s home and avoid shipping in extreme weather. And when in doubt, a quality accessory or a nursery gift card is always welcome. The thought that goes into choosing something they’ll really use is what makes a bonsai gift special.

    Ready to shop? Check the Kaneshin No.61A tweezers, or search the Wazakura starter kit on Amazon.

  • Bonsai Winter Protection: 6 Products and Methods to Keep Your Trees Alive Until Spring

    Bonsai Winter Protection: 6 Products and Methods to Keep Your Trees Alive Until Spring

    Affiliate disclosure: Some links on this page are affiliate links. If you buy through them, Aribonsai may earn a small commission at no extra cost to you. It doesn’t change what we recommend or how we rank anything.


    Winter kills more bonsai than any pest

    Every autumn, bonsai forums fill up with the same question: what do I do with my trees this winter?

    It’s a good question to ask early. Winter is when many bonsai are lost, and often not for the reason people expect. A juniper growing in the ground can handle hard frost easily, because the soil insulates its roots. The same juniper in a shallow bonsai pot is a different story. Its roots sit in a few centimeters of soil, exposed on every side, and they’re far less cold-hardy than the branches above them.

    Then there’s the opposite mistake. Many beginners bring hardy outdoor trees into a warm living room to “protect” them. That can be just as harmful, because temperate trees need a cold, dormant rest to stay healthy.

    Good bonsai winter protection sits between those two extremes: keep the roots from freezing too hard, keep the tree cold enough to stay dormant, and shield it from drying winds and endless winter rain.

    In my experience, the people who lose trees in winter usually either did nothing at all, or did far too much. This guide explains what your trees actually need, then compares six winter protection products and methods, from free techniques to cold frames and small greenhouses.


    Who this bonsai winter protection guide is NOT for

    It’s not for indoor tropical bonsai. Ficus, carmona, jade and other tropical species stay indoors all winter in a bright spot. Our grow light for bonsai guide covers the light they need.

    It’s not for very mild climates. If your winters rarely freeze, many temperate trees need little or no protection beyond shelter from wind.

    It’s not a species-by-species guide. Cold tolerance varies by species and even by individual tree. Always check what your specific trees need.

    Still with us? Let’s go.


    How we picked these (3 things that actually matter)

    1. How cold your winters get

    This decides almost everything.

    Evergreen Gardenworks, a long-established bonsai nursery, says most temperate woody plants in containers need no protection until temperatures fall below about 15°F (-10°C). Bonsai Empire gives a similar guideline: where lows often drop below about 15°F (-10°C), a cold frame or greenhouse is recommended. In milder areas, around 25°F (-4°C) at night, trees can often stay outside on the ground, sheltered from wind, with pots covered or insulated.

    2. How hardy your trees are

    Bonsai Empire groups trees roughly like this:

    • Very hardy: pines, larch, spruce, fir, yew. Tolerate strong frost but still need root protection in pots.
    • Cold hardy: junipers, Japanese maple, Chinese elm, hornbeam, zelkova. Can stay outdoors with some protection.
    • Moderately hardy: azalea, beech, olive, camellia. Roots are frost-sensitive, so a cold frame or insulated shelter helps.
    • Frost tender and tropical: serissa, bougainvillea, ficus, jade and others. Keep indoors or in a heated space.

    3. Protecting roots, not just branches

    Most winter protection is really about the roots. Evergreen Gardenworks explains that container roots lack the insulation of surrounding soil, which is why potted trees need protection that trees in the ground don’t. Covering the pot, burying it, or keeping it in a sheltered structure all help.

    A few winter habits that matter more than any product

    None of these cost anything.

    • Let trees feel the first frosts. Evergreen Gardenworks recommends letting plants experience early freezes so they harden off, then starting protection as lows approach about 20°F (-7°C).
    • Don’t bring temperate trees into a warm house. Warmth can break dormancy.
    • Keep the tree cold but not frozen solid. Evergreen Gardenworks suggests keeping a cold frame above about 15°F and below about 40°F (4°C).
    • Watch watering. Dormant trees need little water, but they mustn’t dry out. Check soil during warm spells.
    • Shelter from wind. Cold, drying winds damage evergreens.
    • Clean up before winter. Remove fallen leaves and debris, where pests and fungus overwinter. Our bonsai pest control guide covers dormant-season clean-up.
    • Watch for early spring growth. Once buds open, protect trees from late frosts.

    Bonsai winter protection comparison table

    Product / methodTypeBest forClimateApprox. price
    Heeling in (burying pots)Free methodHardy trees, snowy areasColdFree
    Foam insulation around potsDIY insulationRoot protection on the benchMild to moderate coldLow
    DeWitt N-Sulate frost clothFrost fabricCovering trees on cold nightsMild to moderate coldVaries by size
    Min-max thermometerMonitoringAny protected spaceAnyLow
    Palram Canopia Plant Inn cold frameCold frameSmall collectionsCold~£344 (UK)
    Unheated garage or shed (+ thermostat outlet)ShelterMany trees in very cold areasVery coldLow to moderate

    Prices are approximate and vary by size, retailer and region. Always check the current price before buying.


    The 6 best bonsai winter protection options, reviewed

    1. Heeling in (burying pots in the ground) – the best free method

    This is the oldest bonsai winter protection trick, and it costs nothing.

    Missouri Botanical Garden describes it simply: bury the pots in a sheltered spot outdoors, cover the soil lightly with mulch, and place gravel in the trench for drainage. The ground keeps the soil cool and evens out temperature swings. Evergreen Gardenworks adds that in heavy-snow areas, heeling pots in, mulching the pot tops and lower stems with bark, and letting snow insulate them works well.

    It does take garden space and some digging. And trees in the ground aren’t as easy to check, so keep an eye on watering during dry, mild spells.

    Pros

    • Free
    • Uses the ground’s natural insulation
    • Smooths out temperature swings

    Cons

    • Needs garden space
    • More work in autumn and spring
    • Harder to check trees

    Best for: hardy trees in gardens with space, especially in snowy areas.


    2. Foam insulation around pots – the easiest bench protection

    If you can’t bury your pots, insulating them is the next best thing.

    Bonsai Empire suggests placing styrofoam covers around pots to insulate the roots. You can use foam insulation boards, polystyrene boxes, or even foam cooler boxes. Set pots close together on the ground, surround them with foam, and fill gaps with mulch or bark.

    It’s cheap, quick and works well in moderate cold. In very cold climates, it’s usually combined with a cold frame or sheltered structure.

    Pros

    • Cheap and easy
    • Protects roots without moving trees far
    • Reusable every winter

    Cons

    • Less effective in severe cold
    • Can look untidy
    • Make sure water can still drain

    Best for: growers in moderate climates who keep trees on a bench or patio.

    Search foam insulation board on Amazon


    3. DeWitt N-Sulate frost cloth – best for cold nights

    Frost cloth is a lightweight, breathable fabric you drape over plants to trap ground warmth on cold nights. Evergreen Gardenworks describes a similar minimal approach: drape a cover over plants overnight and remove it during the day.

    DeWitt’s N-Sulate fabric is a popular choice, at 1.5 oz per square yard and 11.5 mil thick, UV-treated and permeable. Gemplers describes it as protecting plants from severe cold and spring or fall frosts. It’s sold in large 12-foot-wide rolls, from about $213 for 12 × 250 feet at one retailer, and smaller 10 × 12-foot pieces are also available elsewhere.

    For most hobbyists, a small piece is plenty. Drape it over trees and pots on cold nights, and secure the edges so wind can’t lift it.

    Pros

    • Breathable and light
    • Easy to put on and take off
    • Useful for unexpected spring frosts

    Cons

    • Limited protection in severe cold
    • Big rolls are more than most hobbyists need
    • Needs securing in wind

    Best for: mild to moderate climates, and late frosts after buds open.

    Search DeWitt N-Sulate frost cloth on Amazon


    4. Min-max thermometer – the small tool that prevents big mistakes

    You can’t protect trees properly if you don’t know how cold it gets, or how warm a cold frame becomes on a sunny afternoon.

    Evergreen Gardenworks recommends using a min-max thermometer in a cold frame. It records the lowest and highest temperatures since you last reset it, so you can see whether your trees dipped below safe levels overnight or overheated during the day.

    It’s cheap, and it turns guessing into knowing.

    Pros

    • Very inexpensive
    • Shows overnight lows and daytime highs
    • Useful in any shelter

    Cons

    • Needs checking and resetting

    Best for: anyone using a cold frame, greenhouse, garage or shed.

    Search min-max thermometers on Amazon


    5. Palram Canopia Plant Inn Cold Frame – best cold frame for a small collection

    A cold frame is a small, low greenhouse that shelters trees from wind, frost and excess rain. Bonsai Empire recommends a cold frame or greenhouse where winter lows often fall below about 15°F (-10°C).

    The Palram Canopia Plant Inn 4×4 Raised Cold Frame is about 1.18 × 1.18 m, with a rust-resistant aluminium frame and clear polycarbonate glazing. It has a hinged lid with five positions for ventilation and a storage compartment underneath. A UK retailer lists it at around £344.

    Ventilation is critical. Missouri Botanical Garden and Evergreen Gardenworks both warn that cold frames can overheat on sunny days, which can break dormancy. Open the lid on mild days, and use a min-max thermometer.

    Pros

    • Shelters trees from frost, wind and rain
    • Adjustable lid for ventilation
    • Durable aluminium and polycarbonate

    Cons

    • Expensive for a cold frame
    • Can overheat if not vented
    • Mainly sold in the UK

    Best for: small collections in cold climates.

    Search Palram Canopia cold frames on Amazon


    6. Unheated garage or shed with a thermostat outlet – best for very cold climates

    In very cold climates, many growers move trees into an unheated garage, shed or porch for the coldest part of winter.

    Evergreen Gardenworks describes using an unheated structure with a low-set thermostat and a space heater that turns on below about 20°F (-7°C), while avoiding long periods above about 40°F (4°C). Plug-in thermostat outlets can switch a heater on only when it gets very cold. Missouri Botanical Garden adds two cautions: prevent overheating on mild days, and check soil moisture often, because the trees won’t get rain or snow.

    Evergreen Gardenworks notes that dormant deciduous trees need no light, and dormant evergreens can stay in the dark as long as temperatures stay near or below freezing.

    Pros

    • Protects many trees at once
    • Low cost if you already have the space
    • Works in severe cold

    Cons

    • Trees need regular watering checks
    • Risk of warmth breaking dormancy
    • Heaters need safe setup

    Best for: large collections in very cold winters.

    Search plug-in thermostat outlets on Amazon


    Which bonsai winter protection should you use? (By situation)

    Your winters are mild (rarely below 25°F / -4°C): keep trees on the ground, sheltered from wind, with pots insulated or covered on cold nights.

    Your winters are moderate: foam insulation around pots, plus frost cloth on the coldest nights.

    Your winters are cold (often below 15°F / -10°C): a cold frame, or heeling pots into the ground.

    Your winters are very cold: an unheated garage or shed, ideally with a thermostat-controlled heater for extreme nights.

    You grow tropical bonsai: keep them indoors, with a grow light if needed.

    You grow a mix: hardy trees outside or in a cold frame, tender trees indoors.

    A simple starter setup

    For most hobbyists in moderate climates, a good first winter setup is: pots grouped on the ground in a sheltered spot, foam insulation around them, a piece of frost cloth for the coldest nights, and a min-max thermometer.


    Extra care for shohin, mame and good pots

    Small trees need more bonsai winter protection than large ones. A shohin or mame pot holds very little soil, so it freezes faster and more completely than a large pot. Many growers group small trees together and bury or insulate them more carefully than their bigger trees, or move them into a cold frame first.

    Pots deserve attention too. Wet soil expands when it freezes, and repeated freeze-thaw cycles can stress ceramic pots. Many growers protect valuable pots by grouping them in a sheltered spot, insulating them, or keeping them out of standing water in winter. Making sure pots drain well, and not leaving them sitting in saucers of water, also helps.

    In Japan, growers in colder regions have long used sheltered winter storage areas for their trees, sometimes called a muro. The idea is the same as a cold frame or unheated shed: keep the trees cold and dormant, but out of the harshest frost and wind. Whatever you call it, the principles are the same everywhere: protect the roots, keep the tree dormant, and check it regularly.


    Winter watering and care

    Dormant trees need much less water, but they still need some. Check pots during mild or windy spells, and water when the soil is starting to dry. Make sure water reaches the root ball, since mulch can shed water. A gentle bonsai watering can helps avoid washing away mulch or soil.

    Avoid fertilizing during dormancy, and save any repotting for late winter or early spring, depending on species.


    Common bonsai winter protection mistakes

    Bringing hardy trees indoors. Warmth can break dormancy.

    Doing nothing in a cold climate. Pot roots freeze far more easily than tree roots in the ground.

    Letting cold frames overheat. Ventilate on sunny days.

    Forgetting to water. Sheltered trees don’t get rain.

    Removing protection too early. Late frosts can damage new buds.


    Conclusion: keep roots safe, keep trees dormant

    Good bonsai winter protection isn’t complicated. It’s about protecting the roots from hard freezes, keeping trees cold enough to stay dormant, and shielding them from drying wind and endless rain.

    In mild areas, simple insulation and frost cloth are often enough. In colder areas, heeling pots in or using a cold frame makes a real difference. And in very cold climates, an unheated garage with careful temperature control can protect a whole collection.

    Know your climate, know your trees, and check on them regularly through the winter. A little preparation in autumn means healthy buds and strong growth when spring finally arrives.

    Ready for winter? Search DeWitt frost cloth, or compare cold frames on Amazon.

  • Best Bonsai Pest Control Products: 6 Gentle-to-Strong Options for Insects and Fungus

    Best Bonsai Pest Control Products: 6 Gentle-to-Strong Options for Insects and Fungus

    Affiliate disclosure: Some links on this page are affiliate links. If you buy through them, Aribonsai may earn a small commission at no extra cost to you. It doesn’t change what we recommend or how we rank anything.


    Small trees, small problems that grow fast

    Bonsai pest control is one of those topics nobody thinks about until something goes wrong.

    You notice a sticky shine on the leaves of your ficus. A cluster of tiny green insects on new shoots. A pale, speckled look on a juniper that turns out to be spider mites. White fluff in the branch crotches. Or spots and powdery patches on a maple’s leaves.

    On a big garden tree, a few pests rarely matter. On a bonsai, they can. A small tree has far fewer leaves to lose, and pests spread quickly when trees sit close together on a bench or a windowsill.

    The trouble is that the garden-center shelf is overwhelming. Insecticides, fungicides, oils, soaps, systemic granules, ready-to-use sprays and concentrates. Some are gentle enough for regular use, others are much stronger. And some, used in the wrong conditions, can damage the very tree you’re trying to protect.

    In my experience, most bonsai pest problems are solved with the gentlest tools first: a strong rinse, a cotton swab, insecticidal soap or neem oil. Stronger products are a last resort. This guide explains how to choose, then compares six bonsai pest control options, from simple household fixes to copper fungicide.


    Who this bonsai pest control guide is NOT for

    It’s not a diagnosis guide. If you’re not sure what’s wrong with your tree, identify the problem first. Overwatering, underwatering, poor light and nutrient problems can all look like pests or disease.

    It’s not a replacement for the label. Every product here has its own dilution rates, timing and safety instructions. Always read and follow the label.

    It’s not for every country. Pesticide availability and rules vary by country and state. Some products here can’t be shipped to certain US states, and some aren’t sold in Canada.

    Still with us? Let’s go.


    How we picked these (3 things that actually matter)

    1. Gentle first, strong last

    Bonsai Learning Center recommends a sensible order for dealing with pests: physical removal first, then good growing practices, then organic controls like neem oil, insecticidal soap and horticultural oil, and only then targeted chemicals such as copper fungicides or systemic insecticides.

    That’s the order we follow here. Gentle options are safer for your trees, for beneficial insects, and for you.

    2. Matching the product to the problem

    Different products work on different problems.

    • Soft-bodied insects (aphids, whiteflies, mealybugs, spider mites): insecticidal soap or neem oil.
    • Scale and overwintering eggs: horticultural oil, or a cotton swab with rubbing alcohol for small outbreaks.
    • Fungal diseases (powdery mildew, black spot, rust, leaf spots): neem oil for mild cases, copper fungicide for more serious ones.

    Using the wrong product wastes time and can stress the tree.

    3. Plant safety and conditions

    Many sprays can damage leaves if used in the wrong conditions. For example, Bonide’s horticultural oil label says not to apply above 90°F or to dry plants, and not to use it together with sulfur sprays or when sulfur is on the foliage. Always test any spray on a small part of the tree first, especially on sensitive species and newly repotted trees.

    A few pest prevention habits that matter more than any product

    None of these cost anything.

    • Inspect your trees often. Check while you water, especially in spring and summer.
    • Quarantine new trees. Keep new arrivals apart for several weeks before they join your collection.
    • Improve airflow. Space trees out so leaves dry quickly.
    • Water the soil, not the foliage, when fungus is a problem. A gentle bonsai watering can helps.
    • Keep the bench clean. Remove fallen leaves and debris, where pests and fungus overwinter.
    • Pick off pests by hand. Fine bonsai tweezers are perfect for caterpillars and small clusters.
    • Rinse with water. A firm spray knocks off aphids and spider mites surprisingly well.

    Common bonsai pests at a glance

    Knowing what you’re looking at is half of bonsai pest control. These are the pests growers report most often.

    • Aphids: small green, black or brown insects clustered on soft new shoots. Leaves may curl or feel sticky.
    • Spider mites: tiny and hard to see. Look for fine pale speckling on leaves or needles, and sometimes fine webbing. Junipers are a common target.
    • Scale insects: small, hard or waxy bumps on bark and leaves that don’t look like insects at first.
    • Mealybugs: white, cotton-like clumps, often in branch crotches and leaf joints, especially on indoor trees.
    • Caterpillars: chewed leaves and small droppings. Usually easiest to remove by hand.
    • Fungus gnats: small flies around the soil of indoor trees, often a sign the soil is staying too wet.

    If you’re unsure, take a clear photo and ask at a local bonsai club or nursery before spraying anything.


    Bonsai pest control comparison table

    ProductTypeTargetsStrengthApprox. price
    Rubbing alcohol + cotton swabHouseholdScale, mealybugsVery gentle, spot useVery low
    Safer Brand Insect Killing SoapInsecticidal soapAphids, mites, whiteflies, mealybugsGentle~$15 (16 oz concentrate)
    Bonide Captain Jack’s Neem OilNeem oilInsects, mites, mildew, rustGentle to moderateVaries
    Bonide All Seasons Spray OilHorticultural oilScale, mites, eggsModerate~$30 (32 oz)
    Bonide Liquid Copper FungicideCopper fungicideLeaf spots, blights, mildewStronger~$28 (16 oz concentrate)
    Lime sulfur (dormant spray)Dormant treatmentOverwintering fungus and pestsStrong, dormant season onlyVaries

    Prices are approximate and vary by retailer. Always check the current price and local rules before buying.


    The 6 best bonsai pest control options, reviewed

    1. Rubbing alcohol and a cotton swab – the first thing to try

    Before you buy anything, check your bathroom cabinet.

    Bonsai Learning Center recommends dabbing scale insects and mealybugs with a cotton swab dipped in rubbing alcohol. It’s precise, cheap and very effective for small outbreaks, because you treat only the pests, not the whole tree. Pair it with a firm water rinse for aphids and spider mites.

    It isn’t practical for large infestations, but for a few scale insects on a juniper or mealybugs in a ficus’s branch crotches, it’s often all you need.

    Pros

    • Almost free
    • Precise, treats only the pest
    • No spray drift onto other trees

    Cons

    • Slow on large infestations
    • Doesn’t prevent new pests

    Best for: small outbreaks of scale and mealybugs.

    Search cotton swabs and isopropyl alcohol on Amazon


    2. Safer Brand Insect Killing Soap – the best gentle spray

    Insecticidal soap is the classic first spray for soft-bodied pests. Safer Brand’s concentrate uses potassium salts of fatty acids, which break down the waxy coating of insects and cause them to dehydrate. It works on contact and doesn’t persist in the environment.

    The label lists aphids, mealybugs, spider mites, whiteflies, leafhoppers, soft scales and more. You mix 1 part concentrate with 50 parts water, and a 16 oz bottle makes up to 6 gallons. It’s OMRI listed for organic use and costs about $15. One retailer notes it isn’t available for sale in Canada.

    Because it only works on contact, you need to spray the insects directly, including the undersides of leaves, and repeat while pests are present.

    Pros

    • Gentle and OMRI listed
    • Works on many common bonsai pests
    • Concentrate makes a lot of spray
    • Doesn’t persist in the environment

    Cons

    • Contact only, so coverage matters
    • Needs repeat applications
    • Not sold in Canada

    Best for: aphids, spider mites, whiteflies and mealybugs on indoor and outdoor bonsai.

    Search Safer Brand insecticidal soap on Amazon


    3. Bonide Captain Jack’s Neem Oil – best all-rounder for insects and fungus

    Neem oil is popular with bonsai growers because it does two jobs: it controls insects and mites, and it helps with some fungal diseases.

    Bonide’s Captain Jack’s Neem Oil is a ready-to-use spray derived from neem seed. Bonide says it kills all stages of insects, including eggs, larvae and adults, and targets mites, aphids and whiteflies. It also controls black spot, powdery mildew and rust, and can be used as a dormant spray. Bonide describes it as approved for organic gardening.

    In Europe, bonsai shops also sell small bottles of neem oil concentrate. Maillot, for example, sells a 60 ml bottle for around €6.40 and suggests monthly preventive use on outdoor bonsai from May to September.

    Pros

    • Works on insects, mites and some fungal diseases
    • Approved for organic gardening
    • Ready-to-use convenience
    • Bonsai-sized concentrates available in Europe

    Cons

    • Strong smell
    • Test on sensitive trees first
    • Check temperature guidance on the label

    Best for: growers who want one spray for common insects and mild fungal problems.

    Search Bonide neem oil on Amazon


    4. Bonide All Seasons Horticultural & Dormant Spray Oil – best for scale and overwintering pests

    Horticultural oil is the tool for scale insects, mites and overwintering eggs, which can be hard to reach with soap.

    Bonide’s All Seasons oil is a refined mineral oil that coats and smothers insects and eggs. The label lists scale insects, spider mites, aphids, whitefly, mealybugs and more, plus some diseases like powdery mildew and rust. It can be used during dormancy or the growing season. A 32 oz ready-to-spray bottle costs about $30.

    Read the cautions carefully. The label says not to apply above 90°F or to dry plants, not to use it with sulfur sprays or when sulfur is on the foliage, and not to use the hose-end sprayer on houseplants or in greenhouses. It’s also toxic to fish.

    Pros

    • Effective on scale and overwintering eggs
    • Usable in dormant and growing seasons
    • Covers many common pests

    Cons

    • Can damage leaves in heat or on dry plants
    • Not compatible with sulfur sprays
    • Hose-end version not for houseplants

    Best for: outdoor bonsai with scale or persistent mite problems.

    Search Bonide All Seasons spray oil on Amazon


    5. Bonide Liquid Copper Fungicide – best for stubborn fungal disease

    When fungal disease goes beyond a few spots, copper fungicide is a common next step. Bonsai Learning Center mentions copper-based fungicides as a targeted option for certain fungal diseases.

    Bonide Liquid Copper Fungicide lists a wide range of diseases on its label, including anthracnose, bacterial leaf spot, black spot, botrytis, downy mildew, fire blight, powdery mildew and scab. A 16 oz concentrate costs about $28. One retailer notes it isn’t OMRI certified, and that it can’t be shipped to Alaska, California or Washington, D.C.

    It’s stronger than neem oil, so use it when you’ve identified a specific disease, follow the label closely, and avoid overuse.

    Pros

    • Covers many fungal and bacterial diseases
    • Long shelf life
    • Widely available in the US

    Cons

    • Not OMRI certified
    • Shipping restrictions in some states
    • Toxic to fish

    Best for: identified fungal problems that gentler sprays haven’t solved.

    Search Bonide Liquid Copper Fungicide on Amazon


    6. Lime sulfur as a dormant spray – the winter clean-up

    Many bonsai growers know lime sulfur as a deadwood treatment, but it’s also used in some places as a dormant spray against overwintering fungus and pests.

    It’s strong, smells of sulfur, and is mainly applied when deciduous trees are dormant. Rules on its horticultural use vary by country and state, and it shouldn’t be combined with oil sprays; Bonide’s oil label warns against using oil where sulfur is on the foliage. Our lime sulfur for bonsai guide covers products, safety and where to buy.

    Pros

    • Useful dormant-season clean-up
    • Also used for deadwood treatment
    • A little goes a long way

    Cons

    • Strong and unpleasant to handle
    • Restricted in some areas
    • Not compatible with oil sprays

    Best for: experienced growers doing a dormant-season clean-up on outdoor trees.

    Check our lime sulfur guide


    Which bonsai pest control product should you use? (By problem)

    Aphids on new shoots: rinse with water, then insecticidal soap.

    Spider mites on junipers: rinse, then insecticidal soap or neem oil, repeated.

    Scale insects: cotton swab with rubbing alcohol for small outbreaks; horticultural oil for larger ones.

    Mealybugs on indoor trees: rubbing alcohol on a swab, then insecticidal soap.

    Powdery mildew or rust: improve airflow, then neem oil; copper fungicide if it persists.

    Leaf spots and blights: remove affected leaves, then copper fungicide.

    Winter clean-up on outdoor trees: dormant oil or lime sulfur, never together.

    A simple starter kit

    Most hobbyists can handle the majority of pest problems with just three things: a spray bottle, a bottle of insecticidal soap and a bottle of neem oil. Add horticultural oil or copper fungicide only if you face scale or stubborn fungal disease.


    What about systemic insecticides?

    Systemic insecticides are absorbed by the plant and kill sap-sucking insects that feed on it. Bonsai Learning Center lists them as a last-resort option for persistent sap-sucking pests.

    They can work well, but they’re stronger, can affect beneficial insects and pollinators, and are restricted in some countries. If you consider one, read the label carefully, avoid flowering trees that attract pollinators, and check local rules first.


    How to spray bonsai safely

    1. Identify the pest or disease before treating.
    2. Read the label, including temperature limits and plant warnings.
    3. Test on a small area and wait a day or two.
    4. Spray in cool conditions, such as early morning or evening.
    5. Cover both sides of the leaves, plus branch crotches and bark.
    6. Keep sprays off the soil where possible, especially on newly repotted trees.
    7. Repeat as the label directs. Most pests need more than one treatment.
    8. Wear gloves and eye protection, and keep pets and children away until it dries.

    Common bonsai pest control mistakes

    Spraying without identifying the problem. Watering issues often look like pests.

    Using strong chemicals first. Start gentle and step up only if needed.

    Spraying in hot sun. Many sprays burn leaves in heat.

    Mixing oil and sulfur. It can damage foliage.

    Treating once and stopping. Eggs hatch later. Follow up.

    Bringing home untreated new trees. Quarantine first.


    Conclusion: gentle, early and consistent

    Good bonsai pest control isn’t about having the strongest spray. It’s about spotting problems early, starting with the gentlest fix, and following up.

    For most growers, a cotton swab with rubbing alcohol, insecticidal soap and neem oil will handle the majority of problems. Horticultural oil is the next step for scale and overwintering pests, and copper fungicide is there for stubborn fungal disease. Whatever you use, read the label, test first, and spray in cool conditions.

    Ready to protect your trees? Search Safer Brand insecticidal soap, or search Bonide neem oil on Amazon.

  • Best Bonsai Raffia in 2026: 6 Wraps for Bending Branches Without Breaking Them

    Best Bonsai Raffia in 2026: 6 Wraps for Bending Branches Without Breaking Them

    Affiliate disclosure: Some links on this page are affiliate links. If you buy through them, Aribonsai may earn a small commission at no extra cost to you. It doesn’t change what we recommend or how we rank anything.


    The quiet layer behind every dramatic bend

    Watch a professional bonsai artist make a big bend on an old juniper and you’ll notice something before the wire even goes on. They wrap the branch, round and round, in pale strips of what looks like dried grass.

    That’s bonsai raffia. It’s one of the cheapest supplies in bonsai, and one of the most important for heavy work.

    Raffia does two jobs. It compresses the branch, holding the outer wood and bark together so they’re less likely to split when you bend. And it protects the bark from the wire, clamps and guy wires that go on top. When a big bend goes wrong, it’s often because the branch wasn’t supported well enough before the force was applied.

    The confusing part is that “raffia” covers a lot of products. There’s bonsai-specific raffia, garden raffia, craft-store raffia, and a whole range of alternatives people swear by: electrical tape, vet wrap, nylon cord. Some work well. Some leave sticky residue on your bark for a year.

    In my experience, most beginners skip raffia entirely, then wonder why a branch cracked during a bend that looked easy. This guide explains what matters, then compares six bonsai raffia options and alternatives, from premium bonsai raffia to the wraps experienced growers use on top of it.


    Who this bonsai raffia guide is NOT for

    It’s not for light wiring. Thin branches that bend easily with wire alone don’t usually need raffia.

    It’s not a wiring guide. Wire choice and gauges have their own article: our bonsai wire guide covers aluminum and copper.

    It’s not about decorative raffia. Gift-wrapping and craft raffia in bright colors is a different use, although natural craft raffia can work for bonsai, as we’ll see.

    Still with us? Let’s go.


    How we picked these (3 things that actually matter)

    1. Strand length and width

    This matters more than people expect.

    Longer, wider strands cover more of the branch in one pass and need fewer joins. On a thick trunk, short strands mean constant splicing, which is slow and creates weak points. Bonsai forum members note that craft-store raffia often has shorter strands than bonsai-specific raffia, which means more knots and more joining.

    2. Natural fiber that breathes

    Natural raffia is made from palm leaf fiber. Once soaked, it’s flexible enough to wrap tightly around a branch. As it dries, it tightens and grips.

    Bonsai Mirai makes an important point about why natural raffia is preferred: unlike electrical tape or horse wrap, it lets oxygen move through so the tree’s vascular system keeps working. Raffia also breaks down over time rather than strangling the branch.

    3. Grip and how easy it is to remove

    Wet raffia that dries on the branch grips tightly. That’s what you want for support. But it also makes it harder to remove later. Some growers wrap electrical tape over raffia to keep it moist and hold everything together, while others leave it exposed.

    You’ll eventually remove raffia once the bend has set, so think about that when you wrap.

    A few raffia habits that matter more than the product

    None of these cost anything.

    • Soak it first. Retailers and experienced growers recommend soaking raffia in water before use, from around 20 minutes to a couple of hours, so it’s flexible and won’t snap when pulled tight.
    • Wrap tightly, with overlap. Each turn should overlap the last, covering the whole area you’ll bend.
    • Use several layers for big bends. Thick branches often get two or more layers.
    • Wrap before you wire. Raffia goes on first, then wire, clamps or guy wires on top.
    • Keep it away from new buds. Leave growth points uncovered where you can.
    • Bend in the right season. Many growers avoid heavy bending in summer and prefer late winter or early spring.
    • Remove it once the bend holds. Leaving it on forever can hide problems in the bark.

    Bonsai raffia comparison table

    ProductTypeBest forSizeSellerApprox. price
    Bonsai Mirai RaffiaPremium bonsai raffiaBig bends, professional workNot statedBonsai MiraiCheck price
    Herons Natural Raffia (Cream)Natural raffiaUK growersNot statedHerons~£5 (UK)
    Bonsai Plaza Natural RaffiaNatural raffiaEU growers50 gBonsai Plaza~€4.30 (EU)
    Natural craft raffiaNatural raffiaBudget, light workVariesCraft stores, AmazonLow
    Electrical tapeOuter wrapHolding raffia moist and in placeRollsHardware storesLow
    Vet wrapSelf-adhesive wrapExperiments onlyRollsFarm storesLow

    Prices are approximate and vary by seller. Always check the current price before buying.


    The 6 best bonsai raffia options, reviewed

    1. Bonsai Mirai Raffia – the premium choice for big bends

    Bonsai Mirai, the well-known Oregon bonsai studio, sells its own raffia. It describes it as the widest, longest and most consistent raffia available, and says it constantly searches for and tests the highest-quality raffia for its trees.

    Mirai calls raffia essential for major design work on many bonsai species, because it provides compression and protection while still letting oxygen move through to the tree’s vascular system.

    The listing doesn’t give a size or price, so check the shop directly. But if you’re working on a large juniper or pine and making serious bends, long, wide, consistent strands save a lot of time and splicing.

    Pros

    • Long, wide, consistent strands
    • Chosen by a professional bonsai studio
    • Fewer joins on thick branches

    Cons

    • Price and size not listed on the page
    • More expensive than craft raffia

    Best for: serious growers doing heavy bends on large trees.

    Check Raffia at Bonsai Mirai


    2. Herons Natural Raffia (Cream) – the simple UK option

    Herons Bonsai sells natural raffia in cream for around £5. It’s described as a protective wrap: wrapping raffia around a branch before you put wire on can help protect the branch.

    The listing is short, without weight or origin details, but at this price it’s an easy add-on to any order. Herons also includes 50 g of raffia in its large branch bending kit, alongside a bender, clamp, trunk splitter and heavy wire.

    Pros

    • Inexpensive
    • Sold by an established UK bonsai nursery
    • Easy to add to a tool or soil order

    Cons

    • Weight and origin not stated
    • Mainly available in the UK

    Best for: UK growers who need raffia for occasional bends.

    Check Natural Raffia at Herons


    3. Bonsai Plaza Natural Raffia – the best-documented budget pick

    Bonsai Plaza’s natural raffia comes in 50 g bundles for around €4.30, and its listing has clearer instructions than most.

    It recommends soaking the raffia in water for a couple of hours so it can be pulled tight without breaking, then wrapping it firmly around the branch or trunk in overlapping turns before bending. It also says raffia should go on before wire, clamps or guy wires, especially for heavier bending, brittle material, or older, thicker branches.

    The product is unbranded, and origin isn’t stated. But for European growers, it’s an inexpensive and well-explained option.

    Pros

    • Clear usage instructions
    • Inexpensive 50 g bundles
    • Good for EU buyers

    Cons

    • Unbranded, origin not stated
    • Strand length not listed

    Best for: European growers who want an affordable, reliable bundle.

    Check Natural Raffia at Bonsai Plaza


    4. Natural craft raffia – the budget workaround

    You don’t always need bonsai-branded raffia. On bonsai forums, growers say craft-store raffia and bonsai-specific raffia are largely interchangeable, and some use both.

    The main difference is strand length. Craft raffia tends to have shorter strands, so you’ll make more joins on a thick branch. Make sure you buy natural raffia, not synthetic or colored decorative ribbon. US bonsai retailers also sell raffia at modest prices, so compare before buying lots of small craft bundles, which can add up.

    Pros

    • Cheap and easy to find
    • Works well for small and medium branches
    • Good for practice

    Cons

    • Shorter strands mean more joins
    • Quality varies a lot
    • Avoid synthetic or dyed versions

    Best for: beginners, practice bends, and small to medium branches.

    Search natural raffia on Amazon


    5. Electrical tape – the outer layer that holds it all together

    Electrical tape isn’t a replacement for raffia, but many experienced growers use it alongside it.

    On bonsai forums, a common method is to wrap the branch in raffia, then cover the raffia with electrical tape. The tape holds everything in place and helps keep the raffia moist. Some growers add aluminum or copper wire under the tape for extra support. One suggestion is to leave small gaps in the tape so you can rewet the raffia underneath.

    The downside is that a taped branch looks black and untidy for a while, and tape doesn’t breathe the way raffia does, which is exactly why Mirai recommends raffia as the layer against the bark.

    Pros

    • Holds raffia tightly in place
    • Helps keep raffia moist
    • Cheap and widely available

    Cons

    • Doesn’t breathe, so not ideal directly on bark
    • Looks messy during training
    • Needs careful removal

    Best for: experienced growers making very heavy bends who want an extra outer layer.

    Search vinyl electrical tape on Amazon


    6. Vet wrap – the alternative most growers regret

    Vet wrap is the stretchy, self-sticking bandage used on horses and pets. Some well-known bonsai artists have used it, and it’s sometimes described as breathable, so it’s worth discussing.

    On bonsai forums, though, opinions are mostly negative. Growers report that it gets sticky, leaves residue on the bark, gums up rough bark, and degrades in sun. One grower who used it on pines and junipers said the leftover bits disappeared within a year, but several others said they wouldn’t use it again.

    We’ve included it because people often ask. For most growers, natural raffia is the better choice.

    Pros

    • Easy and fast to apply
    • Stretchy, so it compresses well

    Cons

    • Can leave sticky residue
    • Degrades in sunlight
    • Many growers report bad experiences

    Best for: experimenters only. Most growers should use raffia.

    Search vet wrap on Amazon


    Which bonsai raffia should you buy? (By situation)

    You’re making big bends on large conifers: Bonsai Mirai Raffia.

    You’re in the UK: Herons Natural Raffia.

    You’re in Europe: Bonsai Plaza Natural Raffia.

    You’re practicing or bending smaller branches: natural craft raffia.

    You want extra hold on a very heavy bend: raffia underneath, electrical tape on top.

    You’re tempted by vet wrap: try raffia first.

    A typical heavy-bend wrap

    For a thick conifer branch, many growers use this order: soaked raffia wrapped tightly in several layers, then heavy wire over the raffia, sometimes electrical tape over everything, and finally guy wires or a jack to make the bend. Good bonsai jin pliers help tighten wire neatly over the raffia.


    How to wrap a branch with bonsai raffia

    The basic technique is simple, but a little care makes a big difference.

    1. Soak the raffia. Put a bundle in a bucket of water before you start. Wet strands are softer and can be pulled tight without snapping.
    2. Prepare a few strands at a time. Take two or three strands together for thicker branches. This gives a wider, stronger band.
    3. Anchor the start. Begin a little below the area you’ll bend. Lay the end of the raffia along the branch and wrap over it to lock it in place.
    4. Wrap tightly with overlap. Pull firmly as you wrap, overlapping each turn by about half its width. Gaps leave weak spots.
    5. Join new strands neatly. When a strand runs out, lay the new one over the old end and keep wrapping over both. No knots needed.
    6. Cover past the bend. Finish a little beyond the area that will bend, then tuck the end under the last turn.
    7. Add more layers if needed. On heavy bends, many growers wrap a second layer in the opposite direction.
    8. Wire over the raffia. Apply wire while the raffia is still damp, then bend slowly.

    The first time takes a while. After a few branches, it becomes quick and natural.


    Other uses for raffia in bonsai

    Raffia isn’t only for bending. Bonsai growers also use it to:

    • Tie a weak tree upright in its pot when it has few roots.
    • Anchor a tree temporarily during repotting. Our bonsai repotting supplies guide covers tie-down methods.
    • Hold soil in place in group plantings and landscape displays.
    • Protect bark under guy wires where they touch the trunk.

    One article from Bonsai Clubs International notes that raffia breaks down over time without harming the tree, unlike stretchy rubber tape, which can strangle roots.


    How to remove bonsai raffia

    Raffia should come off once the bend has set, which can take a growing season or longer on heavy bends.

    1. Check the bend. Make sure it holds before removing support.
    2. Remove outer layers first. Tape and wire come off before the raffia.
    3. Cut, don’t unwind forcefully. Dried raffia grips tightly. Cutting it carefully with scissors is often easier than pulling.
    4. Check the bark. Look for cracks or wounds. Seal any open wounds; our bonsai cut paste guide compares sealants.
    5. Rewire if needed. If the branch starts to spring back, rewire lightly.

    Common bonsai raffia mistakes

    Using dry raffia. It snaps and doesn’t grip properly.

    Wrapping too loosely. Loose raffia gives no compression.

    Using synthetic ribbon. Plastic raffia doesn’t breathe or break down.

    Leaving it on too long. Check regularly, and remove it when the bend has set.

    Skipping it on brittle wood. Old, thick or brittle branches need support most.


    Conclusion: wrap first, bend second

    Bonsai raffia isn’t glamorous, but it’s one of the main reasons professionals can make dramatic bends without snapping branches. It compresses the wood, protects the bark, and still lets the branch breathe.

    For heavy work on large conifers, a premium raffia like Bonsai Mirai’s is worth it. For most hobbyists, an inexpensive natural raffia from a bonsai shop works well. And if you need extra hold, electrical tape over the raffia is a proven combination.

    Soak it, wrap it tightly with overlap, bend slowly, and remove it once the branch holds its new shape.

    Ready for your next bend? Check Raffia at Bonsai Mirai, or check Natural Raffia at Bonsai Plaza.

  • Best Kanuma Bonsai Soil in 2026: Kanuma, Kiryu, Hyuga Pumice and 6 Japanese Soils Beyond Akadama

    Best Kanuma Bonsai Soil in 2026: Kanuma, Kiryu, Hyuga Pumice and 6 Japanese Soils Beyond Akadama

    Affiliate disclosure: Some links on this page are affiliate links. If you buy through them, Aribonsai may earn a small commission at no extra cost to you. It doesn’t change what we recommend or how we rank anything.


    Akadama isn’t the whole story

    Most bonsai growers learn about akadama first. It’s the famous Japanese clay that appears in almost every soil mix you read about. But walk into a serious bonsai nursery in Japan and you’ll see bags of other soils stacked right next to it: pale yellow kanuma, rusty brown kiryu, white hyuga pumice, black volcanic rock.

    Each one exists for a reason. Kanuma bonsai soil is the classic choice for satsuki azaleas. Kiryu drains fast and suits pines and junipers. Hyuga pumice adds air and lightness. Black lava rock gives structure that lasts for years.

    The confusing part is knowing which one you actually need, and in what proportion. A mix that’s perfect for an azalea can be wrong for a pine. A soil that works in Japan’s humid summers may stay too wet in a cold, rainy climate.

    In my experience, most people only need one or two of these beyond akadama, and the right choice depends almost entirely on the species they grow. This guide explains what each soil does, then compares six Japanese soils and mixes you can buy outside Japan, starting with kanuma.


    Who this kanuma bonsai soil guide is NOT for

    It’s not an akadama guide. Akadama has its own article: our akadama and Japanese bonsai soil guide compares the main brands.

    It’s not for indoor tropical trees in potting compost. If your tree lives in a garden-center potting mix and you’re happy with it, this guide may be more than you need.

    It’s not a fertilizer guide. These soils are mostly inorganic. Feeding is a separate topic.

    Still with us? Let’s go.


    How we picked these (3 things that actually matter)

    1. What each soil does

    Japanese bonsai soils aren’t interchangeable. Here’s the quick version.

    • Kanuma is a soft, pale yellow, acidic volcanic soil. It holds water and air well and is the traditional soil for satsuki azaleas and other acid-loving plants. It’s usually described as darkening when wet, which helps you see when it needs watering.
    • Kiryu is a harder, iron-rich granular soil. It drains freely and keeps its structure longer than akadama, which makes it popular for pines, junipers and other conifers.
    • Hyuga pumice is a light Japanese pumice. It adds aeration and drainage while holding some water.
    • Fuji rock (black lava) is a durable volcanic rock. It adds structure, drainage and aeration, and doesn’t break down.

    2. Your species

    This decides almost everything.

    • Satsuki and other azaleas: kanuma, often on its own or as most of the mix.
    • Pines and junipers: kiryu, pumice and lava, usually mixed with akadama.
    • Deciduous trees: akadama-based mixes, sometimes with pumice and lava.
    • Many other species: the common “equal thirds” mix of akadama, pumice and lava.

    3. Grain size, dust and durability

    Grain size should match the pot. Smaller particles (around 2–4 mm) suit shohin and small pots. Medium grains (about 3–6 mm) suit most bonsai. Larger grains suit big trees and the bottom drainage layer.

    Dust matters too. Fine particles clog the gaps between grains and slow drainage. Sifting before use makes a real difference. Our bonsai soil sieve guide covers the tools.

    And durability varies. Kanuma and akadama are softer and break down over time. Kiryu, pumice and lava last much longer.

    A few soil habits that matter more than the brand

    None of these cost anything.

    • Sift everything. Remove dust before you repot.
    • Match soil to species. Don’t put a pine in pure kanuma, or an azalea in pure lava.
    • Use a coarser bottom layer. Many growers put larger particles at the bottom of the pot for drainage.
    • Watch how fast the pot dries. Adjust the mix if it stays wet too long or dries out too quickly.
    • Think about your climate. In wet, cold areas, a mix with more pumice and lava drains better. In hot, dry areas, more akadama or kanuma holds water longer.
    • Store soil dry. Wet, frozen soil can break down in the bag.

    Kanuma bonsai soil and other Japanese soils: comparison table

    SoilTypeBest forBag sizeSellerApprox. price
    Japanese KanumaAcidic volcanic soilSatsuki, azaleas16 LBonsai Learning Center (US)~$45–69
    Kanuma (UK / Canada)Acidic volcanic soilSatsuki, azaleas~14–17 LHerons, Canada Bonsai~£25 / CAD $42
    KiryuIron-rich volcanic gritPines, junipers2 LBonsai Direct (UK)~£12
    Hyuga PumiceJapanese pumiceAeration in any mix18 LBonsai Learning Center (US)~$45–69
    Fuji Rock (Black Lava)Volcanic rockStructure, drainage18 LBonsai Learning Center (US)~$45–69
    Premium Japanese MixAkadama + Fuji rock + HyugaReady-to-use mix~24–25 lbBonsai Learning Center (US)~$70–94

    Prices are approximate, often include shipping in a price range, and vary by country and seller. Always check the current price before buying.


    The 6 best Japanese bonsai soils beyond akadama, reviewed

    1. Japanese Kanuma (Bonsai Learning Center) – the classic azalea soil in the US

    If you grow satsuki azaleas in the US, this is the soil you’re looking for. Bonsai Learning Center sells Japanese kanuma in 16-liter bags, with shipped and local pickup options, priced at about $45–69 depending on the option.

    The seller describes it as an excellent drainage component for bonsai soil, recommended for azaleas and other acid-loving plants. Kanuma’s natural acidity and its soft, water-holding structure are exactly why satsuki growers in Japan have used it for generations.

    It was listed as out of stock when we checked, which is common for imported soils. Check back, or look at other US bonsai nurseries.

    Pros

    • Traditional Japanese soil for azaleas
    • Acidic, which suits acid-loving plants
    • Holds water and air well
    • Shipping option available

    Cons

    • Stock is inconsistent
    • Grain size not listed
    • Softer than other soils, so breaks down over time

    Best for: US satsuki and azalea growers.

    Check Japanese Kanuma at Bonsai Learning Center


    2. Kanuma from Herons and Canada Bonsai – best options outside the US

    If you’re in the UK or Canada, kanuma is easier to find than you might think.

    Herons Bonsai in the UK sells kanuma for around £25, in two grades: standard (3–6 mm) and large (6–11 mm). The listing describes the bag as approximately 14 liters, though the title says 17 liters, so confirm the size if it matters. Herons describes kanuma as great for acid-loving plants like azaleas and camellias, and useful as an additive in other mixes.

    In Canada, Canada Bonsai sells 17-liter bags of 3–5 mm kanuma, describing it as the substrate to use for satsuki azaleas and for producing satsuki cuttings. It was listed at around CAD $42.

    Neither listing states the country of origin, though kanuma is traditionally a Japanese soil.

    Pros

    • Easy to buy in the UK and Canada
    • Two grain sizes at Herons
    • Good for cuttings and azaleas

    Cons

    • Origin not stated
    • Bag size wording inconsistent at Herons

    Best for: UK and Canadian growers of azaleas and camellias.

    Check Kanuma at Herons · Check Kanuma at Canada Bonsai


    3. Kiryu (Bonsai Direct) – best for pines and junipers

    Kiryu is the soil many conifer growers reach for. Bonsai Direct describes it as a natural granular material mined in Japan, formed from weathered volcanic deposits and rich in iron minerals.

    It’s harder than akadama and keeps its structure longer. That’s why it’s popular for pines, junipers and other conifers that dislike soggy roots, and for older trees that are repotted less often. Bonsai Direct notes that it’s often mixed roughly 50/50 with akadama.

    The 2-liter bag (around £12) is small, which makes it a good way to try kiryu before buying larger quantities.

    Pros

    • Mined in Japan
    • Free-draining and long-lasting
    • Ideal for conifers
    • Small bag for trying it out

    Cons

    • 2-liter bag doesn’t go far
    • Mainly available in the UK and Europe

    Best for: pine and juniper growers.

    Check Kiryu at Bonsai Direct


    4. Hyuga Pumice (Bonsai Learning Center) – best for lighter, airier mixes

    Pumice is one of the most useful bonsai soil components, and Japanese hyuga pumice is a premium version. Bonsai Learning Center sells it in 18-liter bags for about $45–69.

    The seller describes it as a drainage component that also retains water and provides good aeration. It’s usually mixed with akadama and lava to make a complete bonsai soil. Because it doesn’t break down like akadama or kanuma, it helps a mix keep its structure between repottings.

    Pros

    • Japanese pumice
    • Adds aeration and drainage while holding some water
    • Long-lasting
    • Works with almost any species

    Cons

    • Not a complete soil on its own
    • Grain size not listed

    Best for: anyone building their own mix.

    Check Hyuga Pumice at Bonsai Learning Center


    5. Fuji Rock Black Lava (Bonsai Learning Center) – best for structure

    Black lava rock gives a soil mix its backbone. Bonsai Learning Center sells Japanese Fuji Rock in 18-liter bags for about $45–69.

    It’s described as a durable volcanic rock that adds aeration and drainage while holding some moisture, and that releases trace minerals and supports microbial life. Like pumice, it doesn’t break down, so it helps keep the mix open as akadama gradually softens. The seller says it’s typically mixed with akadama and pumice in equal thirds.

    Pros

    • Japanese volcanic rock
    • Very durable
    • Adds drainage and aeration
    • Supports a long-lasting mix

    Cons

    • Heavier than pumice
    • Grain size not listed

    Best for: conifers and any mix that needs to stay open for years.

    Check Fuji Rock at Bonsai Learning Center


    6. Premium Japanese Mix (Bonsai Learning Center) – best ready-to-use option

    Don’t want to buy three bags and mix them yourself? This is the shortcut.

    Bonsai Learning Center’s Premium Japanese Mix is made from equal thirds of Double Line akadama, black Fuji rock and hyuga pumice. It’s hand-sifted through window screen to remove most of the dust, and the seller says it’s the same mix it uses on its own trees. A bag of around 24–25 pounds costs about $70–94.

    The equal-thirds mix is a widely used all-purpose bonsai soil. It drains well, holds water and nutrients, and keeps its structure for a good while. It isn’t ideal for satsuki azaleas, which prefer kanuma, but it suits a wide range of other species.

    Pros

    • Ready to use, no mixing
    • All Japanese components
    • Pre-sifted
    • Suits many species

    Cons

    • More expensive than mixing your own
    • Not ideal for azaleas

    Best for: growers who want a high-quality Japanese mix without the work.

    Check the Premium Japanese Mix at Bonsai Learning Center


    Which kanuma bonsai soil or mix should you buy? (By species)

    Satsuki and other azaleas: kanuma. Many growers use it alone or as most of the mix. Many satsuki growers also top it with Japanese mountain moss to hold moisture at the surface.

    Pines and junipers: kiryu mixed with akadama, or an akadama, pumice and lava mix.

    Deciduous trees: an akadama-based mix, with some pumice and lava.

    Most other species: the Premium Japanese Mix, or your own equal thirds of akadama, pumice and lava.

    Cuttings of azaleas: small-grain kanuma.

    Cold, wet climates: more pumice and lava, less akadama or kanuma.

    Hot, dry climates: a little more akadama or kanuma to hold water.

    Simple starting mixes

    These are starting points, not rules. Adjust them to your trees and climate.

    • Azalea mix: mostly kanuma, with a little pumice if you want faster drainage.
    • Conifer mix: akadama and kiryu, roughly half and half.
    • All-purpose mix: equal thirds akadama, pumice and lava.

    Kanuma vs akadama: what’s the difference?

    This is one of the most common questions, because the two look a little alike in the bag. Both are soft Japanese volcanic soils that hold water and air, and both gradually break down over time.

    The main differences are color, acidity and use. Kanuma bonsai soil is pale yellow and noticeably acidic, which is why it’s the go-to soil for satsuki azaleas and other acid-loving plants. Akadama is reddish-brown, closer to neutral, and used across a much wider range of species.

    In practice, that means kanuma is usually a specialist soil and akadama is a general one. If you grow mostly pines, maples and junipers, you may never need kanuma at all. If you grow satsuki, it’s likely to become the main soil on your bench.

    A useful side benefit, often mentioned by azalea growers, is that kanuma visibly darkens when wet and lightens as it dries. That makes it easy to see at a glance which pots need water, which is helpful for azaleas that dislike drying out.


    How to use kanuma and other Japanese soils when repotting

    1. Sift each soil. Remove dust and separate grain sizes.
    2. Mix in a tray. Combine components evenly before you start.
    3. Prepare the pot. Mesh over drainage holes and tie-down wire in place. Our bonsai repotting supplies guide lists everything.
    4. Add a coarse base layer.
    5. Position and tie in the tree.
    6. Fill and work in the soil with a chopstick.
    7. Water until it runs clear.

    Common Japanese bonsai soil mistakes

    Using kanuma for everything. It’s excellent for azaleas, but its acidity and softness don’t suit every tree.

    Skipping sifting. Dust clogs the pot and slows drainage.

    Ignoring climate. A mix that works in Japan may stay too wet in a cooler, rainier place.

    Mixing grain sizes randomly. Similar-sized particles drain more evenly.

    Leaving soil bags out in the rain and frost. Soft soils like kanuma and akadama can break down in the bag.


    Conclusion: choose soil by species, then by climate

    Akadama gets most of the attention, but Japanese bonsai soil is a whole family. Kanuma bonsai soil is the classic choice for satsuki azaleas. Kiryu suits pines and junipers. Hyuga pumice and Fuji lava rock keep any mix airy and durable.

    For most growers, the simplest approach is this: kanuma for azaleas, kiryu or an akadama-pumice-lava mix for conifers, and the equal-thirds mix for almost everything else. If you’d rather not mix at all, a ready-made Japanese mix saves time.

    Sift your soil, match it to your trees, and adjust for your climate.

    Ready to repot? Check Japanese Kanuma at Bonsai Learning Center, or try the Premium Japanese Mix for an all-purpose option.

  • Best Bonsai Moss in 2026: 6 Picks, From Japanese Mountain Moss to Sun-Tolerant Live Moss

    Best Bonsai Moss in 2026: 6 Picks, From Japanese Mountain Moss to Sun-Tolerant Live Moss

    Affiliate disclosure: Some links on this page are affiliate links. If you buy through them, Aribonsai may earn a small commission at no extra cost to you. It doesn’t change what we recommend or how we rank anything.


    Why does every show tree have that green carpet?

    Look at photos from any major bonsai exhibition and you’ll notice the same thing. The soil is almost never visible. Instead, there’s a low, even carpet of moss that makes the tree look like it’s growing on an old hillside rather than in a pot.

    Bonsai moss isn’t just decoration, though. A good moss layer helps keep the soil surface from drying out too fast, stops heavy watering from washing soil away, and keeps birds from digging through the pot. And on a newly repotted tree, it can help hold the surface together while the roots settle.

    The trouble is that moss is surprisingly hard to get right. You lay down a nice sheet, and two weeks later it’s brown. Or it grows so well that it creeps up the trunk and holds water against the bark. Or it simply looks wrong, like a piece of carpet dropped on top of the soil.

    In my experience, most moss problems come down to choosing the wrong type for the conditions. Shade moss in full sun burns. Thick sheet moss on a fast-draining pot dries out. This guide explains what matters, then compares six bonsai moss options, from Japanese mountain moss to live moss you can grow in sun.


    Who this bonsai moss guide is NOT for

    It’s not about air layering. Long-fibered sphagnum is also used to wrap air layers. That’s a different job. Here, we’re talking about moss for the soil surface.

    It’s not about terrariums. Indoor terrarium moss lives in high humidity. Most bonsai live outdoors, in wind and sun, which is a very different environment.

    It’s not for people who want zero maintenance. Moss needs moisture and the right light. If your trees are in a hot, dry spot and you can’t water often, a bare soil surface or a thin sphagnum layer may suit you better.

    Still with us? Let’s go.


    How we picked these (3 things that actually matter)

    1. Sun or shade

    This is the most important question.

    Many mosses naturally grow in shade, on forest floors or the north side of rocks. Put them on a bonsai bench in full sun and they quickly dry out and brown. Others, often collected from sidewalks, rooftops and rock surfaces, handle sun and drying much better.

    Bonsai growers have long noticed this. Many recommend collecting moss from sunny, hard surfaces like concrete, brick or stone, because those conditions are closer to a bonsai pot than a shady forest floor.

    2. Sheets, fragments or a top dressing

    Moss comes in different forms, and each suits a different use.

    • Live sheets or squares give instant coverage. They’re great before a show. But laying large plates of moss on the surface often looks unnatural, and some growers find that placed moss doesn’t last as well as moss grown in place.
    • Fragments, crumbled or sieved moss are sprinkled on the soil and grow into a carpet over a few weeks. It’s slower, but the result often looks and lasts better.
    • Top dressings like Japanese mountain moss or sieved sphagnum aren’t always about a green carpet. They mainly hold moisture at the surface.

    3. Your species and your soil

    Moss affects the root zone. A thick, wet moss layer keeps the surface damp for longer, which some trees love and others don’t. Bonsai Tonight notes, for example, that Japanese mountain moss may acidify the root environment slightly more than white sphagnum, which suits acid-loving satsuki azaleas.

    Think about your soil too. If you use fast-draining akadama mixes, a thin moss or sphagnum layer helps the surface stay moist between waterings. Our akadama and Japanese bonsai soil guide explains how these soils behave.

    A few moss habits that matter more than the product

    None of these cost anything.

    • Keep moss off the trunk base. Moss growing up the trunk keeps bark wet. Leave a small gap around the base.
    • Use tweezers to place it. Pressing small pieces of moss into the soil surface with bonsai tweezers gives a much more natural result than laying big sheets.
    • Water it in. After applying moss, water gently so it settles, then water the tree as usual.
    • Mist new moss daily. Fresh moss needs moisture to establish.
    • Thin it if it gets too thick. A dense moss mat can block water from reaching the roots.
    • Remove it when repotting. Old moss can be reused, or crumbled and grown again.
    • Watch out for weeds. Collected moss can carry weed seeds. Pull them early.

    Bonsai moss comparison table

    MossTypeLightBest forOriginApprox. price
    Mountain Moss (Yamagoke)Top dressingVariesSatsuki azaleas, moistureImported from Japan~$8 (2 L)
    Besgrow NZ SphagnumSieved sphagnumAnyMoisture layer, moss baseNew ZealandVaries
    Sun Tolerant Moss ClumpsLive mossSunOutdoor bonsai in sunUS sellerFrom ~$35
    Racomitrium Sun MossLive mossSunJapanese-style carpetUS sellerCheck price
    Sheet Moss (Hypnum)Live sheetsShadeQuick display coverageUS sellerFrom ~$14
    Kyoto Moss SporesSporesPartial shadeExperimentingNot statedVaries

    Prices are approximate and vary by seller and season. Always check the current price before you buy.


    The 6 best bonsai moss options, reviewed

    1. Mountain Moss (Yamagoke) – the classic Japanese top dressing

    If you grow satsuki azaleas, this is the one you’ll hear about most. Bonsai Tonight calls Japanese mountain moss, or yamagoke, the go-to top dressing for satsuki bonsai.

    It’s imported from Japan and sold in 2-liter and 8-liter bags, from about $8. You spread it over the soil surface, where it helps keep moisture near the top so trees don’t dry out. Azalea growers like that it knits together into a protective layer on the surface.

    Bonsai Tonight also notes that mountain moss may acidify the root environment slightly more than white sphagnum. That’s a good thing for satsuki and other acid-loving plants. For other species, many growers prefer sphagnum.

    Bonsai Tonight only ships within the US, so growers elsewhere will need to look for Japanese mountain moss from a local bonsai shop.

    Pros

    • Imported from Japan
    • Traditional choice for satsuki azaleas
    • Knits into a protective surface layer
    • Inexpensive

    Cons

    • Slightly acidifying, which won’t suit every species
    • US shipping only from this seller

    Best for: satsuki and azalea growers, and anyone who wants a traditional Japanese top dressing.

    Check Mountain Moss at Bonsai Tonight


    2. Besgrow New Zealand Sphagnum – the best base for any moss layer

    Sphagnum isn’t the green carpet you see at shows, but it’s the quiet workhorse underneath many of them.

    New Zealand sphagnum, often sold under the Besgrow Spagmoss name, is harvested from New Zealand’s West Coast and sold dry in compressed blocks. Bonsai growers use it in a few ways. Sieved finely, it makes a thin layer that holds moisture at the surface. Long-fibered sphagnum can hold soil in place on uneven surfaces. And many growers mix shredded sphagnum with crumbled live moss and sprinkle it on, so the moss has something moist to grow into.

    On bonsai forums, some growers describe sphagnum as the most important part of the mix for function, with live moss added for looks.

    Availability varies. One US retailer we checked had paused dry-goods shipments to the US, so check a few sellers.

    Pros

    • Holds moisture at the soil surface
    • Helps live moss establish
    • Works on almost any species
    • Sold dry, so it stores well

    Cons

    • Not a green carpet on its own
    • Availability varies by country and seller
    • Needs sieving or shredding for top dressing

    Best for: every grower, as a moisture layer or a base for growing moss.

    Search Besgrow sphagnum moss on Amazon


    3. Sun Tolerant Moss Clumps – best live moss for sunny benches

    Most bonsai live in sun for much of the day, which is exactly where many mosses fail. Moss Acres, a US live moss grower, sells a moss specifically for those conditions: Sun Tolerant Moss Clumps (Bryum caespiticium), from around $35.

    Bryum is the kind of moss you often see growing in sidewalk cracks and on sunny walls, which is why it suits a bonsai pot. Clumps can be broken into small pieces and pressed into the soil surface, where they spread into a low, natural-looking cover.

    Moss Acres also lists a “Moss for Bonsai” bundle and other sun-tolerant options, so it’s worth browsing its bonsai section.

    Pros

    • Chosen for sun tolerance
    • Low, fine texture suits bonsai
    • Clumps break up easily for natural placement
    • From a specialist moss grower

    Cons

    • More expensive than collecting your own
    • Still needs regular moisture to establish

    Best for: outdoor bonsai in sunny spots.

    Check moss for bonsai at Moss Acres


    4. Racomitrium Sun Moss – the Japanese-style carpet

    Racomitrium is the moss genus behind many of the soft, gray-green carpets associated with Japanese moss gardens, where it’s often called sunagoke. It’s popular in Japan because it handles sun and drying better than many mosses, then greens up quickly when it gets wet.

    Moss Acres sells a Racomitrium Sun Moss square, about 13 by 13 inches, alongside its other live mosses. A square gives you enough to break into pieces for several trees.

    Because it changes color with moisture, it can look silvery when dry and bright green after watering. Some growers love that changing look; others prefer a moss that stays green.

    Pros

    • Classic Japanese moss garden look
    • Good tolerance of sun and drying
    • Greens up quickly after watering

    Cons

    • Looks gray-green when dry
    • Price and stock vary

    Best for: growers who want a Japanese-style moss carpet on sunny trees.

    Check Racomitrium moss at Moss Acres


    5. Sheet Moss (Hypnum) – best for quick display coverage

    Sometimes you just need the soil covered by Saturday. That’s what sheet moss is for.

    Moss Acres sells live Sheet Moss (Hypnum imponens) from around $14. It comes in flat mats you can cut and lay on the soil for instant green coverage, which makes it popular for displays and tray landscapes.

    The catch is light. Sheet moss generally prefers shade and steady moisture, so on a sunny bench it may brown quickly. It also tends to look like a “plate” laid on top unless you tear it into irregular pieces and press them in. Many growers use it for shows and photos, then remove or replace it afterward.

    If you’re preparing for a show, combine it with a well-chosen bonsai display stand for a finished look.

    Pros

    • Instant coverage
    • Easy to cut and shape
    • Affordable

    Cons

    • Prefers shade
    • Can look unnatural if laid in large sheets
    • May not last long in sun

    Best for: shows, photos, and trees kept in shade.

    Check Sheet Moss at Moss Acres


    6. Kyoto Moss Spores – for patient experimenters only

    The idea is appealing: sprinkle spores, and a velvety Kyoto garden moss appears. Joshua Roth sells Kyoto Moss Spores for bonsai, saikei and tray landscapes, with each pack covering up to about 3 square feet.

    The reality is less certain. Customer feedback describes it as fairly temperamental, and at least one grower reported it didn’t grow in their climate. On the Bonsai Mirai forum, one experienced member’s advice was blunt: don’t bother with Kyoto moss, and use local species instead.

    We’ve included it because people often ask about it. It can work, but it’s slow and unpredictable compared with the other options here.

    Pros

    • Designed for bonsai and tray landscapes
    • Covers a fair area
    • Fun if you enjoy experimenting

    Cons

    • Slow and unpredictable
    • Mixed feedback from growers
    • Origin of the spores not stated

    Best for: patient growers who enjoy experimenting.

    Search Kyoto Moss Spores on Amazon


    The free option: grow your own bonsai moss

    Before you buy anything, it’s worth knowing that many experienced growers never buy moss at all.

    A common method shared on bonsai forums goes like this:

    1. Collect moss from sunny, hard surfaces. Sidewalks, brick paths, walls and rocks are good sources. Only collect where you have permission.
    2. Dry and crumble it. Let it dry, then crumble or rub it through a screen. Some growers blend it.
    3. Mix with sieved sphagnum. Many use a mix of moss and shredded sphagnum, roughly half and half or a little more moss.
    4. Sprinkle on the soil. Apply a thin, even layer.
    5. Mist regularly. With daily moisture, growers report new growth within a few weeks.

    One forum member even added a little sumi ink to the sphagnum, and reported lush growth afterward. It’s an experiment, not a proven method, but an interesting one. A soil sieve works well for preparing both the moss and the sphagnum.


    Which bonsai moss should you buy? (By situation)

    You grow satsuki azaleas: Mountain Moss (Yamagoke).

    You want a moisture layer for any tree: sieved New Zealand sphagnum.

    Your trees sit in full sun: Sun Tolerant Moss Clumps or Racomitrium.

    You want a Japanese moss garden look: Racomitrium Sun Moss.

    You need coverage fast for a show: Sheet Moss, torn into irregular pieces.

    You enjoy experiments: Kyoto Moss Spores.

    You want the most natural result for free: collect local moss and mix it with sphagnum.

    You’ve just repotted: a thin layer of sieved sphagnum helps keep the surface moist and hold fresh soil in place. Our bonsai repotting supplies guide covers the rest of what you’ll need.


    How to keep bonsai moss healthy

    • Water regularly. Moss dries out faster than the soil beneath it.
    • Match moss to light. If moss keeps browning, it’s probably getting more sun than it likes.
    • Expect summer dieback. Many growers report moss browning in hot summers, then recovering when cooler, wetter weather returns.
    • Don’t let it get too thick. Thin it out if it forms a dense mat that blocks water.
    • Keep it away from the trunk. Bark that stays wet can suffer.
    • Remove weeds early. They’re much easier to pull when small.

    Common bonsai moss mistakes

    Laying big sheets on top. It looks unnatural and often doesn’t last. Small, irregular pieces work better.

    Using shade moss in full sun. It browns quickly. Choose sun-tolerant moss for sunny benches.

    Covering the trunk base. Leave a gap so the bark can dry.

    Letting moss block watering. A thick mat can shed water. Check that water reaches the soil.

    Expecting instant results from spores or crumbled moss. Growing moss takes weeks, sometimes longer.


    Conclusion: choose moss for your conditions, not the photo

    Bonsai moss is one of the easiest ways to make a tree look finished, and it genuinely helps the soil surface stay moist. But the right moss depends on your light, your species and how much time you have.

    For satsuki growers, Japanese mountain moss is the traditional choice. For almost everyone else, a thin layer of sieved sphagnum mixed with sun-tolerant live moss gives the most natural, long-lasting result. And if you only need coverage for a show, sheet moss will do the job quickly.

    Start small, place it with tweezers, keep it moist, and let it grow into the pot rather than sitting on top.

    Ready to finish your trees? Check Mountain Moss at Bonsai Tonight, or browse live moss for bonsai at Moss Acres.

  • Best Lime Sulfur for Bonsai in 2026: 6 Options for Jin and Shari, From Jin Seal to Sumi Ink

    Best Lime Sulfur for Bonsai in 2026: 6 Options for Jin and Shari, From Jin Seal to Sumi Ink

    Affiliate disclosure: Some links on this page are affiliate links. If you buy through them, Aribonsai may earn a small commission at no extra cost to you. It doesn’t change what we recommend or how we rank anything.


    Your deadwood is carved. Now it needs to last.

    Lime sulfur for bonsai is the step that turns freshly stripped wood into deadwood that looks like it’s been weathering on a mountain for decades.

    You’ve made a jin. Maybe you’ve carved a long shari down the trunk. It looks great for a week. Then the wood starts to look dull, a bit dirty, maybe a little green where algae creeps in. On a tree that sits outside in the rain, untreated deadwood can also start to rot over time.

    That’s why most bonsai growers treat jin and shari with lime sulfur. It does two jobs at once: it helps protect the wood from rot and pests, and it bleaches it to that pale, silvery color you see on old junipers in exhibitions.

    The tricky part is buying it. Lime sulfur comes as bonsai-specific bottles, as “Jin Seal” brush-on liquids, as concentrated animal dips, and in big agricultural containers. It’s restricted for horticultural use in some places. And some growers skip it completely in favor of wood hardeners or ink-tinted finishes.

    In my experience, most people’s first lime sulfur job looks too white. It’s a common surprise, and an easy one to fix next time. This guide explains what matters, then compares six options for treating bonsai deadwood, from simple bonsai bottles to alternatives for growers who don’t want the bright white look.


    Who this lime sulfur for bonsai guide is NOT for

    It’s not a pest-control guide. Lime sulfur is also used as a dormant spray against fungus and pests on some plants. That’s a different use with different dilutions and rules. This guide covers deadwood treatment only.

    It’s not a carving guide. Lime sulfur goes on after the wood is shaped. If you’re still stripping bark, our bonsai jin pliers guide covers the tools for that stage.

    It’s not for every tree. Lime sulfur deadwood is most associated with junipers and other conifers. On some species, many growers prefer a more natural, darker finish, or no whitening at all.

    Still with us? Let’s go.


    How we picked these (3 things that actually matter)

    1. Strength and how you’ll dilute it

    Lime sulfur products vary a lot in concentration.

    • Bonsai-specific bottles are sold for deadwood and are usually ready to use or easy to dilute.
    • “Jin Seal” style liquids are brush-on deadwood treatments containing lime sulfur. They can be used undiluted or diluted with water.
    • Animal dips and agricultural lime sulfur are often stronger. Bonsai forum users point out that animal-dip products can be more concentrated than bonsai-grade products, so the strength should be checked before use.

    Full strength whitens deadwood a lot. Lower strength, built up over several coats, gives more control.

    2. The finish you want

    Fresh lime sulfur doesn’t look the way it ends up. Growers describe it going on yellow, then drying and fading over time toward a bleached, pale color.

    If you want a softer, grayer look, many growers add a colorant. India ink or Japanese sumi ink is a common choice for toning down chalky white deadwood. Others skip lime sulfur entirely and use a clear wood hardener, which preserves the wood without bleaching it.

    3. Safety, storage and where you can buy it

    Lime sulfur is a pesticide-type product with a strong sulfur smell. Treat it with respect: work outside, wear gloves and eye protection, and keep it off foliage and away from children and pets. Read the label of whatever you buy.

    Availability is the other issue. Some bonsai forum members report that lime sulfur is restricted for horticultural use in some US states, and registration rules have affected supply in the past. Rules vary by country and state, so check what’s allowed where you live.

    Storage matters too. Growers recommend buying only what you’ll use in a season, because opened lime sulfur can settle and lose quality over time.

    A few lime sulfur habits that matter more than the brand

    None of these cost anything.

    • Finish carving first. Treat the wood only once it’s shaped.
    • Clean and wet the wood. Many growers wet deadwood and let it dry slightly before applying, so the solution soaks in instead of sitting on top.
    • Protect the pot and soil. Lime sulfur can stain pots and shouldn’t soak into the soil. Cover the soil surface and the pot with plastic or paper. Our Japanese bonsai pots guide shows the kind of pot you’ll want to protect.
    • Keep it off living bark and foliage. Use a small brush and work carefully along the lifeline.
    • Go light, then add more. Thin coats give more control than one heavy coat.
    • Wait before judging. The color changes as it dries and over the following days and weeks.
    • Practice on scrap. A dead branch from the garden is a free test piece.

    Lime sulfur for bonsai comparison table

    ProductTypeBest forFinishAvailabilityApprox. price
    Wigert’s Lime Sulfur (4 oz)Bonsai lime sulfurUS growers, small jobsBleached, paleUS~$10
    Jin Seal (100 ml)Brush-on deadwood liquidEasy application, EU growersGray to whiteEU~€7.50
    Lime sulfur animal dipConcentrated liquidLarge collections, valueVery white at full strengthUS (varies)~$12
    Eutrema Lime SulphurAgricultural lime sulfurClubs, nurseries (UK)Bleached, paleUKFrom ~£69 (5 L)
    PC PetrifierWood hardenerPreserving without whiteningNatural, can be shinyUSVaries
    Japanese sumi inkColorantToning down white deadwoodGray, weatheredWidely availableLow

    Prices are approximate and vary by country and seller. Always check the current price and local rules before buying.


    The 6 best lime sulfur options for bonsai, reviewed

    1. Wigert’s Lime Sulfur (4 oz) – the easiest choice for US growers

    If you’re in the US and just want lime sulfur sold specifically for bonsai, this is the simplest option.

    Wigert’s Bonsai, a long-established Florida bonsai nursery, sells a 4 oz bottle for about $10, described simply as being for bleaching and preserving deadwood on bonsai. It’s a small size, which is actually a good thing: most hobbyists only treat a few trees a year, and lime sulfur is best used within a season.

    The listing doesn’t give a concentration, so start with a light coat and build up.

    Pros

    • Sold specifically for bonsai deadwood
    • Small, affordable bottle
    • Easy to buy in the US

    Cons

    • Concentration not stated
    • Small size won’t go far on large collections

    Best for: beginners and US hobbyists treating a few trees.

    Check Lime Sulfur at Wigert’s Bonsai


    2. Jin Seal – the classic brush-on deadwood treatment

    “Jin Seal” is a name many bonsai growers know. It’s a liquid made for preserving jin and shari, and it contains lime sulfur, which gives treated wood a gray or white look.

    Bonsai Plaza sells a 100 ml bottle for around €7.50. The product description says it helps against fungus and algae and slows rot. The suggested method is to clean the wood with water, let it dry slightly, and brush it on, either undiluted or diluted with water. It recommends allowing 24 hours to dry, using it in a well-ventilated area, and avoiding eye contact.

    Historically, Jin Seal was also associated with the Hô Yoku bonsai care line in the US and UK, so you may see it under slightly different names and sellers. The maker isn’t stated on the Bonsai Plaza listing.

    Pros

    • Made for jin and shari
    • Brush-on liquid is easy to control
    • Clear usage instructions
    • Inexpensive

    Cons

    • Maker and origin not stated
    • Mainly sold in Europe today

    Best for: European growers who want a ready-made deadwood treatment.

    Check Jin Seal at Bonsai Plaza


    3. Lime sulfur animal dip – best value for large collections

    This is the open secret of the bonsai world. Many growers buy lime sulfur sold as a pet or livestock dip, because it’s easy to find and inexpensive.

    Bonsai forum members describe it as essentially the same material used in bonsai, sold for around $12 in the US. The catch is concentration: they warn that animal dips are often stronger than bonsai-grade products, so you should check the strength and dilute it with water before using it on deadwood.

    It’s also worth being clear: this is an off-label use. The product is labeled for animals, not plants, so read the label carefully, follow its safety instructions, and check your local rules.

    Pros

    • Inexpensive and widely available
    • Plenty of product for many trees
    • Can be diluted to suit your finish

    Cons

    • Often more concentrated than bonsai products
    • Labeled for animals, not plants
    • Strong smell and needs careful handling

    Best for: experienced growers with larger collections who are comfortable diluting.

    Search lime sulfur dip on Amazon


    4. Eutrema Lime Sulphur – the UK bulk option

    If you run a club, a nursery or a large collection in the UK, buying bonsai-sized bottles adds up quickly. Eutrema sells lime sulphur (a calcium polysulphide solution) in much larger quantities.

    Its jin page describes lime sulphur, also called Jin Fluid, as giving deadwood an aged patina. The product is listed in 5-litre containers, with larger packs for commercial users, starting at around £69.

    That’s far more than most hobbyists will ever use. But for a bonsai club that runs deadwood workshops, or a professional with many trees, it can make sense. Remember that opened lime sulfur doesn’t keep forever, so only buy what you’ll realistically use.

    Pros

    • Large quantities for clubs and nurseries
    • Sold in the UK
    • Proper horticultural product

    Cons

    • Far too much for most hobbyists
    • Higher upfront cost
    • Storage and shelf life need managing

    Best for: UK clubs, nurseries and professional growers.

    Check Eutrema Lime Sulphur


    5. PC Petrifier – best if you don’t want white deadwood

    Not every tree suits bright white deadwood. Some growers want to preserve the wood but keep its natural color, especially on deciduous trees and some pines.

    That’s where wood hardeners come in. On bonsai forums, PC Petrifier is one of the most-recommended alternatives to lime sulfur. Growers describe it as safe and effective, though it can look shiny when dry, especially with heavy coats. Several report that the shine fades over days or weeks, and that one or two light coats avoid the problem.

    It isn’t lime sulfur, and it doesn’t bleach the wood. But if your goal is “keep this deadwood from rotting without turning it white,” it’s worth considering.

    Pros

    • Preserves wood without bleaching
    • Often described as safer and easier to handle than lime sulfur
    • Good for species where white deadwood looks unnatural

    Cons

    • Can look shiny if overapplied
    • Not a bonsai-specific product
    • No bleached, aged look

    Best for: growers who want natural-colored deadwood.

    Search PC Petrifier on Amazon


    6. Japanese sumi ink – the secret to natural-looking deadwood

    This isn’t a preservative. It’s the finishing trick that makes lime sulfur look less like paint and more like nature.

    Many growers mix a little India ink or Japanese sumi ink into their lime sulfur, or apply a light ink wash afterward, to tone down chalky white deadwood toward a more natural gray. Some use a light black wash on new deadwood to get a weathered look before applying a preservative.

    Sumi ink is the traditional black ink used in Japanese calligraphy, so it’s easy to find in art stores and online. You only need a few drops. Test the mix on scrap wood first, because a little goes a long way.

    Pros

    • Turns bright white deadwood into natural gray
    • Very inexpensive
    • Easy to find
    • Fits the Japanese aesthetic

    Cons

    • Not a preservative on its own
    • Easy to overdo, so test first

    Best for: anyone whose lime sulfur looks too white, and anyone preparing a tree for display.

    Search Japanese sumi ink on Amazon


    Which lime sulfur for bonsai should you buy? (By situation)

    You’re in the US and treating a few trees: Wigert’s Lime Sulfur.

    You’re in Europe: Jin Seal from Bonsai Plaza.

    You have a large collection and know how to dilute: a lime sulfur animal dip, checked for concentration.

    You run a UK club or nursery: Eutrema Lime Sulphur.

    You want to preserve deadwood without whitening it: PC Petrifier.

    Your deadwood looks too white: add Japanese sumi ink to your lime sulfur, or use a light ink wash.

    You’re preparing a tree for a show: freshen the deadwood with a light lime sulfur coat a few weeks before, tone it with ink if needed, and set the tree on a bonsai display stand that suits it.

    A simple deadwood finishing kit

    For most hobbyists, a bottle of bonsai lime sulfur, a small bottle of sumi ink, a couple of small brushes, gloves and some plastic sheeting to protect the pot and soil is everything you need.


    How to apply lime sulfur to bonsai deadwood (the basics)

    Every product has its own instructions, so always read the label. But the general process growers describe looks like this:

    1. Finish carving. Remove loose fibers and debris with a brush.
    2. Protect the tree. Cover the soil surface and pot. Keep foliage out of the way.
    3. Wet the wood. Lightly wet the deadwood and let it dry slightly so the solution soaks in.
    4. Apply a thin coat. Use a small brush, working carefully along the edge of the living bark.
    5. Let it dry. The color changes as it dries. Some products suggest allowing about 24 hours.
    6. Assess and repeat. Add another coat if needed, or tone it with ink.
    7. Refresh occasionally. Many growers reapply lightly once a year or before shows.

    Lime sulfur safety and storage

    • Work outdoors. The sulfur smell is strong and unpleasant.
    • Wear gloves and eye protection. Avoid skin and eye contact.
    • Keep it off foliage and living bark. It can damage living tissue.
    • Keep it away from metal you care about. Many growers find it stains and corrodes.
    • Store it sealed, cool and out of reach of children and pets.
    • Buy small. Opened lime sulfur can settle and degrade within a season or so.
    • Check local rules. Availability and permitted uses vary by country and state.

    Common lime sulfur mistakes

    Making deadwood too white. The most common mistake. Use lighter coats or add ink.

    Applying before carving is finished. You’ll just expose fresh wood again.

    Getting it on living bark. Work slowly near the lifeline.

    Forgetting to protect the pot. Stains on a good pot are hard to remove.

    Using concentrated products undiluted. Check strength first, especially with animal dips.


    Conclusion: preserve first, then make it look natural

    Lime sulfur for bonsai isn’t glamorous, but it’s what makes deadwood last, and what gives jin and shari that aged, weathered look.

    For most US hobbyists, Wigert’s small bottle is the easiest place to start. In Europe, Jin Seal is a simple brush-on option. If you have many trees, a diluted animal dip is the value choice, as long as you check its strength. And whichever you use, a few drops of Japanese sumi ink can turn harsh white into a natural silver-gray.

    Work outside, protect the pot, go light, and let the color settle before you judge it.

    Ready to finish your deadwood? Check Lime Sulfur at Wigert’s Bonsai, or check Jin Seal at Bonsai Plaza before your next carving session.

  • Best Bonsai Cut Paste in 2026: 6 Wound Sealants Compared, From Kiyonal to Top Jin M

    Best Bonsai Cut Paste in 2026: 6 Wound Sealants Compared, From Kiyonal to Top Jin M

    Affiliate disclosure: Some links on this page are affiliate links. If you buy through them, Aribonsai may earn a small commission at no extra cost to you. It doesn’t change what we recommend or how we rank anything.


    You made the big cut. Now what?

    Bonsai cut paste is one of those supplies nobody thinks about until the moment they need it.

    You’ve just removed a thick branch with a concave cutter. The cut is clean, the tree looks better already, and then you notice the wound. It’s wet. It’s bigger than you expected. And on a small tree, a scar that size is going to be visible for years.

    That’s the job of a bonsai cut paste. It covers the fresh wound, keeps it from drying out and cracking, and helps the tree roll a smooth callus over the cut. On a landscape tree, a scar doesn’t matter much. On a bonsai, where every inch of trunk is on show, it matters a lot.

    The tricky part is that “cut paste” isn’t one product. There are soft putties you press on with your fingers, liquid sealers you brush on, pastes that stay soft for a year, and ones that dry hard. Some contain fungicides. Some are made for specific trees, like junipers or azaleas. And the names don’t help: Kiyonal, Kiyonaru, Cut Paste Hi, Top Jin M, Callus Mate, Kirikuchi-Naoru.

    In my experience, most people buy whichever tube their local shop has, then wonder why it cracked, or why it looks bright orange on a dark pine. This guide sorts out the main types, then compares six bonsai cut paste options, from everyday all-rounders to species-specific Japanese sealers.


    Who this bonsai cut paste guide is NOT for

    It’s not for landscape or orchard trees. Many arborists advise against wound dressings on garden trees and prefer to let them seal naturally. Bonsai is a different situation, because the goal is a clean, nearly invisible scar on a small trunk. This guide is written for bonsai only.

    It’s not a pest or disease treatment guide. Some of these pastes contain fungicides or insecticides, but they’re wound sealers, not cures. If a tree is already sick, a paste won’t fix it.

    It’s not for people who never make big cuts. If you only pinch shoots and trim twigs, you can probably skip paste for now. It becomes important once you start removing branches, carving, or doing heavy root work.

    Still here? Let’s go.


    How we picked these (3 things that actually matter)

    1. Putty or liquid

    This is the main choice, and it affects everything else.

    • Putty (clay-type) cut paste is thick and soft, a bit like modeling clay. You roll a small piece between your fingers and press it into the wound. It’s best on large cuts and hollows, and most types stay soft for a long time, so they flex as the tree grows.
    • Liquid (or semi-liquid) cut paste comes in a tube or bottle, sometimes with a brush. It spreads thinly and gets into small cuts easily. Some liquids stay slightly soft; others dry hard.

    As a general rule, retailers recommend putty for big wounds and liquid for both large and small ones. Many serious hobbyists keep one of each.

    2. Soft-setting or hard-setting

    This matters more than people expect.

    A bonsai cut paste that stays soft (or semi-dry) is less likely to crack as the callus grows underneath. A paste that dries hard forms a tougher shell, which some growers prefer for certain species, but it can split as the wound edges swell. Several of the Japanese products below are designed to stay tacky for a while for exactly this reason.

    There’s also the question of what’s inside. Some pastes include fungicides or insecticides. That’s useful protection, but it also means you should read the label, keep it away from kids, and check that the product can be legally shipped to your country.

    3. Color and the species you grow

    Color sounds cosmetic, but on a bonsai it’s practical. A bright paste on a dark trunk draws the eye straight to the wound for months.

    Japanese makers have responded with species-specific products. There are pastes colored for juniper and pine bark, pastes designed for satsuki azaleas, and formulas aimed at deciduous trees. You don’t need one for every species, but if most of your collection is one type, a matched paste is a nice upgrade.

    A few cut paste habits that matter more than the brand

    None of these cost anything, and they make a bigger difference than switching products.

    • Cut cleanly first. Paste works best on a clean, sharp cut. A ragged wound heals poorly no matter what you cover it with. A sharp bonsai concave cutter or knob cutter does half the work.
    • Clean up the edges. Many growers tidy the bark edges around a big cut with a sharp knife before applying paste, so the callus has a smooth line to grow from.
    • Seal soon after cutting. Most manufacturers say to apply paste to fresh wounds. Waiting a few days lets the exposed wood dry out.
    • Cover the edge, not just the middle. The living layer just under the bark, at the edge of the wound, is what heals. Make sure the paste covers it.
    • Keep it thin with liquids. Thick globs of liquid paste can crack. Some makers recommend just 1–2 mm.
    • Wet your finger. Several Japanese pastes suggest smoothing the surface with a damp finger, which keeps it neat and stops it sticking to you.
    • Check it after a few months. If the paste has split as the callus grows, add a little more.

    Bonsai cut paste comparison table

    ProductTypeSetsBest forTypical sizeApprox. price
    KiyonalLiquid / soft paste (green)Semi-dry, flexibleAll-round everyday use100 g tube~$15–40, varies by seller
    Cut Paste HiPutty (brown or gray)Stays softLarge cuts, hollows, carving190 g / 500 g tub~$15–16
    Callus MatePaste (dark brown)Quick-dryingJunipers, pines, satsuki100 g / 150 g tube~€14 (EU)
    Top Jin MLiquid (orange)Dries hardAzaleas, deciduous, tropicalsTube / 200 ml~$20
    Kirikuchi-NaoruLiquid (green) or puttyLiquid dries hardHard-to-heal trees like quinceVariesCheck seller
    Lac BalsamPaste, “artificial bark”HardensRoot wounds, budget backup150–200 g tube~€7 (EU)

    Prices are approximate and vary a lot between countries and sellers. Always check the current price before you buy.


    The 6 best bonsai cut paste options, reviewed

    1. Kiyonal – the all-rounder most people should start with

    If you only buy one bonsai cut paste, Kiyonal is the usual answer. It’s a Japanese wound paste sold by bonsai shops across Europe and the US, and you’ll also see it spelled “Kiyonaru.”

    It’s a green paste with a little tack. Retailers describe it as quick-drying on the surface but staying semi-dry for a while, which helps prevent cracking. The paste contains insecticides and fungicides, and it’s designed to fall off by itself once the callus has formed, so you don’t have to remove it.

    The standard 100 g tube is the common size. Larger sizes are also sold, mostly in Europe. Some sellers also offer a related product, Kiyonal Ace, but descriptions vary, so check the listing if you see it.

    Pros

    • Works on most species and wound sizes
    • Flexible, semi-dry finish that resists cracking
    • Falls away naturally as the wound heals
    • Widely available outside Japan

    Cons

    • Green color can stand out on dark bark
    • Prices vary a lot between sellers
    • Contains pesticides, so check shipping rules where you live

    Best for: beginners and anyone who wants one reliable tube for everything.

    Check Kiyonal at Bonsai Plaza · Search Kiyonal on Amazon


    2. Cut Paste Hi (putty) – best for big wounds and carving

    This is the classic Japanese clay-type cut paste, the one that comes in a round tub rather than a tube. US retailers like Bonsai Tonight and Wigert’s Bonsai list it, usually just as “Cut Paste.”

    It’s an all-purpose brown putty with a soft, plasticine-like texture. You pinch off a piece, roll it, and press it over the wound. Wigert’s describes it as keeping the cut area soft and protected for a year or longer. It’s often sold in two colors: a green-lid version with a brown tint, and a white-lid version with a gray tint, so you can match darker or lighter bark.

    Because it’s thick, it’s especially good for large branch removals, fresh hollows and carved areas. For small cuts, most retailers point you to a liquid sealer instead.

    Pros

    • Excellent for big wounds and filling hollows
    • Stays soft for a long time, so it flexes with the callus
    • Two colors for dark and light bark
    • Good value for the amount you get

    Cons

    • Too bulky for small, neat cuts
    • Can look obvious on a show tree until it’s trimmed back or covered

    Best for: anyone doing serious branch removal, trunk chops or carving.

    Check Cut Paste at Wigert’s Bonsai · Check Cut Paste at Bonsai Tonight


    3. Callus Mate – best for junipers, pines and satsuki

    Callus Mate is a Japanese wound paste made with darker bark in mind. The juniper version is a dark brown paste, and the product description says it’s especially unobtrusive on satsuki and conifers like pine and shimpaku.

    It dries quickly, sticks well, and helps stop sap bleeding. Like Kiyonal, it contains insecticides and fungicides. The suggested method is to apply it to a clean wound and smooth it with a wet finger. The color darkens over time, so it blends in even more as the months pass.

    It’s sold in 100 g and 150 g tubes. In Europe, the 150 g tube is around €14 at Bonsai Plaza; in the US, Bonsai Tonight lists Callus Mate among its sealers.

    Pros

    • Dark color blends well on conifers and satsuki
    • Quick-drying with good adhesion
    • Darkens with time, so the wound fades from view

    Cons

    • More specialized than an all-rounder
    • Not as easy to find in the US as Kiyonal

    Best for: juniper, pine and satsuki growers who are tired of bright green wounds.

    Check Callus Mate at Bonsai Plaza · Check sealers at Bonsai Tonight


    4. Top Jin M – best medicated liquid for azaleas and deciduous trees

    Top Jin M is a bright orange liquid sealer from Japan. It’s one of the more “medicated” options: Bonsai Tonight notes that it contains thiophanate-methyl, a fungicide, and that it’s often used on azaleas and tropical plants.

    It dries hard and forms what sellers describe as a rain-resistant, antibacterial film. Besides pruning cuts, it’s also used on wounds from sunburn, frost damage or wire marks. A semi-liquid 200 ml version is sold in Europe and is recommended especially for deciduous trees.

    The big downside is the color. Bright orange on a trunk is very visible, so it’s better suited to areas that won’t be on display, or to trees where protection matters more than looks.

    Pros

    • Includes a fungicide for extra protection
    • Hard, rain-resistant film
    • Works on many types of wounds, not just cuts
    • Popular for azaleas and tropicals

    Cons

    • Bright orange, so it’s very noticeable
    • Hard-setting formula can crack as the callus swells
    • Contains a fungicide, so check local rules before ordering

    Best for: azalea, deciduous and tropical growers who want a medicated sealer.

    Check Top Jin M at Bonsai Learning Center · Search Top Jin M on Amazon


    5. Kirikuchi-Naoru – the niche pick for hard-to-heal trees

    The name roughly means “cut-surface healer,” and it’s a niche product most Western hobbyists haven’t tried. It comes in two forms: a green liquid and a putty.

    The liquid is the interesting one. According to Bonsai Tonight, it dries hard and heals wounds quickly, but it can produce a thick callus. That’s why it’s often used on species that are slow or difficult to heal, such as quince. The putty version is suggested for conifers and deciduous species.

    This isn’t a first purchase. But if you grow flowering quince, or other species where wounds tend to stay open for a long time, it’s worth knowing about.

    Pros

    • Fast healing on stubborn species
    • Available in both liquid and putty forms
    • A specialist option most collections don’t have

    Cons

    • Thick callus can be a problem where you want a flat scar
    • Harder to find; price and sizes vary by seller

    Best for: advanced growers with quince or other slow-healing trees.

    Check sealers at Bonsai Tonight


    6. Lac Balsam – the Western backup for roots and budget use

    Lac Balsam isn’t Japanese. It’s a European wound dressing sold for general tree care, and it’s included here because many bonsai growers already own a tube, and because it’s cheap.

    It works like an artificial bark. It hardens after application, which bonsai.de says makes it well suited to wounds in the root area. For trunk and branch wounds, the same retailer only partly recommends it, because it doesn’t stay elastic and can crack and fall off as the tree grows. The tube comes in 150–200 g sizes, and some versions include a brush.

    In practice, that makes it a decent backup: useful for root work during repotting, or as a cheap sealer while you wait for a Japanese paste to arrive. It’s not the best choice for a visible trunk wound on a show tree.

    Pros

    • Inexpensive and easy to find in Europe and North America
    • Good for root wounds
    • Some tubes come with a brush

    Cons

    • Hardens and isn’t flexible, so it can crack on trunks
    • Not designed specifically for bonsai

    Best for: root wounds during repotting, or a budget backup tube.

    Check Lac Balsam at TreeStuff · Search Lac Balsam on Amazon


    Which bonsai cut paste should you buy? (By use case)

    You’re new and want one tube: Kiyonal. It handles most wounds on most species, stays flexible, and falls away when the job is done.

    You’re about to remove a big branch or chop a trunk: Cut Paste Hi (putty). Pair it with Kiyonal for the smaller cuts.

    Your collection is mostly junipers and pines: Callus Mate. The dark color makes a real difference on a conifer you’d like to show.

    You grow satsuki azaleas: Callus Mate is designed with satsuki bark in mind. Top Jin M is the medicated alternative if you don’t mind the orange.

    You grow azaleas, deciduous or tropical trees and want extra protection: Top Jin M.

    You have quince or other trees that heal slowly: Kirikuchi-Naoru liquid, used carefully on cuts where a slightly thicker callus is acceptable.

    You’re repotting and cutting thick roots: Lac Balsam or a putty-type paste works well for root wounds. Our bonsai root cutter guide covers the tools for that job.

    You want a “pro” kit: Many experienced growers keep three sealers on hand: a putty for big wounds, an all-round liquid like Kiyonal, and one species-matched paste for their main trees.

    A simple starter combination

    If you’re building your first kit, one tube of Kiyonal and one small tub of putty-type cut paste will cover almost every situation. Add a species-specific paste later, once you know which trees you grow most. If you’re still putting together your basic tools, our bonsai starter tool set guide is a good place to start.


    How to store bonsai cut paste so it lasts

    A tube or tub of bonsai cut paste usually lasts a long time, because you only use small amounts. But it can dry out if you’re careless.

    • Close it tightly after every use. Air is the main reason pastes harden in the container.
    • Keep it cool and dry. Most makers recommend a cool, dry place, away from direct sun.
    • Keep it away from children and pets. Many of these pastes contain fungicides or insecticides.
    • Wipe the nozzle or lid. Dried paste around the opening makes it hard to close properly next time.
    • Wrap putty if needed. If the tub lid doesn’t seal well, some growers wrap the putty in plastic film inside the tub.

    Common bonsai cut paste mistakes

    These come up again and again in bonsai forums and clubs.

    Using liquid on a huge hollow. Liquid paste is great for clean cuts, but a deep hollow needs putty to fill it.

    Piling on too much. A thick layer of a hard-setting paste is more likely to crack. Thin, even coverage is usually better.

    Covering the whole bark, not the wound. Paste should cover the wound and its edges, not large areas of healthy bark.

    Choosing color last. On a show tree, a bright paste is visible for a long time. Think about color before you buy.

    Forgetting to check. As the callus grows, many pastes split. A quick check every few months lets you top them up.


    Conclusion: start simple, then match your trees

    Bonsai cut paste isn’t a glamorous purchase. But once you start making big cuts, it’s one of the cheapest ways to protect years of work, and the difference between a smooth, rolled-over scar and an ugly crack.

    For most people, Kiyonal is the right place to start. Add a putty-type Cut Paste Hi when you start removing larger branches or carving. And if your collection leans toward junipers, pines or satsuki, Callus Mate is a small upgrade that makes wounds much less noticeable.

    Remember that no bonsai cut paste can save a rough cut. Sharp tools and clean technique come first. The paste is the finishing step.

    Ready to stock up? Check Kiyonal at Bonsai Plaza, or compare putty-type cut paste at Wigert’s Bonsai, and keep a tube next to your cutters before your next big pruning session.