Tag: jin and shari

  • Best Lime Sulfur for Bonsai in 2026: 6 Options for Jin and Shari, From Jin Seal to Sumi Ink

    Best Lime Sulfur for Bonsai in 2026: 6 Options for Jin and Shari, From Jin Seal to Sumi Ink

    Affiliate disclosure: Some links on this page are affiliate links. If you buy through them, Aribonsai may earn a small commission at no extra cost to you. It doesn’t change what we recommend or how we rank anything.


    Your deadwood is carved. Now it needs to last.

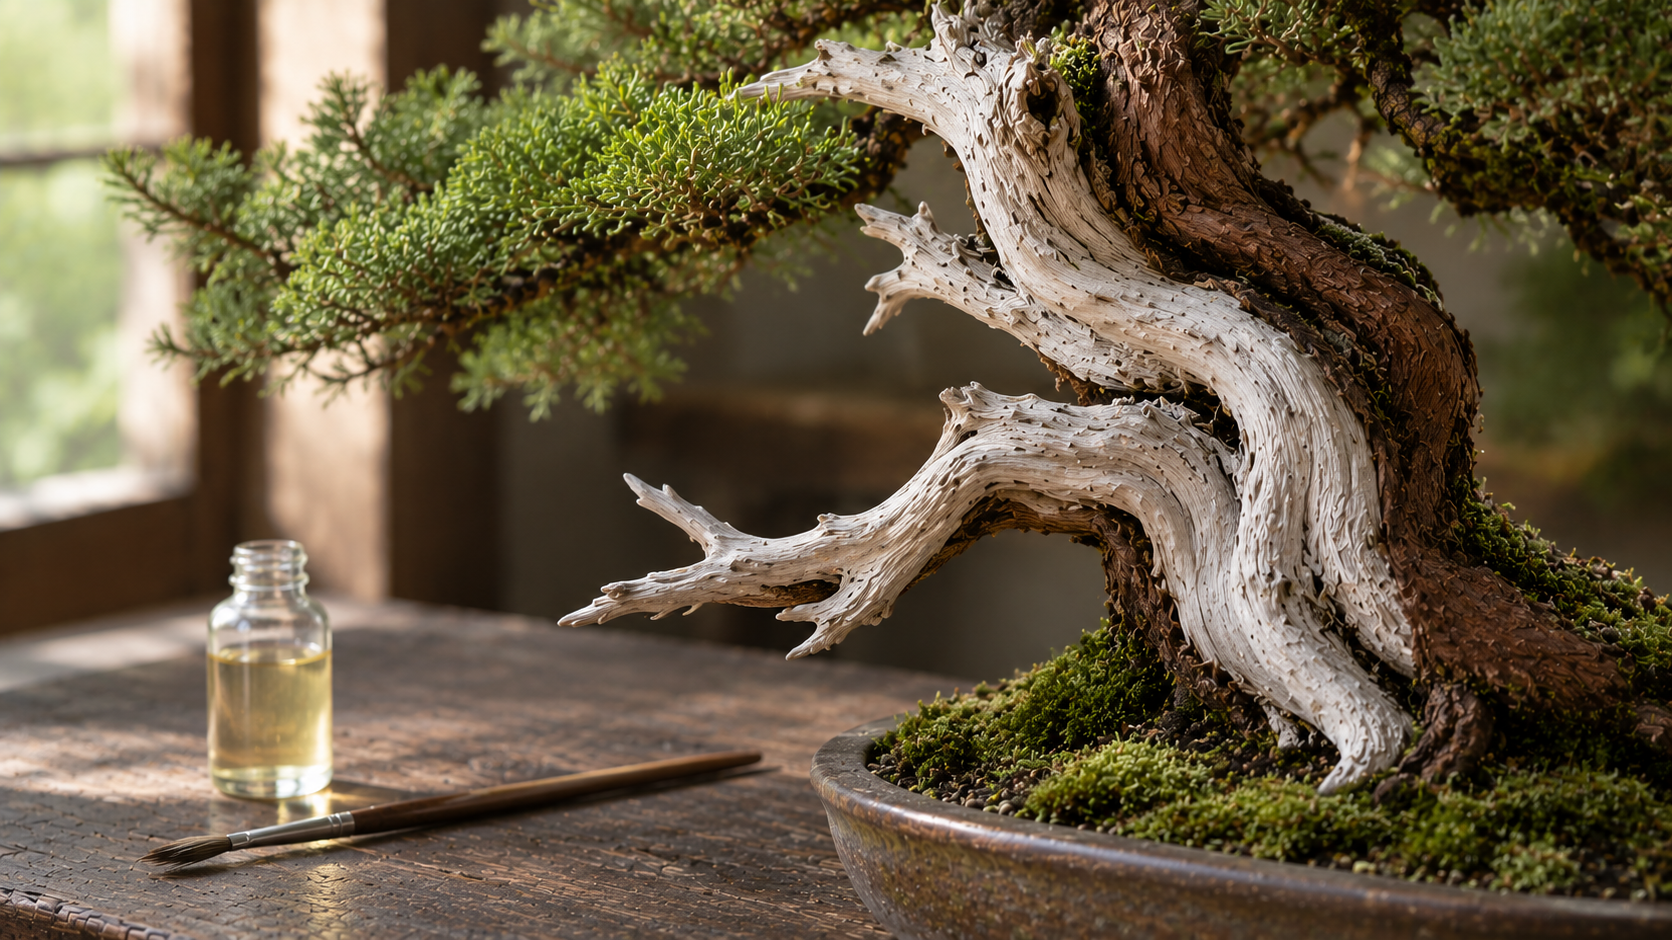
    Lime sulfur for bonsai is the step that turns freshly stripped wood into deadwood that looks like it’s been weathering on a mountain for decades.

    You’ve made a jin. Maybe you’ve carved a long shari down the trunk. It looks great for a week. Then the wood starts to look dull, a bit dirty, maybe a little green where algae creeps in. On a tree that sits outside in the rain, untreated deadwood can also start to rot over time.

    That’s why most bonsai growers treat jin and shari with lime sulfur. It does two jobs at once: it helps protect the wood from rot and pests, and it bleaches it to that pale, silvery color you see on old junipers in exhibitions.

    The tricky part is buying it. Lime sulfur comes as bonsai-specific bottles, as “Jin Seal” brush-on liquids, as concentrated animal dips, and in big agricultural containers. It’s restricted for horticultural use in some places. And some growers skip it completely in favor of wood hardeners or ink-tinted finishes.

    In my experience, most people’s first lime sulfur job looks too white. It’s a common surprise, and an easy one to fix next time. This guide explains what matters, then compares six options for treating bonsai deadwood, from simple bonsai bottles to alternatives for growers who don’t want the bright white look.


    Who this lime sulfur for bonsai guide is NOT for

    It’s not a pest-control guide. Lime sulfur is also used as a dormant spray against fungus and pests on some plants. That’s a different use with different dilutions and rules. This guide covers deadwood treatment only.

    It’s not a carving guide. Lime sulfur goes on after the wood is shaped. If you’re still stripping bark, our bonsai jin pliers guide covers the tools for that stage.

    It’s not for every tree. Lime sulfur deadwood is most associated with junipers and other conifers. On some species, many growers prefer a more natural, darker finish, or no whitening at all.

    Still with us? Let’s go.


    How we picked these (3 things that actually matter)

    1. Strength and how you’ll dilute it

    Lime sulfur products vary a lot in concentration.

    • Bonsai-specific bottles are sold for deadwood and are usually ready to use or easy to dilute.
    • “Jin Seal” style liquids are brush-on deadwood treatments containing lime sulfur. They can be used undiluted or diluted with water.
    • Animal dips and agricultural lime sulfur are often stronger. Bonsai forum users point out that animal-dip products can be more concentrated than bonsai-grade products, so the strength should be checked before use.

    Full strength whitens deadwood a lot. Lower strength, built up over several coats, gives more control.

    2. The finish you want

    Fresh lime sulfur doesn’t look the way it ends up. Growers describe it going on yellow, then drying and fading over time toward a bleached, pale color.

    If you want a softer, grayer look, many growers add a colorant. India ink or Japanese sumi ink is a common choice for toning down chalky white deadwood. Others skip lime sulfur entirely and use a clear wood hardener, which preserves the wood without bleaching it.

    3. Safety, storage and where you can buy it

    Lime sulfur is a pesticide-type product with a strong sulfur smell. Treat it with respect: work outside, wear gloves and eye protection, and keep it off foliage and away from children and pets. Read the label of whatever you buy.

    Availability is the other issue. Some bonsai forum members report that lime sulfur is restricted for horticultural use in some US states, and registration rules have affected supply in the past. Rules vary by country and state, so check what’s allowed where you live.

    Storage matters too. Growers recommend buying only what you’ll use in a season, because opened lime sulfur can settle and lose quality over time.

    A few lime sulfur habits that matter more than the brand

    None of these cost anything.

    • Finish carving first. Treat the wood only once it’s shaped.
    • Clean and wet the wood. Many growers wet deadwood and let it dry slightly before applying, so the solution soaks in instead of sitting on top.
    • Protect the pot and soil. Lime sulfur can stain pots and shouldn’t soak into the soil. Cover the soil surface and the pot with plastic or paper. Our Japanese bonsai pots guide shows the kind of pot you’ll want to protect.
    • Keep it off living bark and foliage. Use a small brush and work carefully along the lifeline.
    • Go light, then add more. Thin coats give more control than one heavy coat.
    • Wait before judging. The color changes as it dries and over the following days and weeks.
    • Practice on scrap. A dead branch from the garden is a free test piece.

    Lime sulfur for bonsai comparison table

    ProductTypeBest forFinishAvailabilityApprox. price
    Wigert’s Lime Sulfur (4 oz)Bonsai lime sulfurUS growers, small jobsBleached, paleUS~$10
    Jin Seal (100 ml)Brush-on deadwood liquidEasy application, EU growersGray to whiteEU~€7.50
    Lime sulfur animal dipConcentrated liquidLarge collections, valueVery white at full strengthUS (varies)~$12
    Eutrema Lime SulphurAgricultural lime sulfurClubs, nurseries (UK)Bleached, paleUKFrom ~£69 (5 L)
    PC PetrifierWood hardenerPreserving without whiteningNatural, can be shinyUSVaries
    Japanese sumi inkColorantToning down white deadwoodGray, weatheredWidely availableLow

    Prices are approximate and vary by country and seller. Always check the current price and local rules before buying.


    The 6 best lime sulfur options for bonsai, reviewed

    1. Wigert’s Lime Sulfur (4 oz) – the easiest choice for US growers

    If you’re in the US and just want lime sulfur sold specifically for bonsai, this is the simplest option.

    Wigert’s Bonsai, a long-established Florida bonsai nursery, sells a 4 oz bottle for about $10, described simply as being for bleaching and preserving deadwood on bonsai. It’s a small size, which is actually a good thing: most hobbyists only treat a few trees a year, and lime sulfur is best used within a season.

    The listing doesn’t give a concentration, so start with a light coat and build up.

    Pros

    • Sold specifically for bonsai deadwood
    • Small, affordable bottle
    • Easy to buy in the US

    Cons

    • Concentration not stated
    • Small size won’t go far on large collections

    Best for: beginners and US hobbyists treating a few trees.

    Check Lime Sulfur at Wigert’s Bonsai


    2. Jin Seal – the classic brush-on deadwood treatment

    “Jin Seal” is a name many bonsai growers know. It’s a liquid made for preserving jin and shari, and it contains lime sulfur, which gives treated wood a gray or white look.

    Bonsai Plaza sells a 100 ml bottle for around €7.50. The product description says it helps against fungus and algae and slows rot. The suggested method is to clean the wood with water, let it dry slightly, and brush it on, either undiluted or diluted with water. It recommends allowing 24 hours to dry, using it in a well-ventilated area, and avoiding eye contact.

    Historically, Jin Seal was also associated with the Hô Yoku bonsai care line in the US and UK, so you may see it under slightly different names and sellers. The maker isn’t stated on the Bonsai Plaza listing.

    Pros

    • Made for jin and shari
    • Brush-on liquid is easy to control
    • Clear usage instructions
    • Inexpensive

    Cons

    • Maker and origin not stated
    • Mainly sold in Europe today

    Best for: European growers who want a ready-made deadwood treatment.

    Check Jin Seal at Bonsai Plaza


    3. Lime sulfur animal dip – best value for large collections

    This is the open secret of the bonsai world. Many growers buy lime sulfur sold as a pet or livestock dip, because it’s easy to find and inexpensive.

    Bonsai forum members describe it as essentially the same material used in bonsai, sold for around $12 in the US. The catch is concentration: they warn that animal dips are often stronger than bonsai-grade products, so you should check the strength and dilute it with water before using it on deadwood.

    It’s also worth being clear: this is an off-label use. The product is labeled for animals, not plants, so read the label carefully, follow its safety instructions, and check your local rules.

    Pros

    • Inexpensive and widely available
    • Plenty of product for many trees
    • Can be diluted to suit your finish

    Cons

    • Often more concentrated than bonsai products
    • Labeled for animals, not plants
    • Strong smell and needs careful handling

    Best for: experienced growers with larger collections who are comfortable diluting.

    Search lime sulfur dip on Amazon


    4. Eutrema Lime Sulphur – the UK bulk option

    If you run a club, a nursery or a large collection in the UK, buying bonsai-sized bottles adds up quickly. Eutrema sells lime sulphur (a calcium polysulphide solution) in much larger quantities.

    Its jin page describes lime sulphur, also called Jin Fluid, as giving deadwood an aged patina. The product is listed in 5-litre containers, with larger packs for commercial users, starting at around £69.

    That’s far more than most hobbyists will ever use. But for a bonsai club that runs deadwood workshops, or a professional with many trees, it can make sense. Remember that opened lime sulfur doesn’t keep forever, so only buy what you’ll realistically use.

    Pros

    • Large quantities for clubs and nurseries
    • Sold in the UK
    • Proper horticultural product

    Cons

    • Far too much for most hobbyists
    • Higher upfront cost
    • Storage and shelf life need managing

    Best for: UK clubs, nurseries and professional growers.

    Check Eutrema Lime Sulphur


    5. PC Petrifier – best if you don’t want white deadwood

    Not every tree suits bright white deadwood. Some growers want to preserve the wood but keep its natural color, especially on deciduous trees and some pines.

    That’s where wood hardeners come in. On bonsai forums, PC Petrifier is one of the most-recommended alternatives to lime sulfur. Growers describe it as safe and effective, though it can look shiny when dry, especially with heavy coats. Several report that the shine fades over days or weeks, and that one or two light coats avoid the problem.

    It isn’t lime sulfur, and it doesn’t bleach the wood. But if your goal is “keep this deadwood from rotting without turning it white,” it’s worth considering.

    Pros

    • Preserves wood without bleaching
    • Often described as safer and easier to handle than lime sulfur
    • Good for species where white deadwood looks unnatural

    Cons

    • Can look shiny if overapplied
    • Not a bonsai-specific product
    • No bleached, aged look

    Best for: growers who want natural-colored deadwood.

    Search PC Petrifier on Amazon


    6. Japanese sumi ink – the secret to natural-looking deadwood

    This isn’t a preservative. It’s the finishing trick that makes lime sulfur look less like paint and more like nature.

    Many growers mix a little India ink or Japanese sumi ink into their lime sulfur, or apply a light ink wash afterward, to tone down chalky white deadwood toward a more natural gray. Some use a light black wash on new deadwood to get a weathered look before applying a preservative.

    Sumi ink is the traditional black ink used in Japanese calligraphy, so it’s easy to find in art stores and online. You only need a few drops. Test the mix on scrap wood first, because a little goes a long way.

    Pros

    • Turns bright white deadwood into natural gray
    • Very inexpensive
    • Easy to find
    • Fits the Japanese aesthetic

    Cons

    • Not a preservative on its own
    • Easy to overdo, so test first

    Best for: anyone whose lime sulfur looks too white, and anyone preparing a tree for display.

    Search Japanese sumi ink on Amazon


    Which lime sulfur for bonsai should you buy? (By situation)

    You’re in the US and treating a few trees: Wigert’s Lime Sulfur.

    You’re in Europe: Jin Seal from Bonsai Plaza.

    You have a large collection and know how to dilute: a lime sulfur animal dip, checked for concentration.

    You run a UK club or nursery: Eutrema Lime Sulphur.

    You want to preserve deadwood without whitening it: PC Petrifier.

    Your deadwood looks too white: add Japanese sumi ink to your lime sulfur, or use a light ink wash.

    You’re preparing a tree for a show: freshen the deadwood with a light lime sulfur coat a few weeks before, tone it with ink if needed, and set the tree on a bonsai display stand that suits it.

    A simple deadwood finishing kit

    For most hobbyists, a bottle of bonsai lime sulfur, a small bottle of sumi ink, a couple of small brushes, gloves and some plastic sheeting to protect the pot and soil is everything you need.


    How to apply lime sulfur to bonsai deadwood (the basics)

    Every product has its own instructions, so always read the label. But the general process growers describe looks like this:

    1. Finish carving. Remove loose fibers and debris with a brush.
    2. Protect the tree. Cover the soil surface and pot. Keep foliage out of the way.
    3. Wet the wood. Lightly wet the deadwood and let it dry slightly so the solution soaks in.
    4. Apply a thin coat. Use a small brush, working carefully along the edge of the living bark.
    5. Let it dry. The color changes as it dries. Some products suggest allowing about 24 hours.
    6. Assess and repeat. Add another coat if needed, or tone it with ink.
    7. Refresh occasionally. Many growers reapply lightly once a year or before shows.

    Lime sulfur safety and storage

    • Work outdoors. The sulfur smell is strong and unpleasant.
    • Wear gloves and eye protection. Avoid skin and eye contact.
    • Keep it off foliage and living bark. It can damage living tissue.
    • Keep it away from metal you care about. Many growers find it stains and corrodes.
    • Store it sealed, cool and out of reach of children and pets.
    • Buy small. Opened lime sulfur can settle and degrade within a season or so.
    • Check local rules. Availability and permitted uses vary by country and state.

    Common lime sulfur mistakes

    Making deadwood too white. The most common mistake. Use lighter coats or add ink.

    Applying before carving is finished. You’ll just expose fresh wood again.

    Getting it on living bark. Work slowly near the lifeline.

    Forgetting to protect the pot. Stains on a good pot are hard to remove.

    Using concentrated products undiluted. Check strength first, especially with animal dips.


    Conclusion: preserve first, then make it look natural

    Lime sulfur for bonsai isn’t glamorous, but it’s what makes deadwood last, and what gives jin and shari that aged, weathered look.

    For most US hobbyists, Wigert’s small bottle is the easiest place to start. In Europe, Jin Seal is a simple brush-on option. If you have many trees, a diluted animal dip is the value choice, as long as you check its strength. And whichever you use, a few drops of Japanese sumi ink can turn harsh white into a natural silver-gray.

    Work outside, protect the pot, go light, and let the color settle before you judge it.

    Ready to finish your deadwood? Check Lime Sulfur at Wigert’s Bonsai, or check Jin Seal at Bonsai Plaza before your next carving session.
  • Best Bonsai Carving Tools in 2026: 6 Picks for Jin and Shari, From Japanese Jin Knives to Power Carving

    Best Bonsai Carving Tools in 2026: 6 Picks for Jin and Shari, From Japanese Jin Knives to Power Carving

    Affiliate disclosure: Some links on this page are affiliate links. If you buy through them, Aribonsai may earn a small commission at no extra cost to you. It doesn’t change what we recommend or how we rank anything.


    Deadwood is where bonsai starts to look old

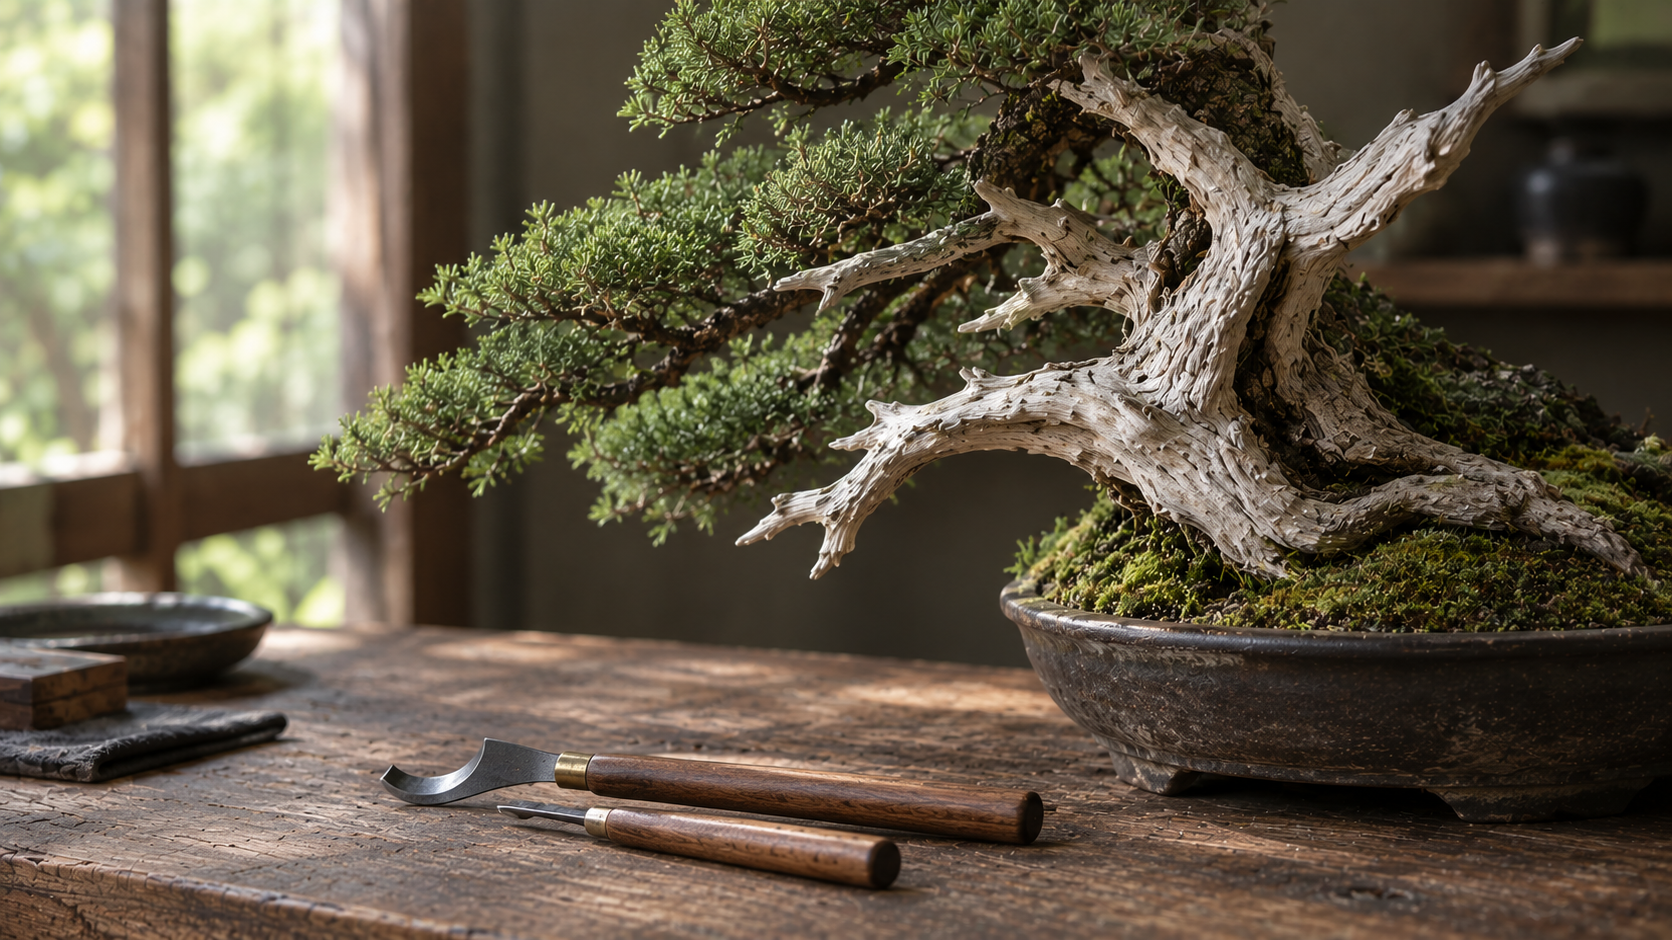
    Bonsai carving tools are what turn a stub into a story.

    Look at almost any famous juniper or pine and you’ll see deadwood: bleached jin at the branch tips, long shari running down the trunk, hollows and grain that make the tree look like it’s survived a century on a mountainside. That character doesn’t happen by accident. Most of it is carved.

    The trouble is that carving looks intimidating from the outside. Do you need a power tool? A set of chisels? Special Japanese knives? And how do you avoid ending up with something that looks gouged rather than weathered?

    The good news is you can start small. A single jin knife and a little patience will take you surprisingly far. Power carving comes later, if at all.

    In my experience, the people who struggle most with deadwood aren’t the ones with cheap tools. They’re the ones who reach for the biggest tool first and remove too much wood in one go. This guide explains what actually matters, then compares six bonsai carving tools, from simple Japanese jin knives to rotary bits for heavy work.


    Who this bonsai carving tools guide is NOT for

    It’s not for wiring or stripping small branches. For peeling bark off thin jin and crushing fibers, bonsai jin pliers are usually the better tool. Carving tools come in when you’re shaping wood, not just stripping it.

    It’s not a full power-carving guide. We’ll cover the basics and one rotary option, but serious power carving (die grinders, chainsaw wheels) is a separate skill with real safety risks.

    It’s not for general woodworking. Some of these tools look like woodworking chisels, but this guide is about using them on living trees and deadwood.

    Still with us? Let’s go.


    How we picked these (3 things that actually matter)

    1. Hand tools or power tools

    This is the big decision.

    • Hand carving tools (jin knives, gouges, chisels, draw knives) are quiet, cheap and very controllable. They’re best for stripping bark, defining the lifeline, and refining detail. They’re slow on large areas.
    • Power carving tools (rotary bits in a Dremel-type tool or die grinder) remove wood quickly. They’re best for big trunks, hollows and heavy shaping. They’re also much easier to overdo, and they need eye protection, gloves and practice.

    Most experienced carvers use both. On bonsai forums, a common pattern is power tools for rough shaping, and hand tools and scrapers for the final detail that makes deadwood look natural.

    2. Blade shape and job

    Each hand tool has a job.

    • Jin knives remove bark and mark the edge between living and dead tissue (the lifeline).
    • Gouges (U-shaped blades) scoop out grooves and hollows.
    • V-parting tools cut sharp grooves that follow the grain.
    • Draw knives pull long strips of wood and bark, useful for making jin.
    • Skew chisels clean up flat areas and edges.

    You don’t need all of them. Start with a jin knife, then add a gouge or two as you need them.

    3. Steel, sharpness and origin

    Sharp tools are safer than dull ones, because you use less force. Look for tools that come pre-sharpened, and check whether the blade is stainless (rust-resistant) or carbon steel (often easier to sharpen, but needs oiling).

    Origin varies. Several tools here are made in Japan by bonsai specialists. Others are sold under bonsai brands without a clear country of origin. We’ve labeled each one as clearly as we can.

    A few carving habits that matter more than the tool

    None of these cost anything.

    • Carve less than you think. You can always remove more wood. You can’t put it back.
    • Follow the grain. Natural deadwood splits and weathers along the grain. Carving against it looks artificial.
    • Protect the lifeline. Never carve into the living strip of bark that feeds the branch above. Mark it clearly before you start.
    • Tear, don’t just cut. Many carvers pull fibers with pliers after cutting, so the wood looks broken by nature rather than sliced.
    • Work on dry deadwood where possible. Several Japanese tool makers describe their jin and shari tools as ideal for dry wood.
    • Finish before you treat. Lime sulfur and other deadwood treatments go on after carving, not before.
    • Practice on scrap. A dead branch from the garden is a free place to learn how each tool behaves.

    Bonsai carving tools comparison table

    ToolTypeBest forOriginApprox. price
    Kikuwa Jin Knife (2281 / 2282)Hand, jin knifeStripping bark, lifelinesJapan~$28
    Kaneshin Jin & Shari Tip (190 mm)Hand, jin toolDebarking, pulling jinJapan~€39 (EU)
    Japanese gouges & draw knife (Bonsai Tonight)Hand, gouges/knivesGrooves, hollows, long jinJapanCheck current price
    Wazakura 3-Piece Chisel KitHand, chiselsGrooves and detail on a budgetJapan (Miki)Check current price
    Ryuga Hand Carving ToolsHand, scrapersJin, shari and flaky barkNot stated~£7.50 each / £80 set of 6 (UK)
    Rotary shapers for Dremel-type toolsPower, rotary bitsHollows and heavy shapingNot stated~€26–100 per bit (EU)

    Prices are approximate and vary by country and seller. Always check the current price before you buy.


    The 6 best bonsai carving tools, reviewed

    1. Kikuwa Jin Knife – the best first carving tool

    If you buy one carving tool, make it a jin knife. And Kikuwa’s jin knives, sold in the US by Bonsai Tonight, are a very good place to start.

    They’re made in Japan, double-sided and come pre-sharpened. The 8.25-inch models have stainless steel blades, so they resist rust, which matters when you’re working on wet bark. Bonsai Tonight describes them as tools for removing bark completely, defining the lifeline, and creating deadwood.

    There are two versions: a standard jin knife (2281) and a narrow-tip version (2282). The narrow tip is better in tight areas and for fine lifeline work. Longer 10-inch versions are also listed.

    Pros

    • Made in Japan, pre-sharpened
    • Stainless steel blade resists rust
    • Standard and narrow-tip options
    • Affordable for a Japanese specialist tool

    Cons

    • Slow on large areas of wood
    • Sharp double-sided blade needs careful handling

    Best for: beginners and anyone starting jin and shari work.

    Check the Kikuwa Jin Knife at Bonsai Tonight


    2. Kaneshin Jin & Shari Tip – best Japanese debarking tool

    Kaneshin is one of the best-known Japanese bonsai tool makers, and its jin and shari tools are aimed at experienced growers.

    The 190 mm Jin & Shari Tip has a blade designed to pull and debark branches when creating jin. The seller describes it as ideal for working on dry bonsai wood and labels it a professional tool for experts. There’s also a 260 mm wide-blade version for larger areas, though it was out of stock when we checked.

    It’s easier to find in Europe than in the US, at around €39.

    Pros

    • Made in Japan by a leading bonsai tool brand
    • Designed specifically for jin and shari
    • Wide-blade version available for bigger trees

    Cons

    • Harder to find in the US
    • More specialized than a standard jin knife

    Best for: experienced growers who already use Kaneshin tools and want a dedicated deadwood tool.

    Check the Kaneshin Jin & Shari Tip at Pollice Verde


    3. Japanese gouges, carving knives and draw knife – best for building a real kit

    Once you’ve used a jin knife for a while, you’ll want tools that can shape wood, not just strip bark. Bonsai Tonight sells a range of Japanese-made hand carving tools for this.

    The range includes spoon gouges (rounded and pointed tips), curved and pointed carving knives, and a draw knife. The gouges scoop out grooves and hollows. The pointed knife can strip upper bark layers while leaving live tissue below, if used carefully. The draw knife pulls long strips of wood and can be used to create jin.

    All of them come pre-sharpened. Bonsai Tonight also offers a discounted basic carving kit if you’d rather not choose tool by tool.

    Pros

    • Made in Japan
    • Covers grooves, hollows and long jin
    • Pre-sharpened
    • Starter kit available

    Cons

    • Buying several tools adds up
    • Takes practice to learn which tool does what

    Best for: intermediate growers ready to go beyond a single jin knife.

    Check carving tools at Bonsai Tonight


    4. Wazakura 3-Piece Chisel Kit – best value Japanese chisel set

    Wazakura is a Japanese brand of bonsai and garden tools, and this kit comes from an artisan workshop in Miki, Hyogo, a region known for blade making.

    The set includes three tools: a V-parting chisel with a 90-degree triangular blade, a single-bevel skew chisel, and a round gouge. Together, they cover the main hand-carving jobs: sharp grooves along the grain, cleaning edges and flat areas, and scooping out rounded hollows.

    It’s a good way to try several carving shapes without buying each tool separately. Prices vary between sellers, so compare before you buy.

    Pros

    • Made in Miki, Japan
    • Three useful shapes in one kit
    • Good value for Japanese-made tools

    Cons

    • Smaller than professional gouges, so better for detail than heavy work
    • Availability and price vary by seller

    Best for: beginners and value-minded growers who want a small Japanese chisel set.

    Search the Wazakura bonsai chisel kit on Amazon


    5. Ryuga Hand Carving Tools – budget scrapers for jin, shari and bark

    Ryuga is a bonsai tool brand sold by several European retailers. Its hand carving tools are inexpensive and practical, though the listings we checked don’t state where they’re made.

    Bonsai4me sells a single 160 mm Ryuga carving tool, described as great for making jin and shari and for peeling off flaky bark, for around £7.50. A set of six 160 mm tools with wooden handles is also available for about £80, and longer 190–195 mm versions are listed too.

    They’re a low-risk way to try hand carving, or to add a few extra shapes to a kit.

    Pros

    • Very affordable single tools
    • Set of six available
    • Useful for jin, shari and flaky bark

    Cons

    • Origin and steel not stated
    • Mainly sold in Europe and the UK

    Best for: budget-conscious growers, especially in the UK and Europe.

    Check Ryuga carving tools at Bonsai4me


    6. Rotary shapers for Dremel-type tools – best for heavy shaping (advanced)

    At some point, hand tools become slow. If you’re working on a big collected juniper or hollowing a thick trunk, rotary carving bits are how most carvers speed things up.

    Bonsai specialty shops sell a wide range of these. Bonsai.de, for example, lists milling heads and shapers with 3 mm shanks (for Dremel-type rotary tools) and 6 mm shanks (for larger tools), at roughly €26–100 per bit. Some are described for use with “the Dremel and similar tools.” Brush wheels in brass, steel and horsehair are also sold for cleaning and finishing deadwood.

    On bonsai forums, experienced carvers often describe a Dremel as a detail tool and a die grinder as the tool for heavier work, with a strong warning to practice on scrap wood first. Power tools remove wood very fast, and they can kick back.

    Pros

    • Much faster than hand tools
    • Wide range of shapes and sizes
    • Brush wheels help finish deadwood

    Cons

    • Easy to overdo and leave tool marks
    • Needs eye protection, gloves, and dust protection
    • Origin of most bits isn’t stated
    • You also need the rotary tool itself

    Best for: advanced growers working on large trunks, hollows and collected trees.

    Check carving bits at Bonsai.de · Search rotary carving bits on Amazon


    Which bonsai carving tools should you buy? (By use case)

    You’re new to deadwood: Kikuwa Jin Knife. Add a pair of jin pliers and you can make convincing jin on most branches.

    You want a Japanese tool for debarking: Kaneshin Jin & Shari Tip.

    You’re ready to carve grooves and hollows: Japanese gouges and a draw knife from Bonsai Tonight, or the starter kit.

    You want a small Japanese chisel set on a budget: Wazakura 3-Piece Chisel Kit.

    You’re in the UK or Europe and want cheap tools to experiment with: Ryuga hand carving tools.

    You’re working on big collected trees: Rotary shapers in a Dremel-type tool or die grinder, followed by hand tools for refinement.

    You want a “pro” setup: A jin knife, two or three gouges, jin pliers, and a rotary tool with a few bits. That covers almost every deadwood job.

    A simple starter kit

    For most growers, a sensible first kit is a jin knife, a pair of jin pliers and one small gouge. That’s enough to make jin, define shari, and add a little texture. Add power tools only once you’re comfortable with hand carving and have a tree that really needs them. If you’re still building your basic toolkit, our bonsai starter tool set guide is a good place to begin.


    How to care for bonsai carving tools

    Carving tools take a lot of punishment. A few habits keep them sharp and safe.

    • Clean off sap and debris after every session. Sap dulls blades and attracts rust.
    • Dry and oil carbon steel blades. Even stainless blades benefit from a wipe and a light coat of oil. Our bonsai tool maintenance guide covers oils, rust erasers and sharpening stones.
    • Hone little and often. A few strokes on a fine stone keeps an edge much better than occasional heavy sharpening.
    • Protect the edges. Store tools in a roll or with blade covers so they don’t knock against each other.
    • Clean rotary bits. Resin and wood fibers clog bits. A brass brush helps.

    Common bonsai carving mistakes

    Carving too much, too soon. The most common mistake by far. Take a little, step back, look, then decide.

    Cutting into the lifeline. A slip with a sharp tool can kill a branch. Mark the lifeline and keep your tools away from it.

    Leaving tool marks. Smooth, regular cuts look man-made. Tear fibers and follow the grain for a more natural finish.

    Using power tools without protection. Eye protection is not optional. Wood chips and broken bits travel fast.

    Treating deadwood before you’re finished. Finish carving first, then apply lime sulfur or other treatments.


    Conclusion: start with a knife, earn the power tools

    Bonsai carving tools can look like a big investment, but you don’t need a full kit to start. A good Japanese jin knife and a pair of jin pliers will handle most early deadwood work and teach you how wood behaves.

    For most people, the Kikuwa Jin Knife is the right first tool. Add Japanese gouges or the Wazakura chisel kit as you start shaping grooves and hollows. And if you eventually take on big collected trees, rotary bits will save hours, as long as you use them carefully and finish by hand.

    Whichever tools you choose, go slowly, follow the grain and protect the lifeline. Good deadwood isn’t about how much wood you remove. It’s about making the tree look like nature did it.

    Ready to start carving? Check the Kikuwa Jin Knife at Bonsai Tonight, or browse Japanese carving tools before your next deadwood session.